本文实例为大家分享了php实现头像上传预览功能的具体代码,供大家参考,具体内容如下
主页面1.php
?
|
1
2
3
4
5
6
7
8
9
10
11
12
13
14
15
16
17
18
19
20
21
22
23
24
25
26
27
28
29
30
31
32
33
34
35
36
37
38
39
40
41
42
43
44
45
46
47
48
49
50
51
52
53
54
55
|
<html>
<head>
<meta http-equiv="content-type" content="text/html; charset=utf-8" />
<title>上传头像</title>
<style type="text/css">
*{
font-family:"微软雅黑";}
#zong{
/*border:1px solid black;*/
position:relative;
width:52%;
height:500x;
left:24%}
.nr{
float:left;
margin-right:30px;}
#yl{width:240px; height:240px; background-size:240px 240px;}
#file{width:240px; height:240px; float:left; opacity:0;}
</style>
</head>
<body>
<div id="zong">
<form id="sc" action="2.php" method="post" enctype="multipart/form-data" target="shangchuan">
<input type="hidden" name="tp" value="" id="tp" />
<div id="yl" style="background-image:url(./image/1.jpg)" class="nr">//头像显示的位置
<input type="file" name="file" id="file" onchange="document.getelementbyid('sc').submit()" />
</div>
<div class="nr">
</div>
</form>
<iframe style="display:none" name="shangchuan" id="shangchuan">
</iframe>
</div>
</body>
<script type="text/javascript">
//回调函数,调用该方法传一个文件路径,改变背景图
function showimg(url)
{
var div = document.getelementbyid("yl");
div.style.backgroundimage = "url("+url+")";
document.getelementbyid("tp").value = url;
}
</script>
</html>
|
处理页面2.php
?
|
1
2
3
4
5
6
7
8
9
10
11
12
13
14
15
16
17
18
19
20
21
22
23
24
25
26
27
28
29
|
<?php
session_start();
$uid = $_session["uid"];
if($_files["file"]["error"])
{
echo $_files["file"]["error"];
}
else
{
if(($_files["file"]["type"]=="image/jpeg" || $_files["file"]["type"]=="image/png")&& $_files["file"]["size"]<1024000)
{
$fname = "./a/image/".date("ymdhis").$_files["file"]["name"]; //头像存储的路径
$filename = iconv("utf-8","gb2312",$fname);
if(file_exists($filename))
{
echo "<script>alert('该文件已存在!');</script>";
}
else
{
move_uploaded_file($_files["file"]["tmp_name"],$filename);
unlink($_post["tp"]);
echo "<script>parent.showimg('{$fname}');</script>";
}
}
}
|
打开显示:

点击图片位置弹出选择框:
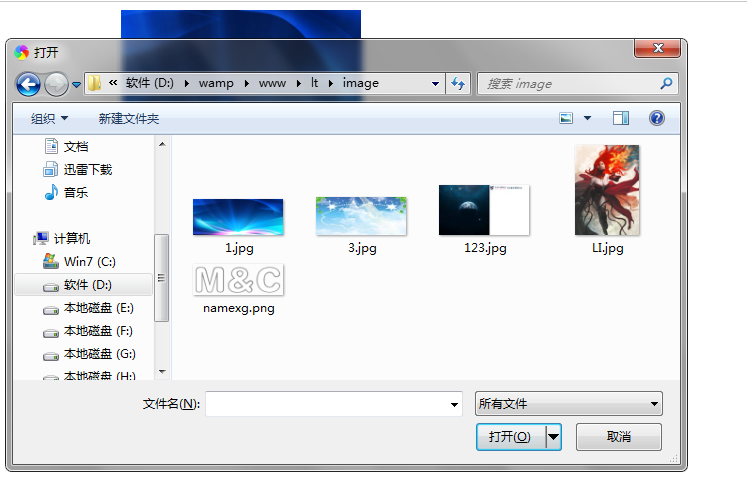
选择图片完成后:

以上就是本文的全部内容,希望对大家的学习有所帮助,也希望大家多多支持快网idc。

相关文章


猜你喜欢
- ASP.NET本地开发时常见的配置错误及解决方法? 2025-06-10
- ASP.NET自助建站系统的数据库备份与恢复操作指南 2025-06-10
- 个人网站服务器域名解析设置指南:从购买到绑定全流程 2025-06-10
- 个人网站搭建:如何挑选具有弹性扩展能力的服务器? 2025-06-10
- 个人服务器网站搭建:如何选择适合自己的建站程序或框架? 2025-06-10