ZKEACMS Core 是基于 .net core 开发的,可以在 windows, linux, mac 上跨平台运行,接下来我们来看看如何在 CentOS 上运行 ZKEACMS。
安装 .Net Core 运行时
运行以下命令,安装 .Net Core Runtime
|
1
2
3
4
|
sudo yum install libunwind libicu
curl -sSL -o dotnet.tar.gz https://go.microsoft.com/fwlink/?linkid=843420
sudo mkdir -p /opt/dotnet && sudo tar zxf dotnet.tar.gz -C /opt/dotnet
sudo ln -s /opt/dotnet/dotnet /usr/local/bin
|
安装 Nginx
|
1
2
3
|
sudo yum install epel-release
sudo yum install nginx
sudo systemctl enable nginx
|
修改 Nginx 的配置
修改 Nginx 的配置,让它反向代理到 localhost:5000,修改全局配置文件 /etc/nginx/nginx.conf ,修改 location 结点为以下内容
|
1
2
3
4
5
6
7
8
|
location / {
proxy_pass http://localhost:5000;
proxy_http_version 1.1;
proxy_set_header Upgrade $http_upgrade;
proxy_set_header Connection keep-alive;
proxy_set_header Host $host;
proxy_cache_bypass $http_upgrade;
}
|
启动 Nginx
|
1
|
sudo systemctl start nginx
|
到这里,我们的环境就搭配好了,接下来,我们来发布 ZKEACMS
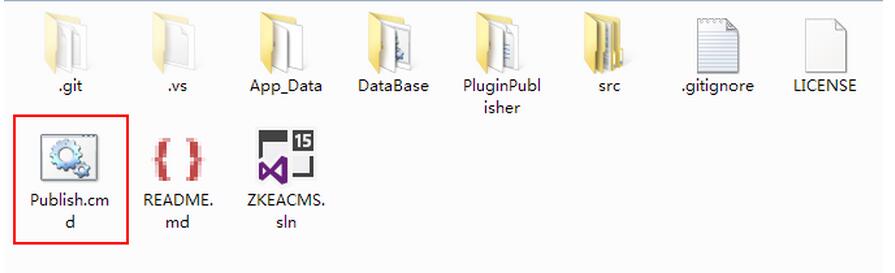
发布 ZKEACMS.Core
发布 ZKEACMS.Core 比较简单,双击 Publish.cmd 即可
数据库 SQLite
为了简单起起见,这里使用 SQLite 作为数据库,生成一个SQLite数据命名为 Database.sqlite。在发布好的程序文件夹下,创建 App_Data 文件夹,并将 Database.sqlite 放入 App_Data 目录下。关于如何生成 SQLite 数据,可以进群询问,或者自行百度/谷歌。
修改连接字符串
打开 appsettings.json,加入 SQLite 的数据库连接字符串,结果如下
|
1
2
3
4
5
6
7
8
9
10
11
12
13
14
15
16
17
18
19
|
{
"ConnectionStrings": {
"DefaultConnection": "",
"Sqlite": "Data Source=App_Data/Database.sqlite",
"MySql": ""
},
"ApplicationInsights": {
"InstrumentationKey": ""
},
"Logging": {
"IncludeScopes": false,
"LogLevel": {
"Default": "Debug",
"System": "Information",
"Microsoft": "Information"
}
},
"Culture": "zh-CN"
}
|
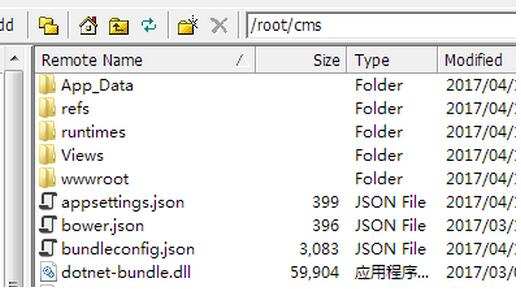
打包上传服务器
我们将发布好的程序打包为 cms.zip 并上传到 /root 目录下。并解压到 /root/cms 目录下,使用以下命令解压
unzip cms.zip -d cms
运行
定位到目录,然后使用 dotnet 命令运行
|
1
2
|
cd /root/cms
dotnet ZKEACMS.WebHost.dll
|
运行成功以后,就可以使用您服务器的IP或者域名访问了 🙂
退出SSH远程连接客户端后,发现访问不了,这是因为 dotnet 也退出了。
以服务方式运行
创建一个服务,让 dotnet 在后台运行。安装 nano 编辑器
|
1
|
yum install nano
|
创建服务
|
1
|
sudo nano /etc/systemd/system/zkeacms.service
|
输入以下内容保存
|
1
2
3
4
5
6
7
8
9
10
11
12
13
14
|
[Unit]
Description=ZKEACMS
[Service]
WorkingDirectory=/root/cms
ExecStart=/usr/local/bin/dotnet /root/cms/ZKEACMS.WebHost.dll
Restart=always
RestartSec=10
SyslogIdentifier=zkeacms
User=root
Environment=ASPNETCORE_ENVIRONMENT=Production
[Install]
WantedBy=multi-user.target
|
启动服务
|
1
|
systemctl start zkeacms.service
|
这样就可以安心的退出SSH远程连接了。
以上就是本文的全部内容,希望对大家的学习有所帮助,也希望大家多多支持快网idc。
原文链接:http://www.zkea.net/codesnippet/detail/post-40

相关文章


- 个人服务器网站搭建:如何选择适合自己的建站程序或框架? 2025-06-10
- 64M VPS建站:能否支持高流量网站运行? 2025-06-10
- 64M VPS建站:怎样选择合适的域名和SSL证书? 2025-06-10
- 64M VPS建站:怎样优化以提高网站加载速度? 2025-06-10
- 64M VPS建站:是否适合初学者操作和管理? 2025-06-10