一、第一种创建uiswitch组件的方法,在代码中动态创建。
1、打开xcode, 新建项目switch,选择single view application。
2、打开viewcontroller.m文件在viewdidload方法里添加代码:
(void)viewdidload
{
[super viewdidload];
uiswitch *switchbutton = [[uiswitch alloc] initwithframe:cgrectmake(50, 100, 20, 10)];
[switchbutton seton:yes];
[switchbutton addtarget:self action:@selector(switchaction:) forcontrolevents:uicontroleventvaluechanged];
[self.view addsubview:switchbutton];
// do any additional setup after loading the view, typically from a nib.
}
[switchbutton addtarget:selfaction:@selector(switchaction:)forcontrolevents:uicontroleventvaluechanged];
代码中selector中的switchaction:需要我们自己实现,就是按下时接收到的事件。
记得把switchbutton加到当前view,调用[self.viewaddsubview:switchbutton];
3、监听uiswitch按下事件
实现代码如下:
(void)switchaction:(id)sender
{
uiswitch *switchbutton = (uiswitch*)sender;
bool isbuttonon = [switchbutton ison];
if (isbuttonon) {
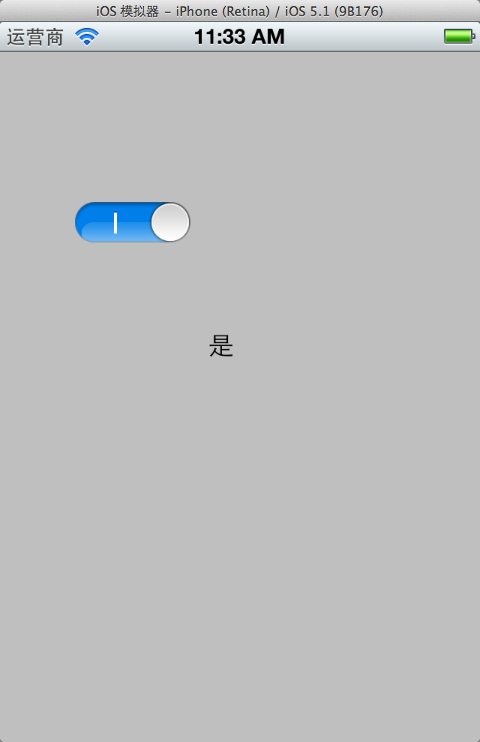
showswitchvalue.text = @"是";
}else {
showswitchvalue.text = @"否";
}
}
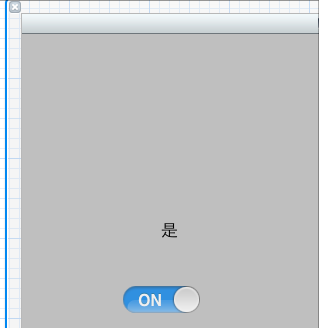
showswitchvalue是我通过拖拽控件方法放到界面上的label,方便显示效果
运行,效果:
二、通过拖拽方法使用uiswitch
1、往xib文件上拖拽一个uiswitch控件。
2、按alt+command + return键开启assistant editor模式,选中uiswitch控件,按住control键,往viewcontroller.h拖拽
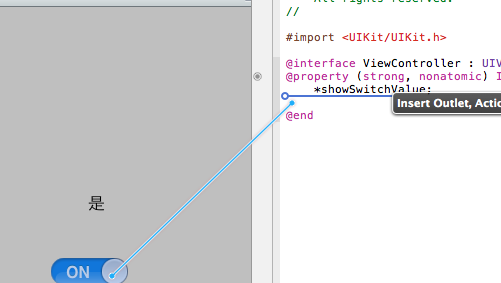
3、选action方式
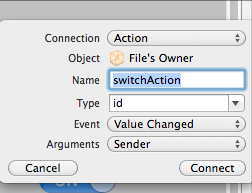
4、.m文件中实现switchaction 。刚才动态创建的时候也用到这个方法名称,可以先注释掉刚才的。
(ibaction)switchaction:(id)sender {
uiswitch *switchbutton = (uiswitch*)sender;
bool isbuttonon = [switchbutton ison];
if (isbuttonon) {
showswitchvalue.text = @"是";
}else {
showswitchvalue.text = @"否";
}
}
三、自定义uiswitch
1.使用类别扩展uiswitch。
如下:
下面是uiswitch.h文件:
#import
@interface uiswitch (tagged)
+ (uiswitch *) switchwithlefttext: (nsstring *) tag1 andright: (nsstring *) tag2;
@property (nonatomic, readonly) uilabel *label1;
@property (nonatomic, readonly) uilabel *label2;
@end
uiswitch.m文件:
#import "uiswitch-extended.h"
#define tag_offset 900
@implementation uiswitch (tagged)
– (void) spelunkandtag: (uiview *) aview withcount:(int *) count
{
for (uiview *subview in [aview subviews])
{
if ([subview iskindofclass:[uilabel class]])
{
*count += 1;
[subview settag:(tag_offset + *count)];
}
else
[self spelunkandtag:subview withcount:count];
}
}
– (uilabel *) label1
{
return (uilabel *) [self viewwithtag:tag_offset + 1];
}
– (uilabel *) label2
{
return (uilabel *) [self viewwithtag:tag_offset + 2];
}
+ (uiswitch *) switchwithlefttext: (nsstring *) tag1 andright: (nsstring *) tag2
{
uiswitch *switchview = [[uiswitch alloc] initwithframe:cgrectzero];
int labelcount = 0;
[switchview spelunkandtag:switchview withcount:&labelcount];
if (labelcount == 2)
{
[switchview.label1 settext:tag1];
[switchview.label2 settext:tag2];
}
return [switchview autorelease];
}
@end
2.还有一种方法,这种方法比较简单,但比较难懂,我不甚理解。
uiswitch *isfooorbar=[[uiswitch alloc] init];
((uilabel )[[[[[[isfooorbar subviews] lastobject] subviews] objectatindex:2] subviews]objectatindex:0]).text = @"foo";
((uilabel *)[[[[[[isfooorbar subviews] lastobject] subviews] objectatindex:2] subviews]objectatindex:1]).text = @"bar";*
四、一些常用方法
获得开关状态
bool setting = switchview.ison;
nslog(@"%d",setting);
设置开关状态 no关闭状态,yes打开状态
[switchview seton:setting animated:yes];
设置开光的切换
switchview.ontintcolor = [uicolor orangecolor];
设置按钮的颜色
switchview.thumbtintcolor = [uicolor redcolor];
开关控件边框的颜色
switchview.tintcolor = [uicolor purplecolor];
添加触发事件
[switchview addtarget:self action:@selector(switchaction:) forcontrolevents:uicontroleventvaluechanged];

相关文章


- 个人网站服务器域名解析设置指南:从购买到绑定全流程 2025-06-10
- 个人网站搭建:如何挑选具有弹性扩展能力的服务器? 2025-06-10
- 个人服务器网站搭建:如何选择适合自己的建站程序或框架? 2025-06-10
- 64M VPS建站:能否支持高流量网站运行? 2025-06-10
- 64M VPS建站:怎样选择合适的域名和SSL证书? 2025-06-10