ios中一般会用到几种方式自定义uiview
1、继承之uiview的存代码的自定义view
2、使用xib和代码一起使用的自定义view
3、存xib的自定义view(不需要业务处理的那种)
本文主要就介绍下存代码的自定义uiview和能够在storeboard中实时显示效果的自定义uiview
先上效果图

上面为设计界面,能够直接显示一个view的圆角与边框线
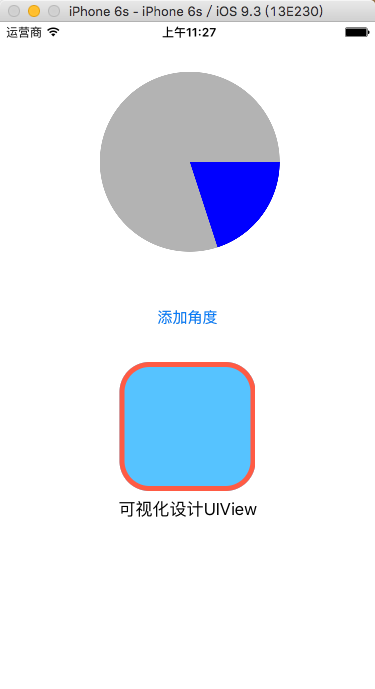
上面那个圆形饼图是用纯代码自定义的
1.实现在storeboard中实时显示效果的自定义uiview
1、创建myview.h 继承 uiview
?
|
1
2
3
4
5
6
7
8
9
10
11
12
13
14
15
16
17
|
#import <uikit/uikit.h>
// 设置类为可视化设计
ib_designable
@interface myview : uiview
// ibinspectable 为可视化设计属性
// 边框宽度
@property (nonatomic,assign)ibinspectable float borderwidth;
// 边框颜色
@property (nonatomic,retain)ibinspectable uicolor* bordercolor;
// 圆角
@property (nonatomic,assign)ibinspectable float cornerradius;
@end
|
这里要注意的就是上面的两个关键标签
ib_designable :代表的是这个类可以在storeboard中显示实时的效果
ibinspectable :代表把这个属性能在storeboard中修改
2、myview.m的实现
?
|
1
2
3
4
5
6
7
8
9
10
11
12
13
14
15
16
17
18
19
20
21
22
|
//
// myview.m
// 01_cirprogress
//
// created by xgao on 15/10/29.
// copyright (c) 2015年 xgao. all rights reserved.
//
#import "myview.h"
@implementation myview
// 边框宽度
- (void)setborderwidth:(float)borderwidth{
self.layer.borderwidth = borderwidth;
}
// 边框颜色
- (void)setbordercolor:(uicolor *)bordercolor{
self.layer.bordercolor = bordercolor.cgcolor;
}
// 圆角
- (void)setcornerradius:(float)cornerradius{
self.layer.cornerradius = cornerradius;
}
@end
|
3、在storeboad中添加一个view,并且设置这个view的类为 我们刚才创建的 myview
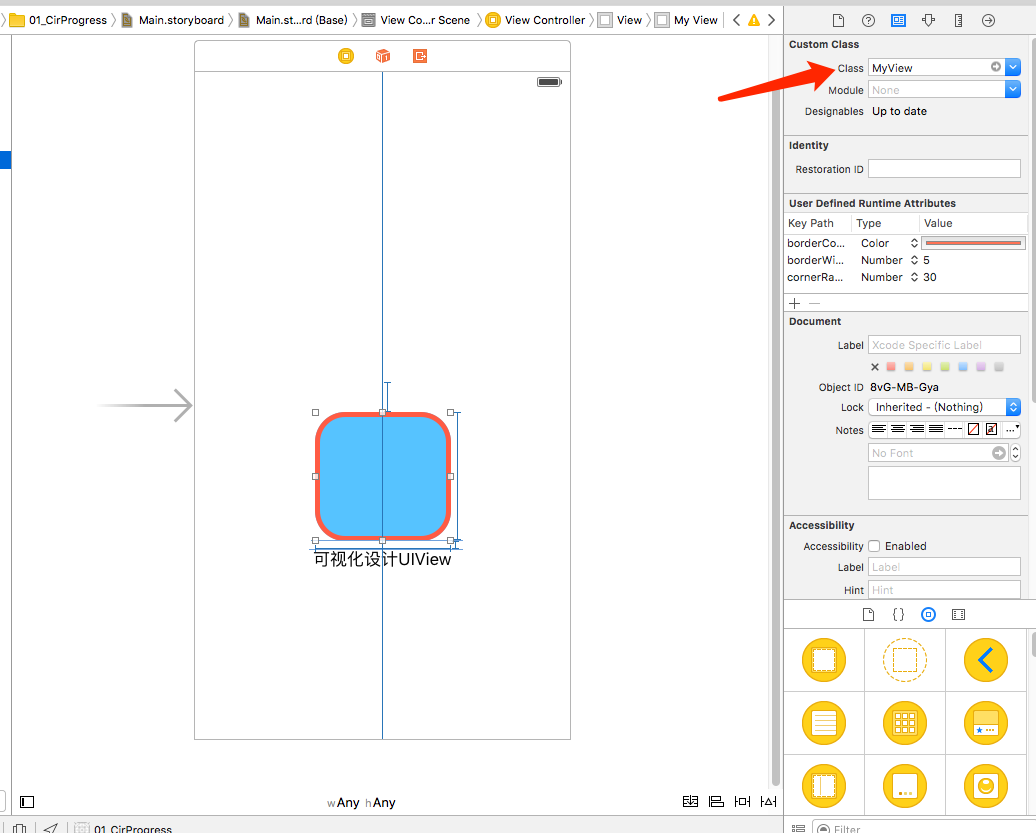
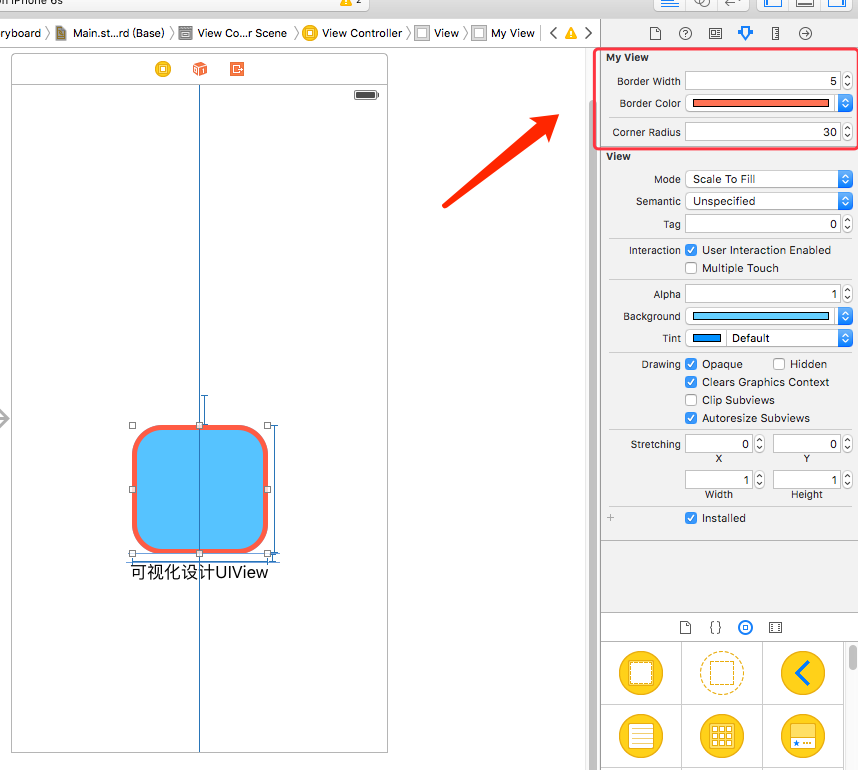
上图里面的那些属性就是我们在.h文件里面加了ibinspectable关键字的属性,这里就能实时修改看效果了。
2.实现纯代码的自定义view
1、创建一个继承uiview的 myprogress 类文件,myprogress.h 如下:
?

|
1
2
3
4
5
|
#import <uikit/uikit.h>
@interface myprogress : uiview
// 当时进度值
@property (nonatomic,assign) float progressvalue;
@end
|
2、myprogress.m 如下:
?
|
1
2
3
4
5
6
7
8
9
10
11
12
13
14
15
16
17
18
19
20
21
22
23
24
25
26
27
28
29
30
31
32
33
34
35
36
37
38
39
40
41
42
43
44
45
46
47
48
49
50
51
52
53
54
55
56
57
58
59
|
#import "myprogress.h"
@implementation myprogress
{
float _provalue;
}
// 重写初始化方法
- (id)initwithframe:(cgrect)frame{
self = [super initwithframe:frame];
if (self) {
// 设置背影为透明色
self.backgroundcolor = [uicolor clearcolor];
}
return self;
}
// 重设progressvalue属性
- (void)setprogressvalue:(float)progressvalue
{
_progressvalue = progressvalue;
// 重新画ui
[self setneedsdisplay];
}
// 绘图
- (void)drawrect:(cgrect)rect {
// 获取画图的上下文
cgcontextref ctx = uigraphicsgetcurrentcontext();
/**** 绘制圆形背景线 ****/
// 圆的半径
float r = rect.size.width / 2.0;
// 全圆
cgfloat endangle = m_pi * 2;
// 画圆形线
cgcontextaddarc(ctx, r, r, r, 0, endangle, 0);
// 背影颜色
cgcontextsetrgbfillcolor(ctx, 0.7, 0.7,0.7, 1);
// 完成绘制
cgcontextfillpath(ctx);
/**** 绘制扇形区域 ****/
// 计算结束角度
endangle = m_pi * 2 * _progressvalue;
/** 画圆
* 参数1:c 当前上下文
* 参数2:x 圆的x坐标
* 参数3:y 圆的y坐标
* 参数4:radius 圆的半径
* 参数5:startangle 开始角度
* 参数6:endangle 结束角度
* 参数7:clockwise 是否逆时针
*/
cgcontextaddarc(ctx, r, r, r, 0, endangle, 0);
// 连成线,成弧形
cgcontextaddlinetopoint(ctx, r, r);
// 其实就是在连接的那条线上加一个点,让线条连接到那一个点,就像拉弓,可加多个点
// cgcontextaddlinetopoint(ctx, r + 20, r + 20);
// 填充颜色
cgcontextsetrgbfillcolor(ctx, 0, 0, 1, 1);
// 完成绘制
cgcontextfillpath(ctx);
}
|
3、调用自定义的myprogress类
?
|
1
2
3
4
5
6
7
8
9
10
11
12
13
14
15
|
#import "myprogress.h"
@interface viewcontroller ()
{
myprogress* _myproview;
}
@end
@implementation viewcontroller
- (void)viewdidload {
[super viewdidload];
// 创建自定义控件
_myproview = [[myprogress alloc]initwithframe:cgrectmake(100, 50, 180, 180)];
// 默认进度
_myproview.progressvalue = 0.2;
[self.view addsubview:_myproview];
}
|
以上就是本文的全部内容,希望本文的内容对大家的学习或者工作能带来一定的帮助,同时也希望多多支持快网idc!

相关文章


猜你喜欢
- ASP.NET自助建站系统的数据库备份与恢复操作指南 2025-06-10
- 个人网站服务器域名解析设置指南:从购买到绑定全流程 2025-06-10
- 个人网站搭建:如何挑选具有弹性扩展能力的服务器? 2025-06-10
- 个人服务器网站搭建:如何选择适合自己的建站程序或框架? 2025-06-10
- 64M VPS建站:能否支持高流量网站运行? 2025-06-10