

大家可能注意到一些app的tableview的顶部图片,会随着你拉伸而跟着拉伸变大,下面这是我的一些想法
原图:
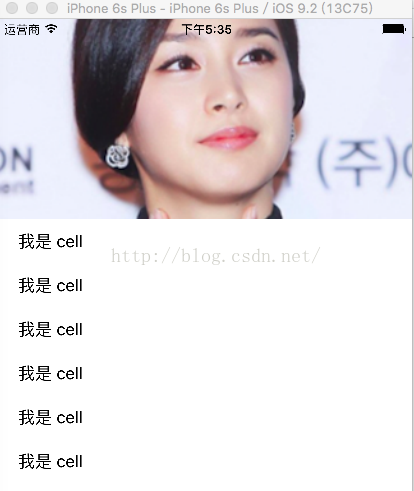
效果图:

下面附上代码吧,这里的图片不是添加在tabview的header上
?
|
1
2
3
4
5
6
7
8
9
10
11
12
13
14
15
16
17
18
19
20
21
22
23
24
25
26
27
28
29
30
31
32
33
34
35
36
37
38
39
40
41
42
43
44
45
46
47
48
49
50
51
52
53
54
55
56
57
58
59
60
61
62
63
64
65
66
67
68
69
70
71
72
73
74
75
76
77
78
|
#define screen_w [uiscreen mainscreen].bounds.size.width
#define screen_h [uiscreen mainscreen].bounds.size.height
#define top 200 //顶部预留
#import "viewcontroller.h"
@interface viewcontroller ()<uitableviewdatasource,uitableviewdelegate>
@property (nonatomic,strong)uitableview *tablev;
@end
@implementation viewcontroller
- (void)viewdidload {
[super viewdidload];
[self creattableview];
}
- (void)creattableview
{
self.automaticallyadjustsscrollviewinsets = no;
self.tablev = [[uitableview alloc] initwithframe:cgrectmake(0, 0, screen_w, screen_h) style:uitableviewstyleplain];
self.tablev.contentinset = uiedgeinsetsmake(top, 0, 0, 0);
self.tablev.delegate = self;
self.tablev.datasource = self;
//创建顶部图片
uiimageview * imageview = [[uiimageview alloc]initwithframe:cgrectmake(0, -top, screen_w, top)];
imageview.tag = 1000;
//更改图片显示模式 根据图片原有尺寸进行显示 将多余部分切除
imageview.contentmode = uiviewcontentmodescaleaspectfill;
//多余部分隐藏
imageview.clipstobounds = yes;
imageview.image = [uiimage imagenamed:@"pic"];
[self.view addsubview:_tablev];
[self.tablev addsubview:imageview];
}
- (void)scrollviewdidscroll:(uiscrollview *)scrollview
{
float offset = scrollview.contentoffset.y;
if (offset < -200)
{
uiimageview * tempimageview = (uiimageview*)[self.view viewwithtag:1000];
cgrect f = tempimageview.frame;
//保持图片原点仍为屏幕左上方
f.origin.y = offset;
//保证图片根据滑动高度拉伸
f.size.height = -offset;
//给图片重新设置坐标
tempimageview.frame = f;
}
}
- (nsinteger)tableview:(uitableview *)tableview numberofrowsinsection:(nsinteger)section
{
return 10;
}
- (uitableviewcell *)tableview:(uitableview *)tableview cellforrowatindexpath:(nsindexpath *)indexpath
{
static nsstring *cell = @"cell";
uitableviewcell *mycell = [tableview dequeuereusablecellwithidentifier:cell];
if (!mycell) {
mycell = [[uitableviewcell alloc] initwithstyle:uitableviewcellstylesubtitle reuseidentifier:cell];
}
mycell.textlabel.text = @"我是 cell";
return mycell;
}
@end
|
以上就是本文的全部内容,希望对大家的学习有所帮助,也希望大家多多支持快网idc。


相关文章


猜你喜欢
- ASP.NET自助建站系统的域名绑定与解析教程 2025-06-10
- 个人服务器网站搭建:如何选择合适的服务器提供商? 2025-06-10
- ASP.NET自助建站系统中如何实现多语言支持? 2025-06-10
- 64M VPS建站:如何选择最适合的网站建设平台? 2025-06-10
- ASP.NET本地开发时常见的配置错误及解决方法? 2025-06-10


