本文实例为大家分享了iOS UIBezierPath实现饼状图的具体代码,供大家参考,具体内容如下
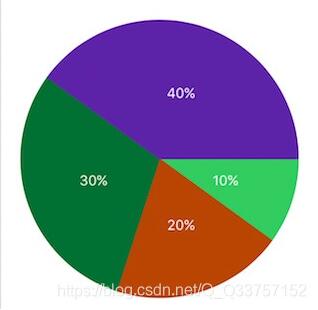
首先看效果图:
代码:
?

|
1
2
3
4
5
6
7
8
9
10
11
12
13
14
15
16
17
18
19
20
21
22
23
24
25
26
27
28
29
30
31
32
33
34
35
36
37
38
39
40
41
42
43
44
45
46
47
48
49
50
51
52
53
54
55
56
57
58
59
60
61
62
63
64
65
66
67
68
69
|
#import <UIKit/UIKit.h>
NS_ASSUME_NONNULL_BEGIN
@interface CircleView : UIView
@property (nonatomic, copy) NSArray<NSNumber *> *valueArray;
@end
NS_ASSUME_NONNULL_END
//
#define S_W self.frame.size.width
#import "CircleView.h"
@interface CircleView ()
@property (nonatomic, copy) NSArray<NSNumber *> *dataArray;
@property (nonatomic, assign) CGFloat endAngleFloat; // 每个扇形起点角度
@end
@implementation CircleView
- (void)setValueArray:(NSArray<NSNumber *> *)valueArray {
self.dataArray = valueArray;
self.endAngleFloat = 0;
[self creatUI];
}
- (void)creatUI {
for (NSInteger i = 0; i<_dataArray.count; i++) {
CAShapeLayer *shapeLayer = [CAShapeLayer layer];
shapeLayer.lineWidth = 1;
shapeLayer.fillColor = [UIColor colorWithRed:arc4random()%256/255.0f green:arc4random()%256/255.0f blue:arc4random()%256/255.0f alpha:1].CGColor;
shapeLayer.strokeColor = shapeLayer.fillColor;
CGFloat valueFloat = [_dataArray[i] floatValue];
CGFloat angleFloat = valueFloat*2*M_PI/100;
UIBezierPath *bezierPath = [UIBezierPath bezierPath];
[bezierPath moveToPoint:CGPointMake(S_W/2, S_W/2)];
[bezierPath addLineToPoint:CGPointMake(S_W*(1+cos(_endAngleFloat))/2, S_W*(1+sin(_endAngleFloat))/2)];
[bezierPath addArcWithCenter:CGPointMake(S_W/2, S_W/2) radius:S_W/2 startAngle:_endAngleFloat endAngle:angleFloat+_endAngleFloat clockwise:YES];
[bezierPath closePath];
shapeLayer.path = bezierPath.CGPath;
[self.layer addSublayer:shapeLayer];
[self addLabelWithFloat:valueFloat angleFloat:angleFloat];
_endAngleFloat += angleFloat;
}
}
- (void)addLabelWithFloat:(CGFloat)valueFloat angleFloat:(CGFloat)angleFloat {
UILabel *label = [[UILabel alloc] init];
label.center = CGPointMake(S_W*(2+cos(angleFloat/2 + _endAngleFloat))/4, S_W*(2+sin(angleFloat/2 + _endAngleFloat))/4);
label.bounds = CGRectMake(0, 0, 50, 50);
label.text = [NSString stringWithFormat:@"%.f%%",valueFloat];
label.textColor = UIColor.whiteColor;
label.textAlignment = NSTextAlignmentCenter;
label.font = [UIFont systemFontOfSize:14];
[self addSubview:label];
}
|
外部调用:
?
|
1
2
3
|
CircleView *view = [[CircleView alloc] initWithFrame:CGRectMake(20, 100, self.view.frame.size.width-40, self.view.frame.size.width-40)];
view.valueArray = @[@(10),@(20),@(30),@(40)];
[self.view addSubview:view];
|
以上就是本文的全部内容,希望对大家的学习有所帮助,也希望大家多多支持快网idc。

相关文章


猜你喜欢
- ASP.NET自助建站系统中的用户注册和登录功能定制方法 2025-06-10
- ASP.NET自助建站系统的域名绑定与解析教程 2025-06-10
- 个人服务器网站搭建:如何选择合适的服务器提供商? 2025-06-10
- ASP.NET自助建站系统中如何实现多语言支持? 2025-06-10
- 64M VPS建站:如何选择最适合的网站建设平台? 2025-06-10