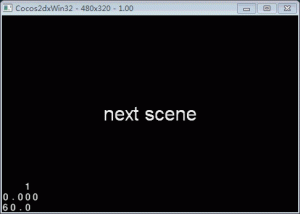
cocos2d-x中的场景切换是通过导演类调用相应的方法完成的,可以通过CCDirector::sharedDirector()->replaceScene()方法切换场景,参数是要切换的新场景,这种方法会释放掉旧的场景。通过pushScene()切换则是将旧的场景压入到栈中,以便通过popScene()函数出栈,继续运行原场景。刚开始程序启动的时候通过runWithScene()运行一个新的场景。下面通过代码来说明。单击下图可以查看效果。
这次代码一共建立了俩个场景,一个是原来的helloworld场景,一个是SecondScene场景。具体的看代码吧。
?

|
1
2
3
4
5
6
7
8
9
10
11
12
13
14
15
16
17
18
19
20
21
22
23
24
25
26
27
28
29
|
bool HelloWorld::init()
{
bool bRet = false;
do
{
CC_BREAK_IF(! CCLayer::init());
CCLabelTTF * ttf = CCLabelTTF::create("next scene","Arial",32);
//为该场景添加一个label菜单
CCMenuItemLabel * labelMenu = CCMenuItemLabel::create(ttf,this,menu_selector(HelloWorld::menuCloseCallback));
CCMenu * menu = CCMenu::create(labelMenu,NULL);
this->addChild(menu);
bRet = true;
} while (0);
return bRet;
}
//该函数实现场景的切换
void HelloWorld::menuCloseCallback(CCObject* pSender)
{
//使用以下的场景切换类可以产生特殊的效果,这些类有很多,一般有俩个或者是三个参数,第一个参数是
//时间,第二个参数是要切换到的场景,第三个参数根据类的不同各不相同,这个淡入淡出的效果第三个参数是颜色
CCTransitionFade * fade = CCTransitionFade::create(2.0,SecondScene::scene(),ccc3(255,100,100));
CCDirector::sharedDirector()->replaceScene(fade);
//也可以采用如下的方法
//CCDirector::sharedDirector()->pushScene(fade);
}
|
以下是SecondScene.cpp
?
|
1
2
3
4
5
6
7
8
9
10
11
12
13
14
15
16
17
18
19
20
21
22
23
24
25
26
27
28
29
30
31
32
33
34
35
36
37
38
39
40
41
42
43
44
45
46
47
48
49
50
51
52
|
#include "SecondScene.h"
#include "HelloWorldScene.h"
CCScene * SecondScene::scene()
{
CCScene * scene = NULL;
do
{
scene = CCScene::create();
CC_BREAK_IF(!scene);
SecondScene * layer = SecondScene::create();
CC_BREAK_IF(!layer);
scene->addChild(layer);
}
while(0);
return scene;
}
bool SecondScene::init()
{
bool bRet = false;
do
{
CC_BREAK_IF(!CCLayer::init());
CCLabelTTF * ttf = CCLabelTTF::create("first scene","Arial",32);
CCMenuItemLabel * labelMenu = CCMenuItemLabel::create(ttf,this,menu_selector(SecondScene::changeScene));
CCMenu * menu = CCMenu::create(labelMenu,NULL);
this->addChild(menu);
bRet = true;
}
while(0);
return bRet;
}
void SecondScene::changeScene(CCObject * sender)
{
//使用CCTransitionPageTurn类需要先设置摄像机
CCDirector::sharedDirector()->setDepthTest(true);
//第三个参数为false表示向前翻页,为true表示向后翻页
CCTransitionPageTurn * pageTurn = CCTransitionPageTurn::create(2.0,HelloWorld::scene(),false);
CCDirector::sharedDirector()->replaceScene(pageTurn);
//采用如下的方法就没有特效了
//CCDirector::sharedDirector()->popScene();
}
|

相关文章


猜你喜欢
- ASP.NET自助建站系统的域名绑定与解析教程 2025-06-10
- 个人服务器网站搭建:如何选择合适的服务器提供商? 2025-06-10
- ASP.NET自助建站系统中如何实现多语言支持? 2025-06-10
- 64M VPS建站:如何选择最适合的网站建设平台? 2025-06-10
- ASP.NET本地开发时常见的配置错误及解决方法? 2025-06-10