demo运行在windows的docker中,系统是win10,所以需要先下载docker for windows,安装完毕后系统会重启,然后桌面上可以找到docker for windows的快捷图标,右下角有个鲸鱼小图标

单击右键,选择菜单中的kitematic

会提示你下载kitematic,自行下载后解压即可,将kitematic快捷到桌面;
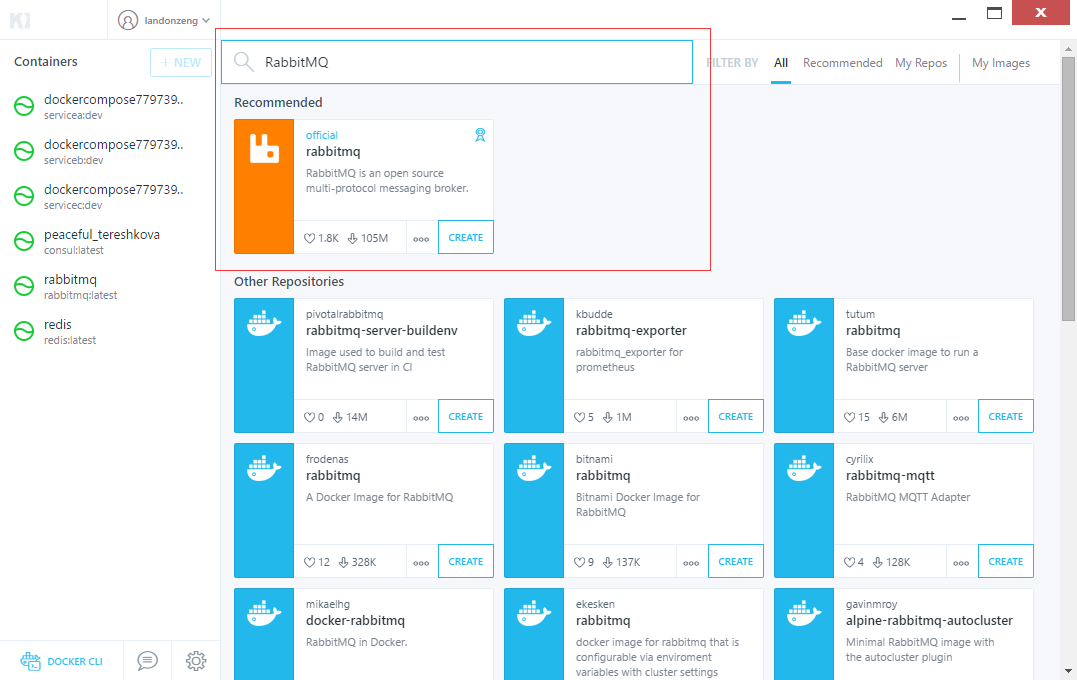
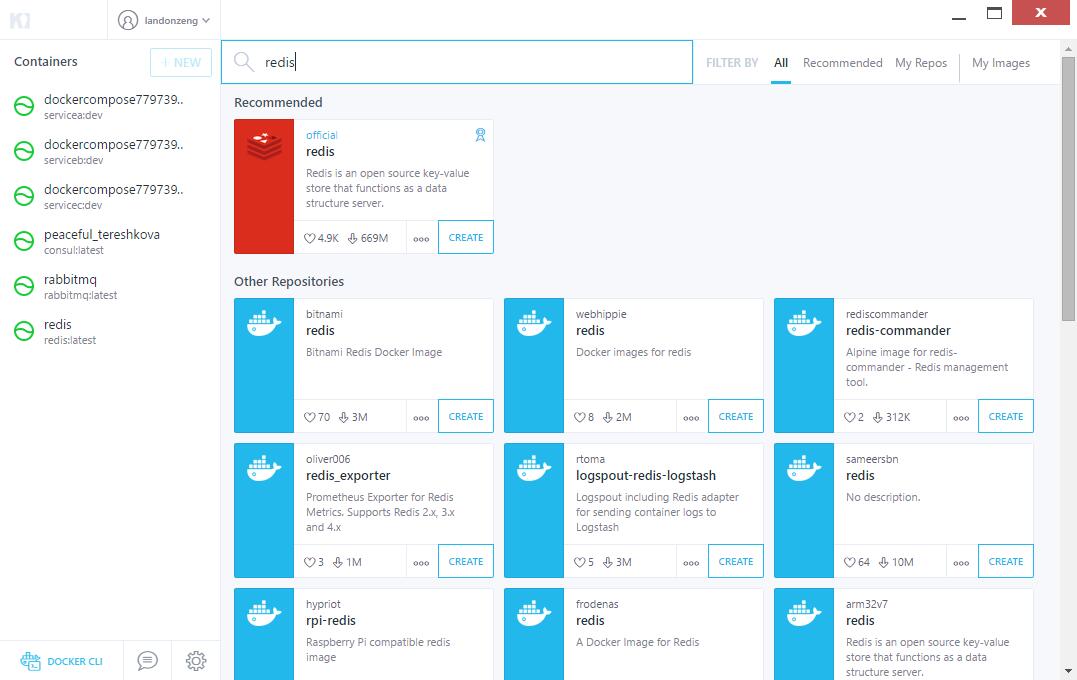
打开kitematic,在搜索栏中下载好rabbitmq、redis、consul相关镜像,因为这些是surging运行的先决条件。
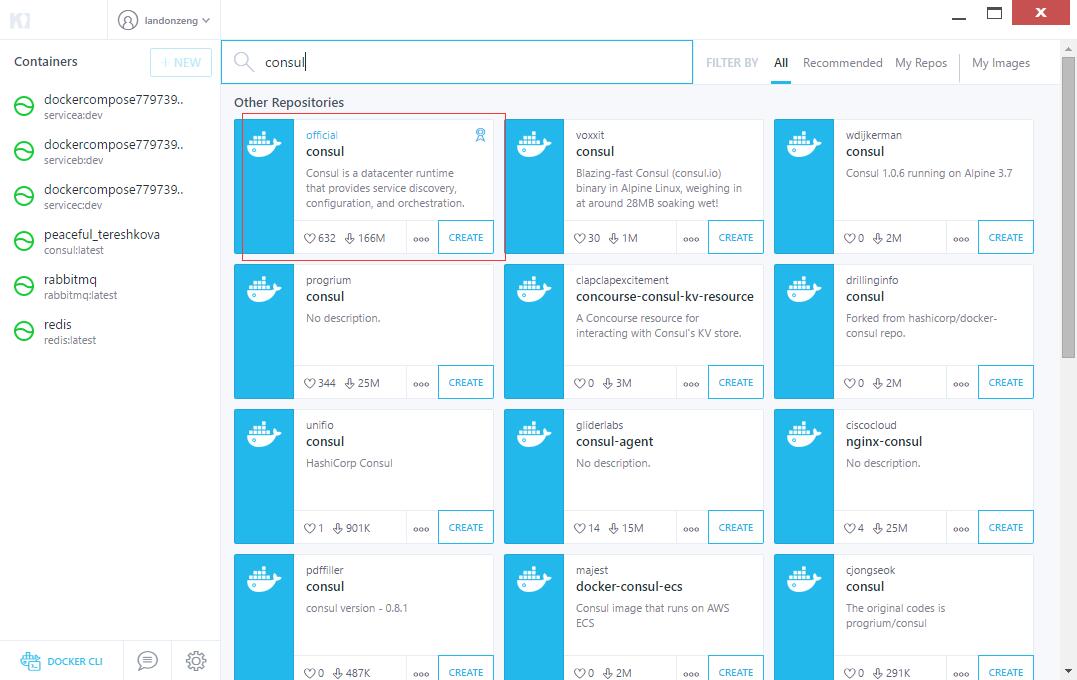
接着去github上下载surging网关项目,修改其中的gatewaysettings.json中register下的address地址,对应的事consul docker镜像的ip
具体如何查看其ip,看如下操作:
打开kitematic,点击左下角,如图:
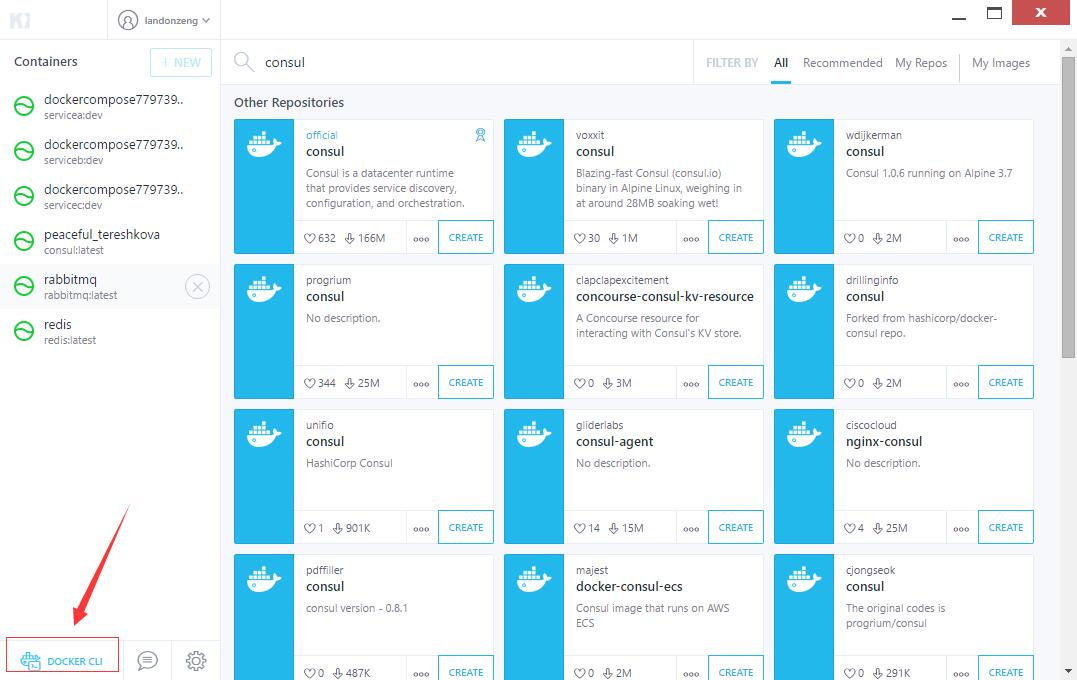
进入到命令窗口,输入docker container ls或者 docker ps -a 查看docker,
可以看到现在运行的docker的相关信息,
如图:

然后查看consul的相关配置,输入docker inspect 镜像的 containerid,如consul的id是b0e98b94638c,输入命令如下:docker inspect b0e98b94638c,
显示这个docker的配置,内容会很多,不过ip的信息在最后,如图

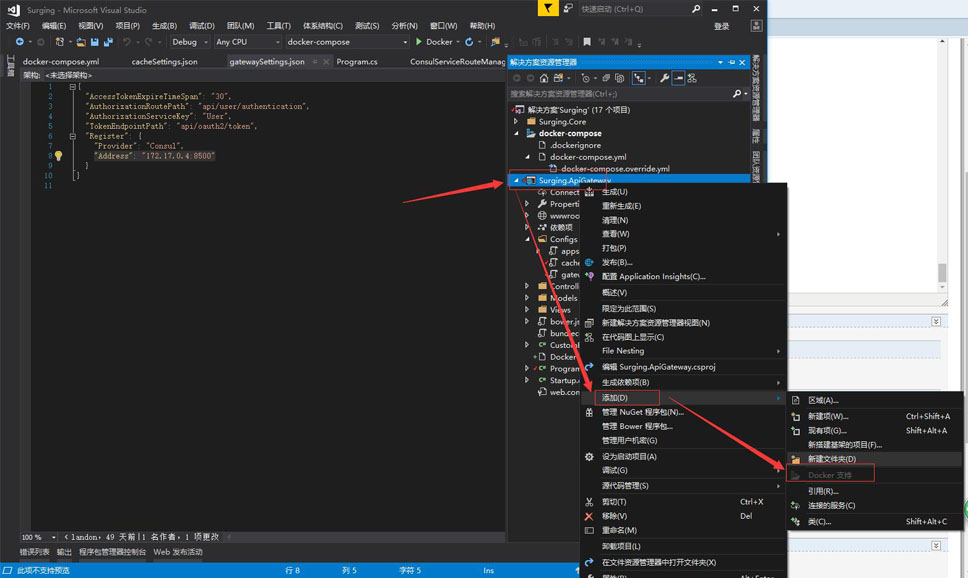
找到其中的ip是多少,然后修改surging网关中的consul地址为:"address": "172.17.0.4:8500",其他配置根据上面的操作进行修改,如redis 镜像地址的查找和修改等;
修改好surging的网关配置后在surging.apigateway项目上单击右键,由于我项目中已经添加过,所以该处为灰色,如图:
新建docker-compose后修改其中docker-compose.yml的配置如下:
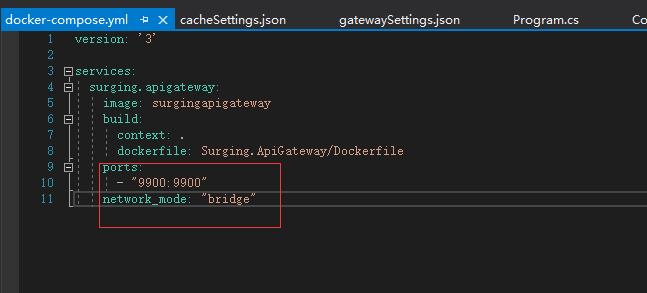
在后面添加docker的外部端口和内部端口的映射和网络模式,这里我们都使用桥接模式,包括之前的consul、rabbitmq、redis都是同一模式,这样他们会在同一vlan下,
然后运行网关,如下:

接下来新建一个解决方案,方案名随意,喜欢就好,由于时间比较短,这里我简单的处理,不清楚的可以留言
新建service.a,然后在其下新建控制台应用service.a、service.b、service.c,新建类库service.a.service、service.b.service、service.c.service;
编辑service.a.csporj、service.b.csporj、service.c.csporj,如下
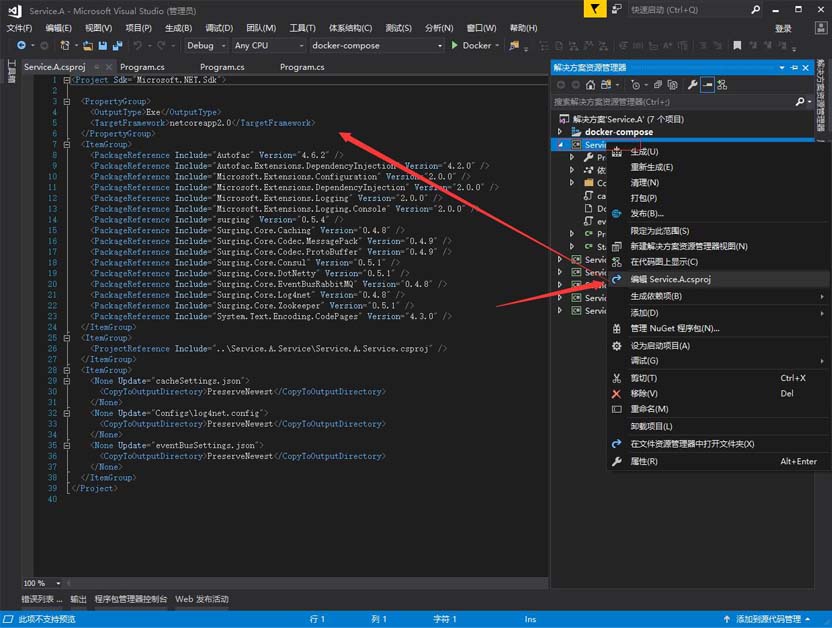
将其中的引用包都复制过去,分别修改一下对应的service,即其中的<projectreference include="..\\service.a.service\\service.a.service.csproj" />,service.a引用service.a.service,service.b引用service.b.service
service.c引用service.c.service;
类库service.a.service、service.b.service、service.c.service中都引用
<packagereference include="surging" version="0.5.4" />
如图:

由于代码很多地方相识,以下我只说service.a,和service.a.service;
service.a 中新增configs文件夹,下面添加log4net.config,log4net.config代码如下:
|
1
2
3
4
5
6
7
8
9
10
11
12
13
14
15
16
17
18
19
20
21
22
23
24
25
26
27
28
29
30
31
32
33
34
35
36
37
38
39
40
41
42
43
44
45
46
47 |
<log4net>
<root>
<level value="error" />
<!-- <appender-ref ref="rollinglogfileappender" /> -->
<appender-ref ref="errorrollinglogfileappender" />
</root>
<appender name="errorrollinglogfileappender" type="log4net.appender.rollingfileappender,log4net" level="error">
<lockingmodel type="log4net.appender.fileappender+minimallock" />
<param name="file" value="c:\\surging\\error\\" />
<param name="appendtofile" value="true" />
<param name="rollingstyle" value="composite" />
<param name="datepattern" value="_yyyymmddhh.txt" />
<param name="staticlogfilename" value="false" />
<param name="maxsizerollbackups" value="-1" />
<param name="maximumfilesize" value="5mb" />
<layout type="log4net.layout.patternlayout,log4net">
<param name="conversionpattern" value="%date [%thread] %-5level %logger [%ndc] - %message%newline" />
</layout>
<filter type="log4net.filter.levelrangefilter">
<param name="levelmin" value="error" />
<param name="levelmax" value="fatal" />
</filter>
</appender>
</log4net> |
然后新增cachesettings.json其中map:properties下的value的值是redis地址
|
1
2
3
4
5
6
7
8
9
10
11
12
13
14
15
16
17
18
19
20
21
22
23
24
25
26
27
28
29
30
31
32
33
34
35
36
37
38
39
40
41
42
43
44
45
46
47
48 |
{
"cachingsettings": [
{
"id": "ddlcache",
"class": "surging.core.caching.rediscache.rediscontext,surging.core.caching",
"properties": [
{
"name": "apprulefile",
"ref": "rule"
},
{
"name": "datacontextpool",
"ref": "ddls_sample",
"maps": [
{
"name": "redis",
"properties": [
{
"value": "172.17.0.2:6379::1"
}
]
},
{
"name": "memorycache"
}
]
},
{
"name": "defaultexpiretime",
"value": "120"
},
{
"name": "connecttimeout",
"value": "120"
},
{
"name": "minsize",
"value": "1"
},
{
"name": "maxsize",
"value": "10"
}
]
}
]
} |
新增eventbussettings.json,其中的eventbusconnection对应的是rabbitmq docker的地址
|
1
2
3
4
5 |
{
"eventbusconnection": "172.17.0.3",
"eventbususername": "guest",
"eventbuspassword": "guest"
} |
program.cs的代码如下
|
1
2
3
4
5
6
7
8
9
10
11
12
13
14
15
16
17
18
19
20
21
22
23
24
25
26
27
28
29
30
31
32
33
34
35
36
37
38
39
40
41
42
43
44
45
46
47
48
49
50
51
52
53
54
55
56
57
58
59
60
61
62
63
64
65
66
67
68
69
70
71
72
73
74
75
76
77
78
79
80
81
82
83
84
85
86
87
88
89
90
91
92
93
94
95
96
97
98
99
100
101
102
103
104 |
using autofac;
using surging.core.codec.messagepack;
using surging.core.consul;
using surging.core.consul.configurations;
using surging.core.cplatform;
using surging.core.cplatform.utilities;
using surging.core.dotnetty;
using surging.core.eventbusrabbitmq;
using surging.core.log4net;
using surging.core.proxygenerator;
using surging.core.servicehosting;
using surging.core.servicehosting.internal.implementation;
using system;
using system.text;
namespace service.a
{
class program
{
static void main(string[] args)
{
newmethod();
}
private static void newmethod()
{
encoding.registerprovider(codepagesencodingprovider.instance);
var host = new servicehostbuilder()
.registerservices(builder =>
{
builder.addmicroservice(option =>
{
option.addserviceruntime();
option.addrelateservice();
//option.usezookeepermanager(new configinfo("127.0.0.1:2181"));
option.useconsulmanager(new configinfo("172.17.0.4:8500"));
option.usedotnettytransport();
option.userabbitmqtransport();
option.addrabbitmqadapt();
//option.useprotobuffercodec();
option.usemessagepackcodec();
builder.register(p => new cplatformcontainer(servicelocator.current));
});
})
.subscribeat()
.uselog4net("configs/log4net.config")
//.useserver("127.0.0.1", 98)
//.useserver("127.0.0.1", 98,“true”) //自动生成token
//.useserver("127.0.0.1", 98,“123456789”) //固定密码token
.useserver(options =>
{
options.ip = "172.17.0.6";
options.port = 9990;
options.token = "true";
options.executiontimeoutinmilliseconds = 30000;
options.maxconcurrentrequests = 200;
options.notrelatedassemblyfiles = "centa.agency.application.dto\\\\w*|stackexchange.redis\\\\w*";
})
.useproxy()
.usestartup<startup>()
.build();
using (host.run())
{
console.writeline($"服务端启动成功,{datetime.now}。");
}
}
}
} |
新增startup.cs
|
1
2
3
4
5
6
7
8
9
10
11
12
13
14
15
16
17
18
19
20
21
22
23
24
25
26
27
28
29
30
31
32
33
34
35
36
37
38
39
40
41
42
43
44
45
46
47
48
49
50
51
52
53
54
55
56
57
58
59
60
61
62
63
64
65
66
67
68
69 |
using autofac;
using autofac.extensions.dependencyinjection;
using microsoft.extensions.configuration;
using microsoft.extensions.dependencyinjection;
using microsoft.extensions.logging;
using surging.core.caching.configurations;
using surging.core.cplatform.utilities;
using surging.core.eventbusrabbitmq.configurations;
using system;
namespace service.a
{
public class startup
{
public startup()
{
var config = new configurationbuilder()
.setbasepath(appcontext.basedirectory);
configureeventbus(config);
//configurecache(config);
}
public icontainer configureservices(containerbuilder builder)
{
var services = new servicecollection();
configurelogging(services);
builder.populate(services);
servicelocator.current = builder.build();
return servicelocator.current;
}
public void configure(icontainer app)
{
app.resolve<iloggerfactory>()
.addconsole((c, l) => (int)l >= 3);
}
#region 私有方法
/// <summary>
/// 配置日志服务
/// </summary>
/// <param name="services"></param>
private void configurelogging(iservicecollection services)
{
services.addlogging();
}
private static void configureeventbus(iconfigurationbuilder build)
{
build
.addeventbusfile("eventbussettings.json", optional: false);
}
/// <summary>
/// 配置缓存服务
/// </summary>
private void configurecache(iconfigurationbuilder build)
{
build
.addcachefile("cachesettings.json", optional: false);
}
#endregion
}
} |
service.a.service 类库下新增aservice.cs
|
1
2
3
4
5
6
7
8
9
10
11
12
13
14
15
16
17
18 |
using surging.core.proxygenerator;
using system;
using system.collections.generic;
using system.text;
using system.threading.tasks;
namespace service.a.service
{
public class aservice:proxyservicebase,iaservice
{
public task<string> sayhello(string name)
{
return task.fromresult($"{name} say : hello");
}
}
} |
新增iaservice.cs
|
1
2
3
4
5
6
7
8
9
10
11
12
13
14 |
using surging.core.cplatform.ioc;
using surging.core.cplatform.runtime.server.implementation.servicediscovery.attributes;
using system;
using system.collections.generic;
using system.text;
using system.threading.tasks;
namespace service.a.service
{
[servicebundle("api/{service}")]
public interface iaservice : iservicekey
{
task<string> sayhello(string name);
}
} |
其他类库和服务与以上代码基本无二,这里不在赘述。不清楚的可以留言
所有代码都处理好后,在service.a、service.b、service.c项目上右键新增docker支持文件,然后会生成一下文件
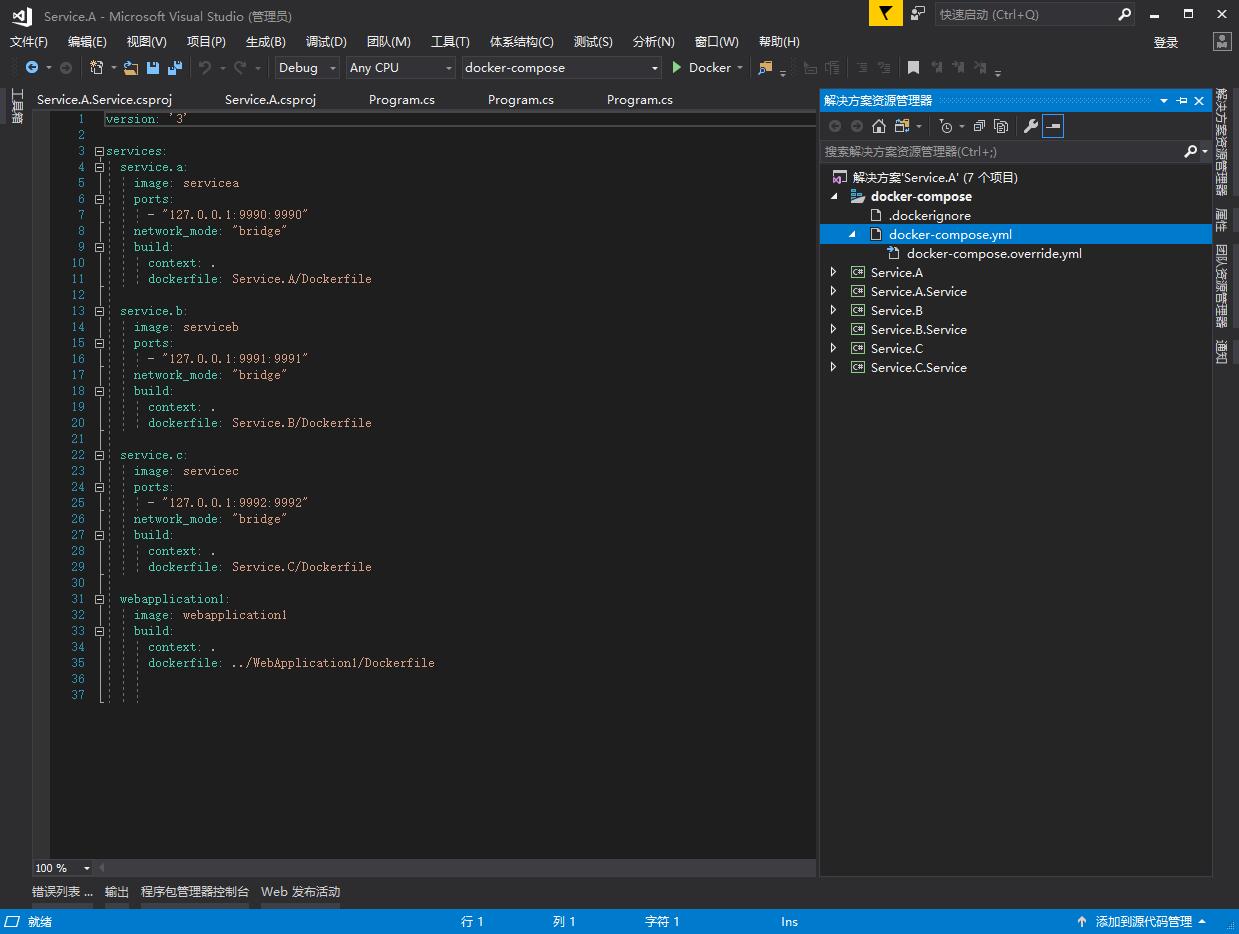
修改其中的docker-compose.yml
|
1
2
3
4
5
6
7
8
9
10
11
12
13
14
15
16
17
18
19
20
21
22
23
24
25
26
27
28
29
30
31
32
33
34
35
36
37
38
39
40
41
42
43
44
45
46
47
48
49
50
51
52
53
54
55
56
57
58
59
60
61
62
63
64
65
66
67
68
69 |
version: '3'
services:
service.a:
image: servicea
ports:
- "127.0.0.1:9990:9990"
network_mode: "bridge"
build:
context: .
dockerfile: service.a/dockerfile
service.b:
image: serviceb
ports:
- "127.0.0.1:9991:9991"
network_mode: "bridge"
build:
context: .
dockerfile: service.b/dockerfile
service.c:
image: servicec
ports:
- "127.0.0.1:9992:9992"
network_mode: "bridge"
build:
context: .
dockerfile: service.c/dockerfile
webapplication1:
image: webapplication1
build:
context: .
dockerfile: ../webapplication1/dockerfile |
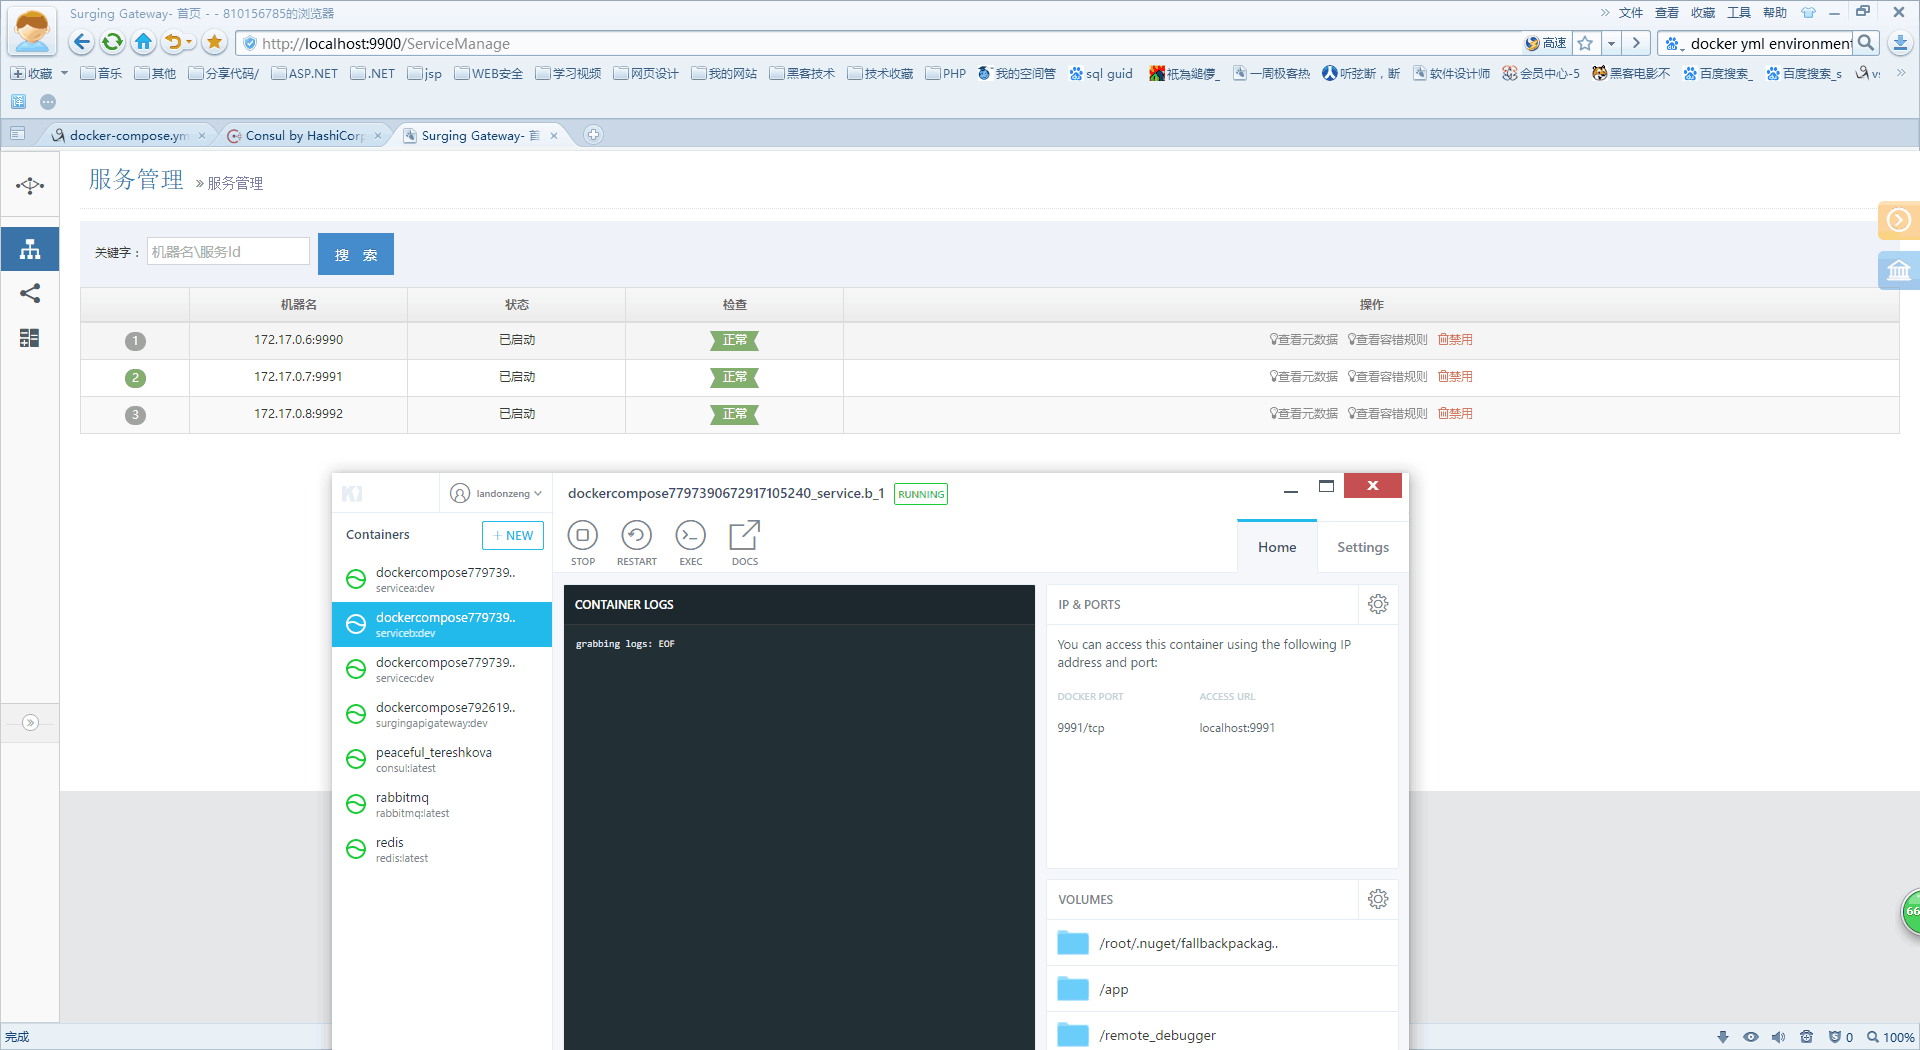
然后选择docker运行即可
最后访问surging网关,即可看见效果
以上就是本文的全部内容,希望对大家的学习有所帮助,也希望大家多多支持快网idc。
原文链接:https://www.cnblogs.com/landonzeng/p/8612026.html

相关文章

- 服务器虚拟化技术深度科普 2025-05-27
- 服务器租用价格怎么计算?服务器租用多少钱一年? 2025-05-27
- 云服务器的“弹性”体现在哪些方面? 2025-05-27
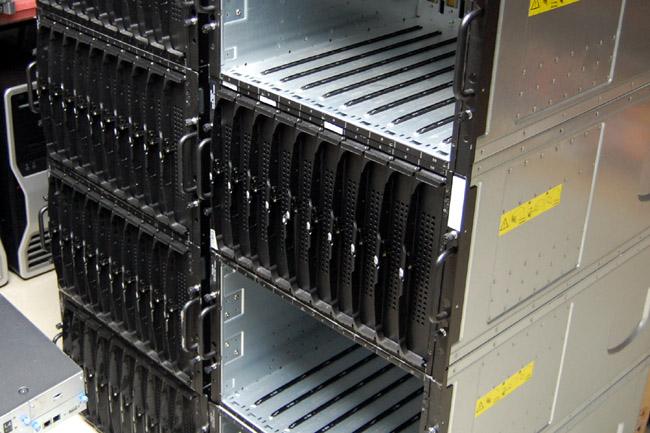
- 刀片服务器是什么 刀片服务器的主要特点 2025-05-27
- 利用FTP和计划任务自动备份网站数据和数据库 2025-05-27