Spire.Cloud.SDK for Java提供了TextRangesApi接口可通过addTextRange()添加文本、deleteTextRange()删除文本、updateTextRangeText()替换文本、updateTextRangeFormat()格式化文本等。本文将从以上方法介绍如何来实现对文本的操作。可参考以下步骤进行准备:
一、导入jar文件
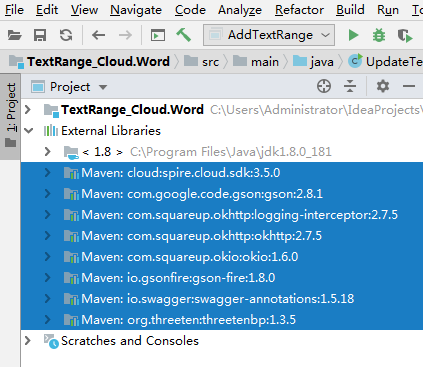
创建Maven项目程序,通过maven仓库下载导入。以IDEA为例,新建Maven项目,在pom.xml文件中配置maven仓库路径,并指定spire.cloud.sdk的依赖,如下:
?
|
1
2
3
4
5
6
7
8
9
10
11
12
13
14
15
16
17
18
19
20
21
22
23
24
25
26
27
28
29
30
31
32
33
34
35
36
37
38
39
40
41
42
43
44
45
46
47
48
49
50
51
52
53
54
55
56
57
|
<repositories>
<repository>
<id>com.e-iceblue</id>
<name>cloud</name>
<url>http://repo.e-iceblue.cn/repository/maven-public/</url>
</repository>
</repositories>
<dependencies>
<dependency>
<groupId> cloud </groupId>
<artifactId>spire.cloud.sdk</artifactId>
<version>3.5.0</version>
</dependency>
<dependency>
<groupId> com.google.code.gson</groupId>
<artifactId>gson</artifactId>
<version>2.8.1</version>
</dependency>
<dependency>
<groupId> com.squareup.okhttp</groupId>
<artifactId>logging-interceptor</artifactId>
<version>2.7.5</version>
</dependency>
<dependency>
<groupId> com.squareup.okhttp </groupId>
<artifactId>okhttp</artifactId>
<version>2.7.5</version>
</dependency>
<dependency>
<groupId> com.squareup.okio </groupId>
<artifactId>okio</artifactId>
<version>1.6.0</version>
</dependency>
<dependency>
<groupId> io.gsonfire</groupId>
<artifactId>gson-fire</artifactId>
<version>1.8.0</version>
</dependency>
<dependency>
<groupId>io.swagger</groupId>
<artifactId>swagger-annotations</artifactId>
<version>1.5.18</version>
</dependency>
<dependency>
<groupId> org.threeten </groupId>
<artifactId>threetenbp</artifactId>
<version>1.3.5</version>
</dependency>
</dependencies>
|
完成配置后,点击“Import Changes” 即可导入所有需要的jar文件。如果使用的是Eclipse,可参考这里的导入方法。
导入结果:
二、登录冰蓝云账号,创建文件夹,上传文档

三、创建应用程序,获取App ID及App Key

完成以上步骤后,可参考以下代码,进行文档操作。
用于测试的Word源文档如下:

1. 添加文本到Word
?
|
1
2
3
4
5
6
7
8
9
10
11
12
13
14
15
16
17
18
19
20
21
22
23
24
25
26
|
import spire.cloud.word.sdk.client.ApiException;
import spire.cloud.word.sdk.client.Configuration;
import spire.cloud.word.sdk.client.api.TextRangesApi;
public class AddTextRange {
//配置App账号信息
static String appId = "App ID";
static String appKey = "App Key";
static String baseUrl = "https://api.e-iceblue.cn";
static Configuration wordConfiguration = new Configuration(appId, appKey, baseUrl);
static TextRangesApi textRangesApi = new TextRangesApi(wordConfiguration);
public static void main(String[] args) throws ApiException {
String name = "testfile.docx";//用于测试的Word源文档
String paragraphPath = "Section/0/Body/0/Paragraph/0";//获取文档中的段落
Integer indexInParagraph = 0;
String text = "新添加的文本内容!";//指定需要添加的文本内容
String folder = "input";//源文档所在的云端文件夹
String storage = null;//冰蓝云存储空间
String password = null;//源文档密码
String destFilePath = "output/AddTextRange.docx";//结果文档路径
//调用方法添加文本内容到Word段落
textRangesApi.addTextRange(name, paragraphPath, text, destFilePath, folder, storage, indexInParagraph, password);
}
}
|
文本添加效果:

2. 删除Word中的文本
?
|
1
2
3
4
5
6
7
8
9
10
11
12
13
14
15
16
17
18
19
20
21
22
23
24
25
|
import spire.cloud.word.sdk.client.ApiException;
import spire.cloud.word.sdk.client.Configuration;
import spire.cloud.word.sdk.client.api.TextRangesApi;
public class DeleteTextRange {
//配置App账号信息
static String appId = "App ID";
static String appKey = "App Key";
static String baseUrl = "https://api.e-iceblue.cn";
static Configuration wordConfiguration = new Configuration(appId, appKey, baseUrl);
static TextRangesApi textRangesApi = new TextRangesApi(wordConfiguration);
public static void main(String[] args) throws ApiException {
String name = "testfile.docx";//源文档
String paragraphPath = "Section/0/Body/0/Paragraph/0";//获取段落
Integer index = 0;
String folder = "input";//源文档所在文件夹
String storage = null;//冰蓝云存储空间
String password = null;//源文档密码
String destFilePath = "output/DeleteTextRange.docx";//结果文档路径
//调用方法删除Word第一段文本
textRangesApi.deleteTextRange(name, paragraphPath, index, destFilePath,folder, storage, password);
}
}
|
文本删除效果:

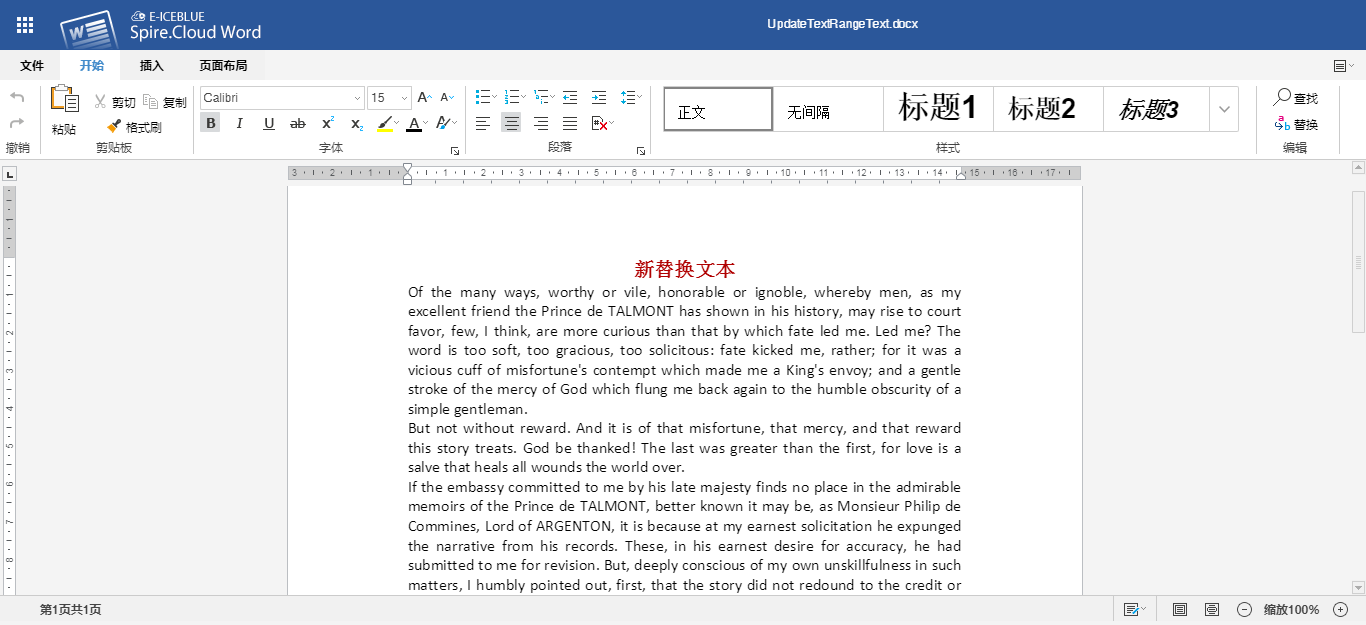
3. 替换Word中的文本
?

|
1
2
3
4
5
6
7
8
9
10
11
12
13
14
15
16
17
18
19
20
21
22
23
24
25
26
|
import spire.cloud.word.sdk.client.ApiException;
import spire.cloud.word.sdk.client.Configuration;
import spire.cloud.word.sdk.client.api.TextRangesApi;
public class UpdateTextRange {
//配置App账号信息
static String appId = "App ID";
static String appKey = "App Key";
static String baseUrl = "https://api.e-iceblue.cn";
static Configuration wordConfiguration = new Configuration(appId, appKey, baseUrl);
static TextRangesApi textRangesApi = new TextRangesApi(wordConfiguration);
public static void main(String[] args) throws ApiException {
String name = "testfile.docx";//源文档
String paragraphPath = "Section/0/Body/0/Paragraph/0";//获取段落
Integer index = 0;
String text = "新替换文本";//指定新文本
String folder = "input";//源文档所在文件夹
String storage = null;
String password = null;
String destFilePath = "output/UpdateTextRangeText.docx";//结果文档路径
//调用方法更新(替换)原有的文本
textRangesApi.updateTextRangeText(name, paragraphPath, index, text, destFilePath, folder, storage, password);
}
}
|
文本替换效果:
?
|
1
2
3
4
5
6
7
8
9
10
11
12
13
14
15
16
17
18
19
20
21
22
23
24
25
26
27
28
29
30
31
32
33
34
35
36
|
import spire.cloud.word.sdk.client.ApiException;
import spire.cloud.word.sdk.client.Configuration;
import spire.cloud.word.sdk.client.api.TextRangesApi;
import spire.cloud.word.sdk.client.model.Color;
import spire.cloud.word.sdk.client.model.Font;
import spire.cloud.word.sdk.client.model.TextRangeFormat;
public class UpdateTextRangeFormat {
//配置App账号信息
static String appId = "App ID";
static String appKey = "App Key";
static String baseUrl = "https://api.e-iceblue.cn";
static Configuration wordConfiguration = new Configuration(appId, appKey, baseUrl);
static TextRangesApi textRangesApi = new TextRangesApi(wordConfiguration);
public static void main(String[] args) throws ApiException {
String name = "testfile.docx";//源文档
String paragraphPath = "Section/0/Body/0/Paragraph/0";//获取段落
Integer index = 0;
//创建文本样式,指定字体、颜色、字号,并应用到文本
TextRangeFormat format = new TextRangeFormat();
Color color = new Color(34,139,34);
Font font = new Font("宋体", 20f, color);
format.setFont(font);
TextRangeFormat textRange = format;
String folder = "input";//源文档所在文件夹
String storage = null;
String password = null;
String destFilePath = "output/UpdateTextRangeFormat.docx";//结果文档路径
//调用方法更新(应用)文本样式
textRangesApi.updateTextRangeFormat(name, paragraphPath, index, textRange, destFilePath, folder, storage, password);
}
}
|
文本格式设置效果:

到此这篇关于Java 添加、删除、替换、格式化Word中的文本的步骤详解(基于Spire.Cloud.SDK for Java)的文章就介绍到这了,更多相关Java 添加、删除、替换、格式化Word中的文本内容请搜索快网idc以前的文章或继续浏览下面的相关文章希望大家以后多多支持快网idc!
原文链接:https://www.cnblogs.com/Yesi/p/13391183.html

相关文章


猜你喜欢
- 64M VPS建站:是否适合初学者操作和管理? 2025-06-10
- ASP.NET自助建站系统中的用户注册和登录功能定制方法 2025-06-10
- ASP.NET自助建站系统的域名绑定与解析教程 2025-06-10
- 个人服务器网站搭建:如何选择合适的服务器提供商? 2025-06-10
- ASP.NET自助建站系统中如何实现多语言支持? 2025-06-10