

本文将介绍使用Spring Boot集成Mybatis并实现主从库分离的实现(同样适用于多数据源)。延续之前的Spring Boot 集成MyBatis。项目还将集成分页插件PageHelper、通用Mapper以及Druid。
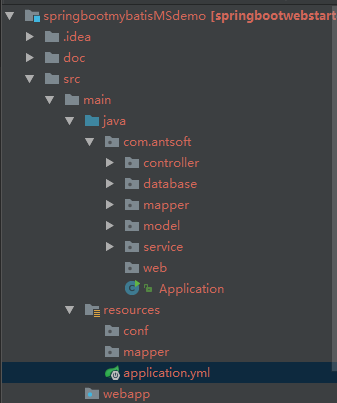
新建一个Maven项目,最终项目结构如下:
多数据源注入到sqlSessionFactory
POM增加如下依赖:
|
1
2
3
4
5
6
7
8
9
10
11
12
13
14
15
16
17
18
19
20
21
22
23
24
25
26
27
28
29
30
31
32
33
34
35
36
37
38
39
40
41
42
43
44
45
46
47
48
49
50
51
52
53
54
55
|
<!--JSON-->
<dependency>
<groupId>com.fasterxml.jackson.core</groupId>
<artifactId>jackson-core</artifactId>
</dependency>
<dependency>
<groupId>com.fasterxml.jackson.core</groupId>
<artifactId>jackson-databind</artifactId>
</dependency>
<dependency>
<groupId>com.fasterxml.jackson.datatype</groupId>
<artifactId>jackson-datatype-joda</artifactId>
</dependency>
<dependency>
<groupId>com.fasterxml.jackson.module</groupId>
<artifactId>jackson-module-parameter-names</artifactId>
</dependency>
<dependency>
<groupId>org.springframework.boot</groupId>
<artifactId>spring-boot-starter-jdbc</artifactId>
</dependency>
<dependency>
<groupId>mysql</groupId>
<artifactId>mysql-connector-java</artifactId>
</dependency>
<dependency>
<groupId>com.alibaba</groupId>
<artifactId>druid</artifactId>
<version>1.0.11</version>
</dependency>
<!--mybatis-->
<dependency>
<groupId>org.mybatis.spring.boot</groupId>
<artifactId>mybatis-spring-boot-starter</artifactId>
<version>1.1.1</version>
</dependency>
<!--mapper-->
<dependency>
<groupId>tk.mybatis</groupId>
<artifactId>mapper-spring-boot-starter</artifactId>
<version>1.1.0</version>
</dependency>
<!--pagehelper-->
<dependency>
<groupId>com.github.pagehelper</groupId>
<artifactId>pagehelper-spring-boot-starter</artifactId>
<version>1.1.0</version>
<exclusions>
<exclusion>
<artifactId>mybatis-spring-boot-starter</artifactId>
<groupId>org.mybatis.spring.boot</groupId>
</exclusion>
</exclusions>
</dependency>
|
这里需要注意的是:项目是通过扩展mybatis-spring-boot-starter的org.mybatis.spring.boot.autoconfigure.MybatisAutoConfiguration来实现多数据源注入的。在mybatis-spring-boot-starter:1.2.0中,该类取消了默认构造函数,因此本项目依旧使用1.1.0版本。需要关注后续版本是否会重新把扩展开放处理。
之所以依旧使用旧方案,是我个人认为开放扩展是合理的,相信在未来的版本中会回归。
如果你需要其他方案可参考传送门
增加主从库配置(application.yml)
|
1
2
3
4
5
6
7
8
9
10
11
12
13
14
15
16
17
18
19
20
|
druid:
type: com.alibaba.druid.pool.DruidDataSource
master:
url: jdbc:mysql://192.168.249.128:3307/db-test?characterEncoding=UTF-8&autoReconnect=true&zeroDateTimeBehavior=convertToNull&useUnicode=true
driver-class-name: com.mysql.jdbc.Driver
username: root
password: root
initial-size: 5
min-idle: 1
max-active: 100
test-on-borrow: true
slave:
url: jdbc:mysql://192.168.249.128:3317/db-test?characterEncoding=UTF-8&autoReconnect=true&zeroDateTimeBehavior=convertToNull&useUnicode=true&characterEncoding=utf-8
driver-class-name: com.mysql.jdbc.Driver
username: root
password: root
initial-size: 5
min-idle: 1
max-active: 100
test-on-borrow: true
|
创建数据源
|
1
2
3
4
5
6
7
8
9
10
11
12
13
14
15
16
17
18
19
20
|
@Configuration
@EnableTransactionManagement
public class DataSourceConfiguration {
@Value("${druid.type}")
private Class<? extends DataSource> dataSourceType;
@Bean(name = "masterDataSource")
@Primary
@ConfigurationProperties(prefix = "druid.master")
public DataSource masterDataSource(){
return DataSourceBuilder.create().type(dataSourceType).build();
}
@Bean(name = "slaveDataSource")
@ConfigurationProperties(prefix = "druid.slave")
public DataSource slaveDataSource1(){
return DataSourceBuilder.create().type(dataSourceType).build();
}
}
|
将多数据源注入到sqlSessionFactory中
前面提到了这里通过扩展mybatis-spring-boot-starter的org.mybatis.spring.boot.autoconfigure.MybatisAutoConfiguration来实现多数据源注入的
|
1
2
3
4
5
6
7
8
9
10
11
12
13
14
15
16
17
18
19
20
21
22
23
24
25
26
|
@Configuration
@AutoConfigureAfter({DataSourceConfiguration.class})
public class MybatisConfiguration extends MybatisAutoConfiguration {
private static Log logger = LogFactory.getLog(MybatisConfiguration.class);
@Resource(name = "masterDataSource")
private DataSource masterDataSource;
@Resource(name = "slaveDataSource")
private DataSource slaveDataSource;
@Bean
public SqlSessionFactory sqlSessionFactory() throws Exception {
return super.sqlSessionFactory(roundRobinDataSouceProxy());
}
public AbstractRoutingDataSource roundRobinDataSouceProxy(){
ReadWriteSplitRoutingDataSource proxy = new ReadWriteSplitRoutingDataSource();
Map<Object,Object> targetDataResources = new ClassLoaderRepository.SoftHashMap();
targetDataResources.put(DbContextHolder.DbType.MASTER,masterDataSource);
targetDataResources.put(DbContextHolder.DbType.SLAVE,slaveDataSource);
proxy.setDefaultTargetDataSource(masterDataSource);//默认源
proxy.setTargetDataSources(targetDataResources);
return proxy;
}
}
|
实现读写分离(多数据源分离)
这里主要思路如下:
1-将不同的数据源标识记录在ThreadLocal中
2-通过注解标识出当前的service方法使用哪个库
3-通过Spring AOP实现拦截注解并注入不同的标识到threadlocal中
4-获取源的时候通过threadlocal中不同的标识给出不同的sqlSession
标识存放ThreadLocal的实现
|
1
2
3
4
5
6
7
8
9
10
11
12
13
14
15
16
17
18
19
20
21
22
|
public class DbContextHolder {
public enum DbType{
MASTER,SLAVE
}
private static final ThreadLocal<DbType> contextHolder = new ThreadLocal<>();
public static void setDbType(DbType dbType){
if(dbType==null)throw new NullPointerException();
contextHolder.set(dbType);
}
public static DbType getDbType(){
return contextHolder.get()==null?DbType.MASTER:contextHolder.get();
}
public static void clearDbType(){
contextHolder.remove();
}
}
|
注解实现
|
1
2
3
4
5
6
7
8
|
/**
* 该注解注释在service方法上,标注为链接slaves库
* Created by Jason on 2017/3/6.
*/
@Target({ElementType.METHOD,ElementType.TYPE})
@Retention(RetentionPolicy.RUNTIME)
public @interface ReadOnlyConnection {
}
|
Spring AOP对注解的拦截
|
1
2
3
4
5
6
7
8
9
10
11
12
13
14
15
16
17
18
19
20
21
22
23
24
25
|
@Aspect
@Component
public class ReadOnlyConnectionInterceptor implements Ordered {
public static final Logger logger = LoggerFactory.getLogger(ReadOnlyConnectionInterceptor.class);
@Around("@annotation(readOnlyConnection)")
public Object proceed(ProceedingJoinPoint proceedingJoinPoint,ReadOnlyConnection readOnlyConnection) throws Throwable {
try {
logger.info("set database connection to read only");
DbContextHolder.setDbType(DbContextHolder.DbType.SLAVE);
Object result = proceedingJoinPoint.proceed();
return result;
}finally {
DbContextHolder.clearDbType();
logger.info("restore database connection");
}
}
@Override
public int getOrder() {
return 0;
}
}
|
根据标识获取不同源
这里我们通过扩展AbstractRoutingDataSource来获取不同的源。它是Spring提供的一个可以根据用户发起的不同请求去转换不同的数据源,比如根据用户的不同地区语言选择不同的数据库。通过查看源码可以发现,它是通过determineCurrentLookupKey()返回的不同key到sqlSessionFactory中获取不同源(前面已经展示了如何在sqlSessionFactory中注入多个源)
|
1
2
3
4
5
6
7
|
public class ReadWriteSplitRoutingDataSource extends AbstractRoutingDataSource {
@Override
protected Object determineCurrentLookupKey() {
return DbContextHolder.getDbType();
}
}
|
以上就完成了读写分离(多数据源)的配置方案。下面是一个具体的实例
使用方式
Entity
|
1
2
3
4
5
6
7
8
9
10
11
|
@Table(name = "t_sys_dic_type")
public class DicType extends BaseEntity{
String code;
String name;
Integer status;
...
}
|
Mapper
|
1
2
|
public interface DicTypeMapper extends BaseMapper<DicType> {
}
|
Service
|
1
2
3
4
5
6
7
8
9
10
11
12
13
14
|
@Service
public class DicTypeService {
@Autowired
private DicTypeMapper dicTypeMapper;
@ReadOnlyConnection
public List<DicType> getAll(DicType dicType){
if (dicType.getPage() != null && dicType.getRows() != null) {
PageHelper.startPage(dicType.getPage(), dicType.getRows());
}
return dicTypeMapper.selectAll();
}
}
|
注意这里的@ReadOnlyConnection注解
Controller
|
1
2
3
4
5
6
7
8
9
10
11
12
|
@RestController
@RequestMapping("/dictype")
public class DicTypeController {
@Autowired
private DicTypeService dicTypeService;
@RequestMapping(value = "/all")
public PageInfo<DicType> getALL(DicType dicType){
List<DicType> dicTypeList = dicTypeService.getAll(dicType);
return new PageInfo<>(dicTypeList);
}
}
|
通过mvn spring-boot:run启动后,即可通过http://localhost:9090/dictype/all 获取到数据
后台打印出
|
1
|
c.a.d.m.ReadOnlyConnectionInterceptor : set database connection to read only
|
说明使用了从库的链接获取数据
备注:如何保证多源事务呢?
1-在读写分离场景中不会考虑主从库事务,在纯读的上下文上使用@ReadOnlyConnection标签。其他则默认使用主库。
2-在多源场景中,Spring的@Transaction是可以保证多源的事务性的。
本文使用代码
以上就是本文的全部内容,希望对大家的学习有所帮助,也希望大家多多支持快网idc。
原文链接:http://www.jianshu.com/p/8813ec02926a

相关文章


- ASP.NET自助建站系统中的用户注册和登录功能定制方法 2025-06-10
- ASP.NET自助建站系统的域名绑定与解析教程 2025-06-10
- 个人服务器网站搭建:如何选择合适的服务器提供商? 2025-06-10
- ASP.NET自助建站系统中如何实现多语言支持? 2025-06-10
- 64M VPS建站:如何选择最适合的网站建设平台? 2025-06-10


