一,准备工作,建立spring-boot-sample-mysql工程
1、http://start.spring.io/
A、Artifact中输入spring-boot-sample-MySQL
B、勾选Web下的web
C、勾选SQL下的JPA MYSQL
2、Eclips中导入工程spring-boot-sample-mysql
A、解压快捷工程spring-boot-sample-mysql到某文件夹
B、eclips中file->import->Import Existing Maven Projects–>Select Maven projects–>finish导入工程
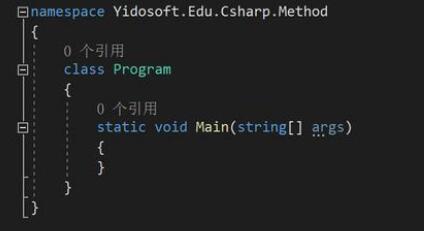
3、工程导入之后,文件结构如下图
4、在包com.example下建立web文件夹
5、便于测试,引入spring-boot-sample-helloworld的HelloController及配置文件logback.xml
HelloController代码为
|
1
2
3
4
5
6
7
8
9
10
11
12
13
14
15
16
17
18
19
20
|
package com.example.web;
import org.slf4j.Logger;
import org.slf4j.LoggerFactory;
import org.springframework.web.bind.annotation.PathVariable;
import org.springframework.web.bind.annotation.RequestMapping;
import org.springframework.web.bind.annotation.RestController;
@RestController
public class HelloController {
protected static Logger logger=LoggerFactory.getLogger(HelloController.class);
@RequestMapping("/")
public String helloworld(){
logger.debug("访问hello");
return "Hello world!";
}
@RequestMapping("/hello/{name}")
public String helloName(@PathVariable String name){
logger.debug("访问helloName,Name={}",name);
return "Hello "+name;
}
}
|
logback.xml配置为
|
1
2
3
4
5
6
7
8
9
10
11
12
13
14
15
16
17
18
19
20
21
22
23
24
25
26
27
28
29
30
31
32
|
<configuration>
<!-- %m输出的信息,%p日志级别,%t线程名,%d日期,%c类的全名,,,, -->
<appender name="STDOUT" class="ch.qos.logback.core.ConsoleAppender">
<encoder>
<pattern>%d %p (%file:%line\\)- %m%n</pattern>
<charset>GBK</charset>
</encoder>
</appender>
<appender name="baselog"
class="ch.qos.logback.core.rolling.RollingFileAppender">
<File>log/base.log</File>
<rollingPolicy class="ch.qos.logback.core.rolling.TimeBasedRollingPolicy">
<fileNamePattern>log/base.log.%d.i%</fileNamePattern>
<timeBasedFileNamingAndTriggeringPolicy class="ch.qos.logback.core.rolling.SizeAndTimeBasedFNATP">
<!-- or whenever the file size reaches 64 MB -->
<maxFileSize>64 MB</maxFileSize>
</timeBasedFileNamingAndTriggeringPolicy>
</rollingPolicy>
<encoder>
<pattern>
%d %p (%file:%line\\)- %m%n
</pattern>
<charset>UTF-8</charset> <!-- 此处设置字符集 -->
</encoder>
</appender>
<root level="info">
<appender-ref ref="STDOUT" />
</root>
<logger name="com.example" level="DEBUG">
<appender-ref ref="baselog" />
</logger>
</configuration>
|
注:logback.xml文件位于src/main/resources下
6、启动工程,通过浏览器查看正确性
http://localhost:8080/
http://localhost:8080/hello/上帝
二,使用JPA,构建业务对象及访问库
1、在包com.example下建立domain文件夹
2、在domain中建立类Person
|
1
2
3
4
5
6
7
8
9
10
11
12
13
14
15
16
17
18
19
20
21
22
23
24
25
26
27
28
29
30
31
32
33
34
35
36
37
38
39
40
41
42
43
44
45
46
47
|
package com.example.domain;
import javax.persistence.Entity;
import javax.persistence.GeneratedValue;
import javax.persistence.Id;
@Entity
public class Person {
@Id
@GeneratedValue
private Long id;
private String name;
private Integer age;
private String address;
public Person() {
super();
}
public Person(Long id, String name, Integer age, String address) {
super();
this.id = id;
this.name = name;
this.age = age;
this.address = address;
}
public Long getId() {
return id;
}
public void setId(Long id) {
this.id = id;
}
public String getName() {
return name;
}
public void setName(String name) {
this.name = name;
}
public Integer getAge() {
return age;
}
public void setAge(Integer age) {
this.age = age;
}
public String getAddress() {
return address;
}
public void setAddress(String address) {
this.address = address;
}
}
|
注意:构造函数
3、在包com.example下建立repository文件夹
4、在repository中建立接口PersonRepository
|
1
2
3
4
5
6
7
8
9
10
11
12
13
14
15
|
package com.example.repository;
import java.util.List;
import org.springframework.data.jpa.repository.JpaRepository;
import org.springframework.data.jpa.repository.Query;
import org.springframework.data.repository.query.Param;
import org.springframework.stereotype.Repository;
import com.example.domain.Person;
@Repository
public interface PersonRepository extends JpaRepository<Person,Long> {
List<Person> findByName(String name);
List<Person> findByAddress(String address);
List<Person> findByNameAndAddress(String name,String address);
@Query("select p from Person p where p.name=:name and p.address=:address")
List<Person> withNameAndAddressQuery(@Param("name")String Name,@Param("address")String address);
}
|
5、在web中建立DataController
|
1
2
3
4
5
6
7
8
9
10
11
12
13
14
15
16
17
18
19
20
21
22
23
24
25
26
27
28
29
30
31
32
33
34
35
36
37
38
39
40
41
42
43
44
45
46
47
48
49
50
51
52
53
54
55
56
57
|
package com.example.web;
import java.util.List;
import org.slf4j.Logger;
import org.slf4j.LoggerFactory;
import org.springframework.beans.factory.annotation.Autowired;
import org.springframework.data.domain.Page;
import org.springframework.data.domain.PageRequest;
import org.springframework.data.domain.Sort;
import org.springframework.data.domain.Sort.Direction;
import org.springframework.web.bind.annotation.RequestMapping;
import org.springframework.web.bind.annotation.RestController;
import com.example.domain.Person;
import com.example.repository.PersonRepository;
@RestController
public class DataController {
protected static Logger logger=LoggerFactory.getLogger(DataController.class);
@Autowired
PersonRepository personRepository;
@RequestMapping("/save")
public Person save(String name,String address,Integer age){
logger.debug("save 开始");
Person p=personRepository.save(new Person(null,name,age,address));
logger.debug("save 结束");
return p;
}
@RequestMapping("/q1")
public List<Person> q1(String address){
logger.debug("q1 开始");
logger.debug("q1 接收参数address={}",address);
List<Person> people=personRepository.findByAddress(address);
return people;
}
@RequestMapping("/q2")
public List<Person> q2(String name,String address){
logger.debug("q2 开始");
logger.debug("q2接收参数name={},address={}",name,address);
return personRepository.findByNameAndAddress(name, address);
}
@RequestMapping("/q3")
public List<Person> q3(String name,String address){
logger.debug("q3 开始");
logger.debug("q3接收参数name={},address={}",name,address);
return personRepository.withNameAndAddressQuery(name, address);
}
@RequestMapping("/sort")
public List<Person> sort(){
logger.debug("sort 开始");
List<Person> people=personRepository.findAll(new Sort(Direction.ASC,"age"));
return people;
}
@RequestMapping("/page")
public Page<Person> page(){
logger.debug("page 开始");
Page<Person> people=personRepository.findAll(new PageRequest(1,2));
return people;
}
}
|
6、配置数据库连接,在application.properties(src/main/resources下)
|
1
2
3
4
5
6
7
|
spring.datasource.url=jdbc:mysql://192.168.56.201:3306/bootsample?useUnicode=true&characterEncoding=UTF-8
spring.datasource.username=root
spring.datasource.password=123456
spring.datasource.driver-class-name=com.mysql.jdbc.Driver
spring.jpa.hibernate.ddl-auto=update
spring.jpa.show-sql=true
spring.jackson.serialization.indent_output=true
|
7、运行测试
A、先保存数据
http://localhost:8080/save?name=aa&&address=北京&&age=1
http://localhost:8080/save?name=ab&&address=北京&&age=2
http://localhost:8080/save?name=cq1&&address=重庆&&age=50
http://localhost:8080/save?name=cq2&&address=重庆&&age=51
B、查询q1
http://localhost:8080/q1?address=北京
C、查询q2
http://localhost:8080/q2?address=北京&&name=aa
D、查询q3
http://localhost:8080/q3?address=北京&&name=aa
E、排序
http://localhost:8080/sort
F、分页
http://localhost:8080/page
运用hibernate访问mysql,基本也是老技术,只是用JPA简化了dao层代码,对于业务对象基本没有变化。
以上所述是小编给大家介绍的SpringBoot入门系列之JPA mysql,希望对大家有所帮助,如果大家有任何疑问请给我留言,小编会及时回复大家的。在此也非常感谢大家对快网idc网站的支持!
原文链接:http://blog.csdn.net/sosfnima/article/details/51993689

相关文章


- ASP.NET自助建站系统中如何实现多语言支持? 2025-06-10
- 64M VPS建站:如何选择最适合的网站建设平台? 2025-06-10
- ASP.NET本地开发时常见的配置错误及解决方法? 2025-06-10
- ASP.NET自助建站系统的数据库备份与恢复操作指南 2025-06-10
- 个人网站服务器域名解析设置指南:从购买到绑定全流程 2025-06-10