搭建效果为:
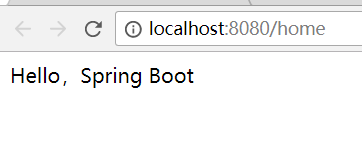
直接在网页输入请求,在页面中显示一行文字:Hello,Spring Boot
与一般的wen项目不同的地方:
1、不需要配置web.xml 文件,但需要注解@SpringBootApplication 等
2、一切和spring有关的jar包都不需要版本号,springcloud会给你选择它最稳定的版本
3、它会定位public static void main()方法来标记为可运行类,必须在主路径下
4、启动方式:
a.右键运行main方法
b.由于我们使用了 spring-boot-starter-parent POM,所以可以使用 mvn spring-boot:run来启动项目(根路径)
c.先使用Maven来package(打包),然后java -jar*-0.0.1-SNAPSHOT.jar。
搭建
创建一个新的maven项目,目录结构如下:

pom.xml文件
?
|
1
2
3
4
5
6
7
8
9
10
11
12
13
14
15
16
17
18
19
20
21
22
23
24
25
26
27
28
29
30
31
32
33
|
<?xml version="1.0" encoding="UTF-8"?>
<project xmlns="http://maven.apache.org/POM/4.0.0"
xmlns:xsi="http://www.w3.org/2001/XMLSchema-instance"
xsi:schemaLocation="http://maven.apache.org/POM/4.0.0 http://maven.apache.org/xsd/maven-4.0.0.xsd">
<modelVersion>4.0.0</modelVersion>
<groupId>cn.jiashubing</groupId>
<artifactId>spring-boot-web</artifactId>
<version>1.0-SNAPSHOT</version>
<parent>
<groupId>org.springframework.boot</groupId>
<artifactId>spring-boot-starter-parent</artifactId>
<version>1.5.2.RELEASE</version>
</parent>
<dependencies>
<dependency>
<groupId>org.springframework.boot</groupId>
<artifactId>spring-boot-starter-web</artifactId>
</dependency>
</dependencies>
<build>
<plugins>
<plugin>
<groupId>org.springframework.boot</groupId>
<artifactId>spring-boot-maven-plugin</artifactId>
</plugin>
</plugins>
</build>
</project>
|
HomeController.java文件
?

|
1
2
3
4
5
6
7
8
9
10
11
12
13
14
15
16
17
18
19
20
21
22
|
package cn.jiashubing.controller;
import org.springframework.boot.autoconfigure.EnableAutoConfiguration;
import org.springframework.stereotype.Controller;
import org.springframework.web.bind.annotation.RequestMapping;
import org.springframework.web.bind.annotation.RequestMethod;
import org.springframework.web.bind.annotation.ResponseBody;
/**
* @author jiashubing
* @since 2018/5/30
*/
@Controller
@EnableAutoConfiguration
public class HomeController {
@RequestMapping(value = "/home", method = RequestMethod.GET)
@ResponseBody
public String home() {
return "Hello,Spring Boot";
}
}
|
JiashubingApplication.java文件
?
|
1
2
3
4
5
6
7
8
9
10
11
12
13
14
15
|
package cn.jiashubing;
import org.springframework.boot.SpringApplication;
import org.springframework.boot.autoconfigure.SpringBootApplication;
/**
* @author jiashubing
* @since 2018/5/29
*/
@SpringBootApplication
public class JiashubingApplication {
public static void main(String[] args) {
SpringApplication.run(JiashubingApplication.class, args);
}
}
|
在浏览器中输入 http://localhost:8080/home
最终效果如下:
以上就是本文的全部内容,希望对大家的学习有所帮助,也希望大家多多支持快网idc。
原文链接:https://www.cnblogs.com/acm-bingzi/p/spring-boot-web-hello.html

相关文章


猜你喜欢
- ASP.NET自助建站系统的域名绑定与解析教程 2025-06-10
- 个人服务器网站搭建:如何选择合适的服务器提供商? 2025-06-10
- ASP.NET自助建站系统中如何实现多语言支持? 2025-06-10
- 64M VPS建站:如何选择最适合的网站建设平台? 2025-06-10
- ASP.NET本地开发时常见的配置错误及解决方法? 2025-06-10