本文主要给大家介绍了关于Spring向页面传值和接受页面传过来的参数的相关内容,分享出来供大家参考学习,下面来一起看看详细的介绍:
一、从页面接收参数
spring MVC接收请求提交的参数值的几种方法:
1、使用HttpServletRequest获取。
1
2
3
4
5
|
@RequestMapping ( "/login.do" )
public String login(HttpServletRequest request){
String name = request.getParameter( "name" )
String pass = request.getParameter( "pass" )
}
|
2、使用@RequestParam注解。
1
2
3
4
5
6
7
8
|
@RequestMapping ( "/login.do" )
public String login(HttpServletRequest request,
String name,
@RequestParam ( "pass" )String password) // 表单属性是pass,用变量password接收
{
syso(name);
syso(password)
}
|
3、使用自动机制封装成实体参数。
1
2
3
4
5
6
7
8
9
10
11
|
<form action= "login.do" >
用户名:<input name= "name" />
密码:<input name= "pass" />
<input type= "submit" value= "登陆" >
</form>
//封装的User类
public class User{
private String name;
private String pass;
}
|
1
2
3
4
5
6
|
@RequestMapping ( "/login.do" )
public String login(User user)
{
syso(user.getName());
syso(user.getPass());
}
|
二、向页面传值
当Controller组件处理后,需要向响应JSP传值时,可以使用的方法:
1),使用HttpServletRequest 和 Session 然后setAttribute()
,就和Servlet中一样
Model数据会利用HttpServletRequest的Attribute传值到success.jsp中
1
2
3
4
5
6
7
|
@RequestMapping ( "/login.do" )
public ModelAndView login(String name,String pass){
User user = userService.login(name,pwd);
Map<String,Object> data = new HashMap<String,Object>();
data.put( "user" ,user);
return new ModelAndView( "success" ,data);
}
|
2),使用ModelAndView对象
3),使用ModelMap对象
使用ModelMap参数对象示例:
ModelMap数据会利用HttpServletRequest的Attribute传值到success.jsp中
1
2
3
4
5
6
7
|
@RequestMapping ( "/login.do" )
public String login(String name,String pass ,ModelMap model){
User user = userService.login(name,pwd);
model.addAttribute( "user" ,user);
model.put( "name" ,name);
return "success" ;
}
|
4),使用@ModelAttribute注解
使用@ModelAttribute示例
在Controller方法的参数部分或Bean属性方法上使用@ModelAttribute数据会利用HttpServletRequest的Attribute传值到success.jsp中
1
2
3
4
5
6
7
8
9
10
|
@RequestMapping ( "/login.do" )
public String login( @ModelAttribute ( "user" ) User user){
//TODO
return "success" ;
}
@ModelAttribute ( "name" )
public String getName(){
return name;
}
|
5)Session存储:可以利用HttpServletReequest的getSession()
方法
1
2
3
4
5
6
7
8
9
|
@RequestMapping ( "/login.do" )
public String login(String name,String pwd
ModelMap model,HttpServletRequest request){
User user = serService.login(name,pwd);
HttpSession session = request.getSession();
session.setAttribute( "user" ,user);
model.addAttribute( "user" ,user);
return "success" ;
}
|
6)自定义Map
1
2
3
4
5
6
7
8
9
10
11
|
@ResponseBody
@RequestMapping (value = "/updatestatus" , method = RequestMethod.POST)
public Map<String, Object> updateStatus(HttpServletRequest request) {
Map<String, Object> result = new HashMap<String, Object>();
String id = request.getParameter( "id" );
SystemAdministrator sysadmin=systemAdminBiz.get(Integer.valueOf(id));
sysadmin.setStatus( 1 );
boolean flag = systemAdminBiz.update(sysadmin);
result.put( "status" , flag);
return result;
}
|
1
2
3
4
5
6
7
8
9
10
11
12
13
14
|
@RequestMapping (value = "/list" , method = {RequestMethod.POST,RequestMethod.GET})
public String queryAdministrator(HttpServletRequest request,ModelMap model) {
Integer roleId = request.getParameter( "roleListById" ) == null ? 0 : Integer.parseInt(request.getParameter( "roleListById" ));
Map<String, Object> properties = new HashMap<String, Object>();
if (roleId.intValue() > 0 ) {
properties.put( "role:=" , roleId);
model.put( "roleId" , roleId);
}
List<SystemAdministrator> administrator = systemAdminBiz.find(properties);
List<SystemRole> systemRole = systemRoleBiz.getAll();
model.put( "administratorList" , administrator);
model.put( "roleList" , systemRole);
return "sys_admin_list" ;
}
|
7)Spring MVC 默认采用的是转发来定位视图,如果要使用重定向,可以如下操作
1,使用RedirectView
2,使用redirect:前缀
1
2
3
4
|
public ModelAndView login(){
RedirectView view = new RedirectView( "regirst.do" );
return new ModelAndView(view);
}
|
或者用如下方法,工作中常用的方法:
1
2
3
4
|
public String login(){
//TODO
return "redirect:regirst.do" ;
}
|
三、实例讲解:
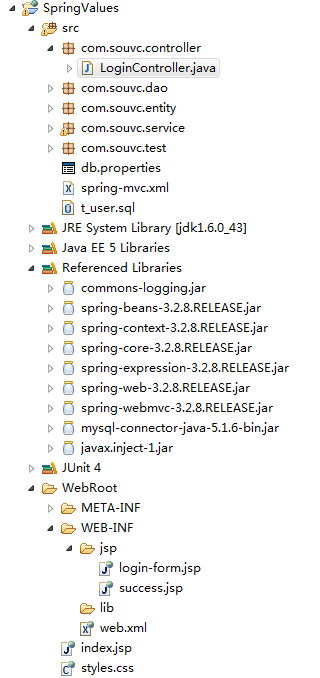
步骤一:创建新Web项目,导入Spring MVC包和业务层UserService
1. 创建Web项目导入相关的jar包:
2. 导入前述业务层UserService类以及依赖的类,等。
User类代码如下:
1
2
3
4
5
6
7
8
9
10
11
12
13
14
15
16
17
18
19
20
21
22
23
24
25
26
27
28
29
30
31
32
33
34
35
36
37
38
39
40
41
42
43
44
45
46
47
48
49
50
51
52
53
54
55
56
57
58
59
60
61
62
63
64
65
66
67
68
69
70
71
72
73
74
75
76
77
78
79
80
81
82
83
|
package com.souvc.entity;
import java.io.Serializable;
public class User implements Serializable {
private static final long serialVersionUID = -603439325380668432L;
private int id;
private String name;
private String pwd;
private String phone;
public User() {
}
public User( int id, String name, String pwd, String phone) {
this .id = id;
this .name = name;
this .pwd = pwd;
this .phone = phone;
}
public User(String name, String pwd, String phone) {
super ();
this .name = name;
this .pwd = pwd;
this .phone = phone;
}
public int getId() {
return id;
}
public void setId( int id) {
this .id = id;
}
public String getName() {
return name;
}
public void setName(String name) {
this .name = name;
}
public String getPwd() {
return pwd;
}
public void setPwd(String pwd) {
this .pwd = pwd;
}
public String getPhone() {
return phone;
}
public void setPhone(String phone) {
this .phone = phone;
}
@Override
public int hashCode() {
return id;
}
@Override
public boolean equals(Object obj) {
if ( this == obj)
return true ;
if (obj == null )
return false ;
if (obj instanceof User) {
User o = (User) obj;
return this .id == o.id;
}
return true ;
}
@Override
public String toString() {
return id + "," + name + "," + pwd + "," + phone;
}
}
|
UserDao接口代码如下:
1
2
3
4
5
6
7
8
9
10
11
12
13
14
15
|
package com.souvc.dao;
import com.souvc.entity.User;
/**
* 用户数据访问对象接口
*/
public interface UserDao {
/** 根据唯一用户名查询系统用户, 如果没有找到用户信息返回null */
public User findByName(String name);
// public User add(String name, String pwd, String phone);
// public User find(int id);
// public User delete(int id);
// public void update(User user);
}
|
UserService类代码如下:
1
2
3
4
5
6
7
8
9
10
11
12
13
14
15
16
17
18
19
20
21
22
23
24
25
26
27
28
29
30
31
32
33
34
35
36
37
38
39
40
41
|
package com.souvc.service;
import java.io.Serializable;
import javax.annotation.Resource;
import org.springframework.stereotype.Service;
import com.souvc.dao.UserDao;
import com.souvc.entity.User;
/** 业务层 注解 */
@Service
// 默认的Bean ID是 userService
public class UserService implements Serializable {
private static final long serialVersionUID = 7360372166489952236L;
private UserDao userDao;
// @Resource //自动匹配userDao对象并注入
@Resource (name = "userDao" )
public void setUserDao(UserDao userDao) {
this .userDao = userDao; //
}
public UserDao getUserDao() {
return userDao;
}
/** 登录系统功能 */
public User login(String name, String pwd) throws NameOrPwdException,
NullParamException {
if (name == null || name.equals( "" ) || pwd == null || pwd.equals( "" )) {
throw new NullParamException( "登录参数不能为空!" );
}
User user = userDao.findByName(name);
if (user != null && pwd.equals(user.getPwd())) {
return user;
}
throw new NameOrPwdException( "用户名或者密码错误" );
}
}
|
NameOrPwdException类代码如下:
1
2
3
4
5
6
7
8
9
10
11
12
13
14
15
16
17
18
19
|
package com.souvc.service;
/** 用户名或者密码错误 */
public class NameOrPwdException extends Exception {
public NameOrPwdException() {
}
public NameOrPwdException(String message) {
super (message);
}
public NameOrPwdException(Throwable cause) {
super (cause);
}
public NameOrPwdException(String message, Throwable cause) {
super (message, cause);
}
}
|
NullParamException类代码如下:
1
2
3
4
5
6
7
8
9
10
11
12
13
14
15
16
17
18
19
|
package com.souvc.service;
/** 参数为空 */
public class NullParamException extends Exception {
public NullParamException() {
}
public NullParamException(String message) {
super (message);
}
public NullParamException(Throwable cause) {
super (cause);
}
public NullParamException(String message, Throwable cause) {
super (message, cause);
}
}
|
JdbcDataSource类代码如下:
1
2
3
4
5
6
7
8
9
10
11
12
13
14
15
16
17
18
19
20
21
22
23
24
25
26
27
28
29
30
31
32
33
34
35
36
37
38
39
40
41
42
43
44
45
46
47
48
49
50
51
52
53
54
55
56
57
58
59
60
61
62
63
64
65
66
67
68
69
70
71
72
73
74
75
76
77
78
79
80
81
|
package com.souvc.dao;
import java.io.Serializable;
import java.sql.Connection;
import java.sql.DriverManager;
import java.sql.SQLException;
import org.springframework.beans.factory.annotation.Value;
import org.springframework.stereotype.Component;
/** 组件注解 */
@Component
public class JdbcDataSource implements Serializable {
private static final long serialVersionUID = -8925981939329398101L;
private String driver;
@Value ( "#{jdbcProps.url}" )
private String url;
@Value ( "#{jdbcProps.user}" )
private String user;
@Value ( "#{jdbcProps.pwd}" )
private String pwd;
public String getDriver() {
return driver;
}
/** 必须使用Bean属性输入, 否则不能进行JDBC Driver注册 */
@Value ( "#{jdbcProps.driver}" )
public void setDriver(String driver) {
try {
// 注册数据库驱动
Class.forName(driver);
this .driver = driver;
} catch (Exception e) {
throw new RuntimeException(e);
}
}
public String getUrl() {
return url;
}
public void setUrl(String url) {
this .url = url;
}
public String getUser() {
return user;
}
public void setUser(String user) {
this .user = user;
}
public String getPwd() {
return pwd;
}
public void setPwd(String pwd) {
this .pwd = pwd;
}
public Connection getConnection() throws SQLException {
Connection conn = DriverManager.getConnection(url, user, pwd);
return conn;
}
public void close(Connection conn) {
if (conn != null ) {
try {
conn.close();
} catch (SQLException e) {
e.printStackTrace();
}
}
}
}
|
MysqlUserDao类代码如下:
1
2
3
4
5
6
7
8
9
10
11
12
13
14
15
16
17
18
19
20
21
22
23
24
25
26
27
28
29
30
31
32
33
34
35
36
37
38
39
40
41
42
43
44
45
46
47
48
49
50
51
52
53
54
55
56
57
58
59
60
61
62
63
64
65
66
67
68
69
|
package com.souvc.dao;
import java.io.Serializable;
import java.sql.Connection;
import java.sql.PreparedStatement;
import java.sql.ResultSet;
import java.sql.SQLException;
import org.springframework.beans.factory.annotation.Autowired;
import org.springframework.beans.factory.annotation.Qualifier;
import org.springframework.stereotype.Repository;
import com.souvc.entity.User;
/** 持久层 注解 */
@Repository ( "userDao" )
// 指定特定的Bean ID 方便setUserDao注入
public class MysqlUserDao implements UserDao, Serializable {
private static final long serialVersionUID = 7385842613248394287L;
private JdbcDataSource dataSource;
public MysqlUserDao() {
}
/** 创建 MysqlUserDAO 对象必须依赖于JDBCDataSource实例 */
public MysqlUserDao(JdbcDataSource dataSource) {
this .dataSource = dataSource;
}
@Autowired
// 按照类型自动装配
public void setDataSource( @Qualifier ( "jdbcDataSource" )
JdbcDataSource dataSource) {
this .dataSource = dataSource;
}
public JdbcDataSource getDataSource() {
return dataSource;
}
/** 根据唯一用户名查询系统用户, 如果没有找到用户信息返回null */
public User findByName(String name) {
System.out.println( "利用JDBC技术查找User信息" );
String sql = "select id, name, pwd, phone from users where name=?" ;
Connection conn = null ;
try {
conn = dataSource.getConnection();
PreparedStatement ps = conn.prepareStatement(sql);
ps.setString( 1 , name);
ResultSet rs = ps.executeQuery();
User user = null ;
while (rs.next()) {
user = new User();
user.setId(rs.getInt( "id" ));
user.setName(rs.getString( "name" ));
user.setPwd(rs.getString( "pwd" ));
user.setPhone(rs.getString( "phone" ));
}
rs.close();
ps.close();
return user;
} catch (SQLException e) {
e.printStackTrace();
throw new RuntimeException(e);
} finally {
dataSource.close(conn);
}
}
}
|
db.properties文件内容如下:
1
2
3
4
5
|
# config for Mysql
driver=com.mysql.jdbc.Driver
url=jdbc:mysql: //localhost:3306/souvc
user=root
pwd= 123456
|
spring-mvc.xml文件代码如下:
1
2
3
4
5
6
7
8
9
10
11
12
13
14
15
16
17
18
19
20
21
22
23
24
25
26
27
28
29
|
<? xml version = "1.0" encoding = "UTF-8" ?>
< beans xmlns = "http://www.springframework.org/schema/beans"
xmlns:xsi = "http://www.w3.org/2001/XMLSchema-instance"
xmlns:context = "http://www.springframework.org/schema/context"
xmlns:jdbc = "http://www.springframework.org/schema/jdbc"
xmlns:jee = "http://www.springframework.org/schema/jee"
xmlns:tx = "http://www.springframework.org/schema/tx"
xmlns:jpa = "http://www.springframework.org/schema/data/jpa"
xmlns:util = "http://www.springframework.org/schema/util"
xmlns:mvc = "http://www.springframework.org/schema/mvc"
xsi:schemaLocation="
http://www.springframework.org/schema/beans http://www.springframework.org/schema/beans/spring-beans-3.2.xsd
http://www.springframework.org/schema/context http://www.springframework.org/schema/context/spring-context-3.2.xsd
http://www.springframework.org/schema/jdbc http://www.springframework.org/schema/jdbc/spring-jdbc-3.2.xsd
http://www.springframework.org/schema/jee http://www.springframework.org/schema/jee/spring-jee-3.2.xsd
http://www.springframework.org/schema/tx http://www.springframework.org/schema/tx/spring-tx-3.2.xsd
http://www.springframework.org/schema/data/jpa http://www.springframework.org/schema/data/jpa/spring-jpa-1.3.xsd
http://www.springframework.org/schema/util http://www.springframework.org/schema/util/spring-util-3.2.xsd
http://www.springframework.org/schema/mvc http://www.springframework.org/schema/mvc/spring-mvc-3.2.xsd">
< util:properties id = "jdbcProps" location = "classpath:db.properties" />
< context:component-scan base-package = "com.souvc" />
<!-- 视图处理 -->
< bean id = "viewResolver" class = "org.springframework.web.servlet.view.InternalResourceViewResolver" >
< property name = "prefix" value = "/WEB-INF/jsp/" ></ property >
< property name = "suffix" value = ".jsp" ></ property >
</ bean >
</ beans >
|
MySQL数据库初始化SQL代码如下:
1
2
3
4
5
6
7
8
9
10
11
12
13
|
DROP TABLE users;
CREATE TABLE USERS
(
ID DOUBLE (7, 0) ,
NAME VARCHAR (50) ,
PWD VARCHAR (50),
PHONE VARCHAR (50) ,
PRIMARY KEY (id)
);
INSERT INTO Users (id, NAME , pwd, phone) VALUES (1, 'Tom' , '123' , '110' );
INSERT INTO Users (id, NAME , pwd, phone) VALUES (2, 'Jerry' , 'abc' , '119' );
INSERT INTO Users (id, NAME , pwd, phone) VALUES (3, 'Andy' , '456' , '112' );
|
3. 为项目添加JUnit4 API,然后添加测试类TestCase和测试方法testUserService()
用于测试上述配置是否正确。TestCase类代码如下:
1
2
3
4
5
6
7
8
9
10
11
12
13
14
15
16
17
18
19
20
21
22
23
24
25
26
27
28
|
package com.souvc.test;
import java.util.Properties;
import org.junit.Test;
import org.springframework.context.ApplicationContext;
import org.springframework.context.support.ClassPathXmlApplicationContext;
import com.souvc.dao.JdbcDataSource;
import com.souvc.entity.User;
import com.souvc.service.UserService;
public class TestCase {
@Test
public void testUserService() throws Exception {
String cfg = "spring-mvc.xml" ;
ApplicationContext ac = new ClassPathXmlApplicationContext(cfg);
Properties obj = ac.getBean( "jdbcProps" , Properties. class );
JdbcDataSource ds = ac.getBean( "jdbcDataSource" , JdbcDataSource. class );
System.out.println(obj);
System.out.println(ds);
System.out.println(ds.getConnection());
UserService service = ac.getBean( "userService" , UserService. class );
User user = service.login( "Tom" , "123" );
System.out.println(user);
}
}
|
执行测试方法testUserService()
,在控制台输出的结果:
1
2
3
|
{user=root, url=jdbc:mysql://localhost:3306/souvc, driver=com.mysql.jdbc.Driver, pwd=123456}
com.souvc.dao.JdbcDataSource@1cb1a4e2
com.mysql.jdbc.JDBC4Connection@3d04fc23
|
利用JDBC技术查找User信息
1
|
1,Tom,123,110
|
这个结果说明业务层UserService工作正常。
4. 配置Spring MVC 核心控制器DispatcherServlet到web.xml。web.xml配置部分代码参考如下:
1
2
3
4
5
6
7
8
9
10
11
12
13
14
15
16
17
18
19
20
21
22
23
24
25
26
|
<? xml version = "1.0" encoding = "UTF-8" ?>
< web-app version = "2.5" xmlns = "http://java.sun.com/xml/ns/javaee"
xmlns:xsi = "http://www.w3.org/2001/XMLSchema-instance"
xsi:schemaLocation="http://java.sun.com/xml/ns/javaee
http://java.sun.com/xml/ns/javaee/web-app_2_5.xsd">
< welcome-file-list >
< welcome-file >index.jsp</ welcome-file >
</ welcome-file-list >
< servlet >
< servlet-name >springmvc</ servlet-name >
< servlet-class >
org.springframework.web.servlet.DispatcherServlet
</ servlet-class >
< init-param >
< param-name >contextConfigLocation</ param-name >
< param-value >classpath:spring-mvc.xml</ param-value >
</ init-param >
< load-on-startup >1</ load-on-startup >
</ servlet >
< servlet-mapping >
< servlet-name >springmvc</ servlet-name >
< url-pattern >*.form</ url-pattern >
</ servlet-mapping >
</ web-app >
|
5. 部署项目到Tomcat并且启动,测试Spring MVC配置是否正常。
在输出结果中出现内容, 并且没有异常就会说明Spring MVC部署正常。
步骤二:实现login-action1.form登录流程,测试利用HttpServletRequrst传值方法
1. 在WEB-INF/jsp文件夹下添加login-form.jsp文件,代码如下所示:
1
2
3
4
5
6
7
8
9
10
11
12
13
14
15
16
17
18
19
20
21
22
23
24
25
26
27
28
29
30
31
32
33
34
35
36
37
38
39
40
41
42
43
44
45
46
47
48
49
50
51
52
53
54
55
56
57
58
59
60
61
62
63
64
65
66
67
|
<%@ page pageEncoding="utf-8" contentType="text/html; charset=utf-8"%>
<!DOCTYPE HTML>
<%@taglib prefix="c" uri="http://java.sun.com/jsp/jstl/core" %>
< c:url var = "base" value = "/" ></ c:url >
< html >
< head >
< title >Login Form</ title >
< link rel = "stylesheet" type = "text/css" href = "${base}styles.css" rel = "external nofollow" rel = "external nofollow" >
</ head >
< body >
< h6 >${message}</ h6 >
< form method = "post" action = "${base}login/login-action1.form" >
< div >
< h2 >登录 login-action1.form</ h2 >
< p >< label >用户</ label >< input type = "text" name = "name" ></ p >
< p >< label >密码</ label >< input type = "password" name = "pwd" ></ p >
< h3 >< input type = "submit" value = "登录" ></ h3 >
</ div >
</ form >
< form method = "post" action = "${base}login/login-action2.form" >
< div >
< h2 >登录 login-action2.form</ h2 >
< p >< label >用户</ label >< input type = "text" name = "name" ></ p >
< p >< label >密码</ label >< input type = "password" name = "pwd" ></ p >
< h3 >< input type = "submit" value = "登录" ></ h3 >
</ div >
</ form >
< form method = "post" action = "${base}login/login-action3.form" >
< div >
< h2 >登录 login-action3.form</ h2 >
< p >< label >用户</ label >< input type = "text" name = "name" ></ p >
< p >< label >密码</ label >< input type = "password" name = "pwd" ></ p >
< h3 >< input type = "submit" value = "登录" ></ h3 >
</ div >
</ form >
< form method = "post" action = "${base}login/login-action4.form" >
< div >
< h2 >登录 login-action4.form</ h2 >
< p >< label >用户</ label >< input type = "text" name = "name" ></ p >
< p >< label >密码</ label >< input type = "password" name = "pwd" ></ p >
< h3 >< input type = "submit" value = "登录" ></ h3 >
</ div >
</ form >
< form method = "post" action = "${base}login/login-action5.form" >
< div >
< h2 >登录 login-action5.form</ h2 >
< p >< label >用户</ label >< input type = "text" name = "name" ></ p >
< p >< label >密码</ label >< input type = "password" name = "pwd" ></ p >
< h3 >< input type = "submit" value = "登录" ></ h3 >
</ div >
</ form >
< form method = "post" action = "${base}login/login-action6.form" >
< div >
< h2 >登录 login-action6.form</ h2 >
< p >< label >用户</ label >< input type = "text" name = "name" ></ p >
< p >< label >密码</ label >< input type = "password" name = "pwd" ></ p >
< h3 >< input type = "submit" value = "登录" ></ h3 >
</ div >
</ form >
</ body >
</ html >
|
方法一解释:
利用HttpServletRequest对象进行浏览器页面到控制器传值。
方法二解释:
使用@RequestParam注解声明表单密码输入框pwd的值注入到password变量,表单中用户名输入框根据名字映自动射注入name变量。 @RequestMapping注解将login-action2.form映射到了checkLogin2()
方法。这样就与login- form.jsp表单对应。
方法三解释:
这里采用user作为参数, Spring会自动的将页面表单参数name,pwd注入到user对象的相应属性name,pwd传递到方法中。@RequestMapping将请求login-action3.form映射到方法checkLogin3()
。
方法四解释:
在处理方法完成后返回一个ModelAndView对象。
方法五解释:
ModelMap属性值与页面login-form.jsp之间的数据对应。
方法六解释:
@ModelAttribute声明的属性与login-form.jsp页面的值关系。
用户名或者密码错误时候出现的时候,能够记住用户名。
在前述案例中,用户登录成功以后, 可以利用HttpServletRequest对象的getSession()
方法访问Session对象, 这样就可以保持用户登录状态了。
2. 为页面添加样式文件styles.css,样式文件保存在WebRoot文件夹下,styles.css文件代码如下所示:
1
2
3
4
5
6
7
8
9
10
11
12
13
14
15
16
17
18
19
20
21
22
23
24
25
26
27
28
29
30
31
32
33
34
35
36
37
38
39
40
41
42
43
44
45
46
|
* {
margin : 0 ;
padding : 0 ;
}
h 6 {
text-align : center ;
color : red ;
padding : 10px ;
font-size : 14px ;
}
form {
padding : 10px ;
float : left ;
}
form div {
border : 1px gray solid ;
width : 320px ;
padding : 8px ;
}
form p input {
width : 180px
}
form h 2 input {
text-align : center ;
}
form h 2 {
background : black ;
color : white ;
padding : 4px ;
}
form p {
background : #ddd ;
padding : 4px 8px 0 8px ;
}
form h 3 {
background : #ddd ;
padding : 8px ;
}
|
3. 在WEB-INF/jsp文件夹下添加success.jsp文件,这个文件是登录成功以后显示的界面,代码如下所示:
1
2
3
4
5
6
7
8
9
10
11
12
13
14
15
|
<%@ page pageEncoding="utf-8" contentType="text/html; charset=utf-8"%>
<!DOCTYPE HTML>
<%@taglib prefix="c" uri="http://java.sun.com/jsp/jstl/core"%>
< c:url var = "base" value = "/" ></ c:url >
< html >
< head >
< title >Success</ title >
< link rel = "stylesheet" type = "text/css" href = "${base}styles.css" rel = "external nofollow" rel = "external nofollow" >
</ head >
< body >
< h6 >
${user.name}登录成功!
</ h6 >
</ body >
</ html >
|
上述页面中,使用EL表达式和标准标签库配合显示界面数据, 其中<c:url var="base" value="/"></c:url>
和${base}
用于解决绝对路径问题。
4. 创建控制器类LoginController,在该类中使用注解@Controller的方式进行配置:
1)使用@Controller将LoginController声明为控制器Bean组件。
2)使用@RequestMapping("/login")
声明对LoginController组件的请求在/login 路径下。
3)流程控制方法loginForm(),用于显示登录表单页面。使用@RequestMapping注解将映射请求/login-form.form到loginForm()方法。
4)增加userService属性,并且使用@Resource注解声明在运行期间注入userService对象。
5)增加控制流程方法checkLogin1()
,使用@RequestMapping注解将请求/login-action1.form映 射到checkLogin1()方法。checkLogin1()
方法调用userService的login方法,实现登录流程。 checkLogin1()
方法主要是测试JSP页面到控制器的数据传输方式。
LoginController类代码如下所示:
1
2
3
4
5
6
7
8
9
10
11
12
13
14
15
16
17
18
19
20
21
22
23
24
25
26
27
28
29
30
31
32
33
34
35
36
37
38
39
40
41
42
43
44
45
46
47
48
49
50
51
52
53
54
55
56
57
58
59
60
61
62
63
64
|