前面已经介绍了如何上手Spirng编码以及IOC的核心概念,今天给大家讲解Spring的另一个重点——DI。
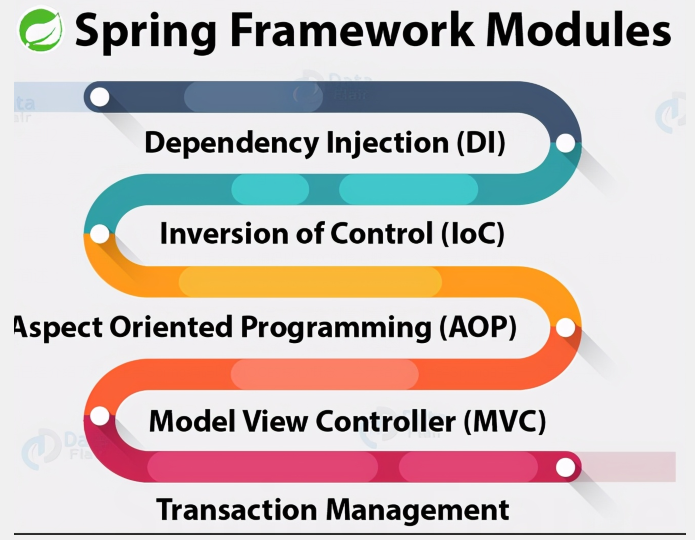
Spring核心模块
DI概念
IoC 其实有两种方式,一种就是 DI(Dependency Injection) ,而另一种是 DL(Dependency Lookup)即依赖查找。前者是当前组件被动接受IoC容器注入的依赖组件,而后者则是组件主动去某个服务注册地查找其依赖的组件,我们这里重点介绍DI。
IoC的一个重点是在系统运行中,动态的向某个对象提供它所需要的其他对象。这一点是通过DI来实现的。比如对象A需要操作数据库,以前我们总是要在A中自己编写代码来获得一个Connection对象,有了spring我们就只需要告诉spring,A中需要一个Connection,至于这个Connection怎么构造,何时构造,A不需要知道。通过依赖注入机制,我们只需要通过简单的配置,而无需任何代码就可指定目标需要的资源,完成自身的业务逻辑,而不需要关心具体的资源来自何处,由谁实现。在系统运行时,spring会在适当的时候制造一个Connection,然后像打针一样,注射到A当中,这样就完成了对各个对象之间关系的控制。A需要依赖Connection才能正常运行,而这个Connection是由spring注入到A中的,依赖注入的名字就这么来的。Spring是通过反射技术实现注入的,它允许程序在运行的时候动态的生成对象、执行对象的方法、改变对象的属性。
简单的总结一下依赖注入:
- 依赖 : 指Bean对象的创建依赖于容器 。
- 注入 : 指Bean对象所依赖的资源 , 由容器来设置和装配。
注入的方式主要包括Setter注入(重点)、构造器注入和参数直接注入。还有拓展方式注入,即:p命名空间注入和c命名空间注入,这里就不再展开介绍了,有兴趣的同学可以自行研究。
Setter注入
IoC 容器使用 setter 方法注入被依赖的实例。通过调用无参构造器或无参 static 工厂方法实例化 bean 后,调用该 bean的setter 方法(类中必须有属性的set方法),即可实现基于setter的DI
代码如下:
- publicclassAddress{
- privateStringaddress;
- publicStringgetAddress(){
- returnaddress;
- }
- publicvoidsetAddress(Stringaddress){
- this.address=address;
- }
- }
- importjava.util.List;
- importjava.util.Map;
- importjava.util.Properties;
- importjava.util.Set;
- publicclassStudent{
- privateStringname;
- privateAddressaddress;
- privateString[]books;
- privateList<String>hobbys;
- privateMap<String,String>card;
- privateSet<String>games;
- privateStringwife;
- privatePropertiesinfo;
- publicvoidsetName(Stringname){
- this.name=name;
- }
- publicStringgetName(){
- returnthis.name;
- }
- publicvoidsetAddress(Addressaddress){
- this.address=address;
- }
- publicvoidsetBooks(String[]books){
- this.books=books;
- }
- publicvoidsetHobbys(List<String>hobbys){
- this.hobbys=hobbys;
- }
- publicvoidsetCard(Map<String,String>card){
- this.card=card;
- }
- publicvoidsetGames(Set<String>games){
- this.games=games;
- }
- publicvoidsetWife(Stringwife){
- this.wife=wife;
- }
- publicvoidsetInfo(Propertiesinfo){
- this.info=info;
- }
- publicvoidshow(){
- System.out.println("name="+name
- +",address="+address.getAddress()
- +",books="
- );
- for(Stringbook:books){
- System.out.print("<<"+book+">>\\t");
- }
- System.out.println("\\nhobbys:"+hobbys);
- System.out.println("card:"+card);
- System.out.println("games:"+games);
- System.out.println("wife:"+wife);
- System.out.println("info:"+info);
- }
- }
配置文件
- <beanid="student"class="com.my.demo.Student">
- <propertyname="name"value="小明"/>
- </bean>
配置文件中把name 赋值为小明,即完成了对代码 private String name的注入。
测试类
- publicstaticvoidmain(String[]args){
- ApplicationContextcontext=newClassPathXmlApplicationContext("bean1.xml");
- Studentstudent=(Student)context.getBean("student");
- System.out.println(student.getName());
- }
运行结果,输出:小明
常见注入方式的xml 配置如下:
bean注入
使用ref进行引入其他bean
- <beanid="student"class="com.my.demo.Student">
- <propertyname="name"value="小明"/>
- <propertyname="address"ref="addr"/>
- </bean>
数组注入
- <propertyname="books">
- <array>
- <value>数学</value>
- <value>语文</value>
- <value>英语</value>
- </array>
- </property>
List注入
- <propertyname="hobbys">
- <list>
- <value>听歌</value>
- <value>看电影</value>
- <value>打游戏</value>
- </list>
- </property>
Map注入
- <propertyname="card">
- <map>
- <entrykey="招行"value="123456789"/>
- <entrykey="工行"value="987654321"/>
- </map>
- </property>
set注入
- <propertyname="games">
- <set>
- <value>CS</value>
- <value>斗地主</value>
- <value>消消乐</value>
- </set>
- </property>
Null注入
- <propertyname="wife"><null/></property>
Properties注入
- <propertyname="info">
- <props>
- <propkey="学号">123456</prop>
- <propkey="性别">男</prop>
- <propkey="姓名">小明</prop>
- </props>
- </property>
测试方法
- publicstaticvoidmain(String[]args){
- ApplicationContextcontext=newClassPathXmlApplicationContext("bean1.xml");
- Studentstudent=(Student)context.getBean("student");
- student.show();
- }
运行结果,输出:
name=小明,address=北京,books=
<<数学>> <<语文>> <<英语>>
hobbys:[听歌, 看电影, 打游戏]
card:{招行=123456789, 工行=987654321}
games:[CS, 斗地主, 消消乐]
wife:null
info:{学号=123456, 性别=男, 姓名=小明}
构造器注入
指IoC 容器使用构造方法注入被依赖的实例。基于构造器的 DI 通过调用带参数的构造方法实现,每个参数代表一个依赖。
代码如下:
- publicclassStudent2{
- privateStringname;
- publicStudent2(Stringname){
- this.name=name;
- }
- publicvoidsetName(Stringname){
- this.name=name;
- }
- publicvoidshow(){
- System.out.println("name="+name);
- }
- }
配置文件中设置
- <!–第一种根据index参数下标设置–>
- <beanid="student1"class="com.my.demo.Student2">
- <!–index是构造方法,下标从0开始–>
- <constructor-argindex="0"value="kevin1"/>
- </bean>
- <!–第二种根据参数名字设置–>
- <beanid="student2"class="com.my.demo.Student2">
- <!–name指参数名–>
- <constructor-argname="name"value="kevin2"/>
- </bean>
- <!–第三种根据参数类型设置(不推荐使用)–>
- <beanid="student3"class="com.my.demo.Student2">
- <constructor-argtype="java.lang.String"value="kevin3"/>
- </bean>
测试代码
- publicstaticvoidmain(String[]args){
- ApplicationContextcontext=newClassPathXmlApplicationContext("bean3.xml");
- Student2user=(Student2)context.getBean("student1")
- user.show();
- }
运行结果:
name=kevin1
参数直接注入
主要通过注解@Autowired、@Qualifier和@Resource来实现
@Autowired
@Autowired是按类型自动转配的,不支持id匹配。
需要导入 spring-aop的包
配置文件中设置<
context:annotation-config/>
代码:
- publicclassAnimal{
- @AutowiredprivateCatcat;//运行时spring通过DI会把Cat类实例化
- @AutowiredprivateDogdog;//运行时spring通过DI会把Dog类实例化
- publicvoidprintCatshot(){
- cat.shout();
- }
- publicvoidprintDogshot(){
- dog.shout();
- }
- }
@Qualifier
@Autowired是根据类型进行自动装配的。如果当Spring上下文中存在一个类型的不同bean时,就会抛出BeanCreationException异常;我们可以使用@Qualifier配合@Autowired来解决这些问题。
代码:
- @Autowired
- @Qualifier(value="dog1")
- privateDogdog1;
- beans.xml
- <beanid="dog1"class="com.my.demo.Dog"/>
- <beanid="dog2"class="com.my.demo.Dog"/>
@Resource
@Resource是J2EE提供的, 需导入Package: javax.annotation.Resource;
@Resource如有指定的name属性,先按该属性进行byName方式查找装配,其次再进行默认的byName方式进行装配,都不成功,则报异常。
代码
- @Resource(name="dog2")
- privateDogdog;
- beans.xml
- <beanid="dog1"class="com.my.demo.Dog"/>
- <beanid="dog2"class="com.my.demo.Dog"/>
最简单的解释
IoC通过DI技术主要实现了以下两点:
- 在系统运行中,动态地向某个对象提供它所需要的其他对象;
- 在系统运行中,动态地从配置文件中读取数据来为对象的属性进行赋值。
原文地址:https://www.toutiao.com/i6942279290830586399/