前言
本篇教程偏向实战,程序猿直接copy代码加入到自己的项目中做简单的修修改改便可使用,而对于springboot以及mybatis不在此进行展开介绍,如有读者希望了解可以给我留言,并持续关注,我后续会慢慢更新。(黑色区域代码部分,安卓手机可手动向左滑动,来查看全部代码)
整合
其实整合很简单,如果是用gradle的话,在build.gradle文件里加入
|
1
|
compile('org.mybatis.spring.boot:mybatis-spring-boot-starter:1.3.1')
|
如果是用maven的话在pom.xml文件里加入

单库配置:
引入之后,默认情况下,spring boot会自动为我们配置好一个datasource,它会在classpath中搜索h2、hsqldb等内存数据库的jar包,如果找到了,就会自动配置一个内存数据库的datasource。
如果在application.yml或application.property中指定了spring.datasource.*的相关配置参数,spring boot就会使用该配置创建一个datasource。
然后会自动创建使用该datasource的sqlsessionfactorybean以及sqlsessiontemplate。会自动扫描你的mappers,连接到sqlsessiontemplate,并注册到spring上下文中。
|
1
2
3
4
|
spring.datasource.url=jdbc:mysql://localhost/test
spring.datasource.username=dbuser
spring.datasource.password=dbpass
spring.datasource.driver-class-name=com.mysql.jdbc.driver
|
更多参数请查看datasourceproperties
多库配置:
由于业务需要,项目要同时使用多个数据库进行业务开发:
首先,我们必须在application.property中自定义两个数据源的配置,一个使用first.datasource.*,另一个使用second.datasource.*,为了能使别人一眼看出连接的是什么库,可以使用数据库命名,比如user库,则可以使用user.datasource.*,在使用多数据源的时候,所有必要配置都不能省略。
|
1
2
3
4
5
6
7
8
9
10
|
first.datasource.url=jdbc:mysql://localhost/first
first.datasource.username=dbuser1
first.datasource.password=dbpass1
first.datasource.driver-class-name=com.mysql.jdbc.driver
first.datasource.type=com.alibaba.druid.pool.druiddatasource//我用的是druid,也可以不加用默认的
second.datasource.url=jdbc:mysql://localhost/second
second.datasource.username=dbuser2
second.datasource.password=dbpass2
second.datasource.driver-class-name=com.mysql.jdbc.driver
second.datasource.type=com.alibaba.druid.pool.druiddatasource
|
直接上代码,我的做法是将两个数据源用两个配置类创建:
|
1
2
3
4
5
6
7
8
9
10
11
12
13
14
15
16
17
18
19
20
21
22
23
24
25
26
27
28
29
30
31
32
33
34
35
36
37
38
39
40
41
42
43
44
45
46
47
48
49
50
51
52
53
54
55
56
57
|
@configuration
@mapperscan(basepackages = {"com.user.server.dao"}, sqlsessiontemplateref = "usersqlsessiontemplate")
public class usermybatisconfig {
@bean(name = "userdatasource")
@primary //必须加此注解,不然报错,下一个类则不需要添加
@configurationproperties(prefix = "first.datasource") // prefix值必须是application.properteis中对应属性的前缀
public datasource userdatasource() {
return datasourcebuilder.create().build();
}
@bean
public sqlsessionfactory usersqlsessionfactory(@qualifier("userdatasource") datasource datasource) throws exception {
sqlsessionfactorybean bean = new sqlsessionfactorybean();
bean.setdatasource(datasource);
//添加xml目录
resourcepatternresolver resolver = new pathmatchingresourcepatternresolver();
try {
bean.setmapperlocations(resolver.getresources("classpath*:com/user/server/dao/mapping/*.xml"));
return bean.getobject();
} catch (exception e) {
e.printstacktrace();
throw new runtimeexception(e);
}
}
@bean
public sqlsessiontemplate usersqlsessiontemplate(@qualifier("usersqlsessionfactory") sqlsessionfactory sqlsessionfactory) throws exception {
sqlsessiontemplate template = new sqlsessiontemplate(sqlsessionfactory); // 使用上面配置的factory
return template;
}
}
@configuration
@mapperscan(basepackages = {"com.airmi.server.dao"}, sqlsessiontemplateref = "autotestsqlsessiontemplate")
public class autotestmybatisconfig {
@bean
@configurationproperties(prefix = "autotest.datasource")
public datasource autotestdatasource() {
return datasourcebuilder.create().build();
}
@bean
public sqlsessiontemplate autotestsqlsessiontemplate(@qualifier("autotestsqlsessionfactory") sqlsessionfactory sqlsessionfactory) throws exception {
sqlsessiontemplate template = new sqlsessiontemplate(sqlsessionfactory);
return template;
}
@bean
public sqlsessionfactory autotestsqlsessionfactory(@qualifier("autotestdatasource") datasource datasource) throws exception {
sqlsessionfactorybean bean = new sqlsessionfactorybean();
bean.setdatasource(datasource);
//添加xml目录
resourcepatternresolver resolver = new pathmatchingresourcepatternresolver();
try {
bean.setmapperlocations(resolver.getresources("classpath*:com/airmi/server/dao/mapping/*.xml"));
return bean.getobject();
} catch (exception e) {
e.printstacktrace();
throw new runtimeexception(e);
}
}
}
|
@primary //该注解表示在同一个接口有多个实现类可以注入的时候,默认选择哪一个,而不是让autowire注解报错,官网要求当多个数据源时,必须指定一个datasource,另一个datasource则不用添加。
@qualifier 根据名称进行注入,通常是在具有相同的多个类型的实例的一个注入(例如有多个datasource类型的实例)。
|
1
|
@mapperscan (basepackages = {"com.user.server.dao"}, sqlsessiontemplateref = "usersqlsessiontemplate") basepackages为mapper所在的包,sqlsessiontemplateref要引用的实例。
|
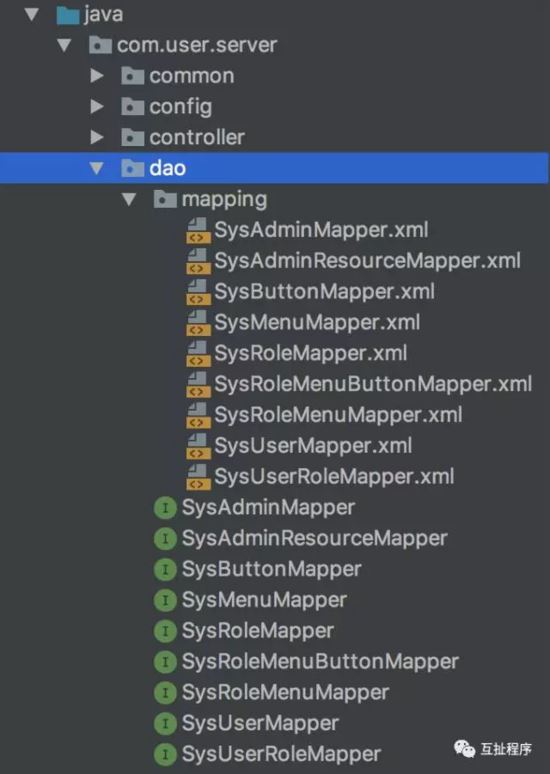
user代码结构如下:
总结
以上所述是小编给大家介绍的spring boot 整合mybatis 使用多数据源的实现方法,希望对大家有所帮助,如果大家有任何疑问请给我留言,小编会及时回复大家的。在此也非常感谢大家对快网idc网站的支持!
原文链接:https://www.jianshu.com/p/0fb2bad454e4

相关文章


- 64M VPS建站:能否支持高流量网站运行? 2025-06-10
- 64M VPS建站:怎样选择合适的域名和SSL证书? 2025-06-10
- 64M VPS建站:怎样优化以提高网站加载速度? 2025-06-10
- 64M VPS建站:是否适合初学者操作和管理? 2025-06-10
- ASP.NET自助建站系统中的用户注册和登录功能定制方法 2025-06-10