kaptcha简介:
kaptcha是一个很有用的验证码生成工具,由于它有许多可配置项,所以用它可以简单快捷的生成各式各样的验证码。
开发工具及使用的核心技术:
1、eclipse
2、mybatis
3、spring
4、springmvc
5、kaptcha
本文将介绍kaptcha两种使用方式:
方式二:在 web.xml 中配置
正式开始:
一、搭骨架
1、添加依赖:
|
1
2
3
4
5
6
|
<!-- 验证码 -->
<dependency>
<groupid>com.github.penggle</groupid>
<artifactid>kaptcha</artifactid>
<version>2.3.2</version>
</dependency>
|
要使用kaptcha验证码,除了spring和mybatis那些依赖,只需引入这一个即可。
2、完善配置文件
①spring-dao.xml
|
1
2
3
4
5
6
7
8
9
10
11
12
13
14
15
16
17
18
19
20
21
22
23
24
25
26
27
28
29
30
31
32
33
34
35
36
37
38
39
40
41
|
<!-- 配置整合mybatis过程 -->
<!-- 1、配置数据库相关参数properties的属性:${url} -->
<context:property-placeholder location="classpath:jdbc.properties" />
<!-- 2、配置数据库连接池 -->
<bean id="datasource" class="com.mchange.v2.c3p0.combopooleddatasource">
<!-- 配置连接池属性 -->
<property name="driverclass" value="${jdbc.driver}"/>
<property name="jdbcurl" value="${jdbc.url}"/>
<property name="user" value="${jdbc.username}"/>
<property name="password" value="${jdbc.password}"/>
<!-- c3p0连接池的私有属性 -->
<property name="maxpoolsize" value="30"/>
<property name="minpoolsize" value="10"/>
<!-- 关闭连接不自动commit -->
<property name="autocommitonclose" value="false"/>
<!-- 获取连接超时时间 -->
<property name="checkouttimeout" value="10000"/>
<!-- 当获取连接失败时重试次数 -->
<property name="acquireretryattempts" value="2"/>
</bean>
<!-- 3、配置mybatis的sqlsessionfactory -->
<bean id="sqlsessionfactory" class="org.mybatis.spring.sqlsessionfactorybean">
<property name="datasource" ref="datasource" />
<!-- 自动扫描mappers.xml文件 -->
<property name="mapperlocations" value="classpath:mappers/*.xml"/>
<!-- mybatis配置文件 -->
<property name="configlocation" value="classpath:mybatis-config.xml"/>
<!-- 扫描entity包,使用别名 -->
<property name="typealiasespackage" value="com.zhu.kaptcha.entity"></property>
</bean>
<!-- 4、dao接口所在包名,spring会自动查找其下的类 -->
<bean class="org.mybatis.spring.mapper.mapperscannerconfigurer">
<property name="basepackage" value="com.zhu.kaptcha.dao" />
<property name="sqlsessionfactorybeanname" value="sqlsessionfactory"></property>
</bean>
|
②spring-service.xml
|
1
2
3
4
5
6
7
8
9
10
11
|
<!-- 扫描service包下所有使用注解的类型 -->
<context:component-scan base-package="com.zhu.kaptcha.service"/>
<!-- 事务管理 -->
<bean id="transactionmanager"
class="org.springframework.jdbc.datasource.datasourcetransactionmanager">
<property name="datasource" ref="datasource" />
</bean>
<!-- 配置基于注解的声明式事物 -->
<tx:annotation-driven transaction-manager="transactionmanager"/>
|
③spring-web.xml
|
1
2
3
4
5
6
7
8
9
10
11
12
13
|
<!-- 配置springmvc -->
<!-- 1、开启springmvc注解模式 -->
<mvc:annotation-driven />
<!--2、定义视图解析器 -->
<bean id="viewresolver" class="org.springframework.web.servlet.view.internalresourceviewresolver">
<property name="prefix" value="/"/>
<property name="suffix" value=".jsp"/>
</bean>
<!-- 3、扫描web相关的bean -->
<context:component-scan base-package="com.zhu.kaptcha.controller"/>
|
④web.xml
|
1
2
3
4
5
6
7
8
9
10
11
12
13
14
15
16
17
18
19
20
21
22
23
24
25
26
27
|
<servlet>
<servlet-name>spring-dispatcher</servlet-name>
<servlet-class>org.springframework.web.servlet.dispatcherservlet</servlet-class>
<init-param>
<param-name>contextconfiglocation</param-name>
<param-value>classpath:spring/spring-*.xml</param-value>
</init-param>
</servlet>
<servlet-mapping>
<servlet-name>spring-dispatcher</servlet-name>
<url-pattern>/</url-pattern>
</servlet-mapping>
<!-- 编码过滤器 -->
<filter>
<filter-name>encodingfilter</filter-name>
<filter-class>org.springframework.web.filter.characterencodingfilter</filter-class>
<async-supported>true</async-supported>
<init-param>
<param-name>encoding</param-name>
<param-value>utf-8</param-value>
</init-param>
</filter>
<filter-mapping>
<filter-name>encodingfilter</filter-name>
<url-pattern>/*</url-pattern>
</filter-mapping>
|
至此,骨架就搭起来了,接下来完成对数据库的操作。
二、对数据库的操作
1、entity层
user.java
|
1
2
3
4
5
|
public class user {
private int uid;
private string username;
private string password;
}
|
2、dao层
userdao.java
|
1
2
3
4
|
public interface userdao {
user finduserbyusername(string username);
}
|
userdao.xml
|
1
2
3
4
5
6
7
8
9
10
11
12
13
14
|
<?xml version="1.0" encoding="utf-8"?>
<!doctype mapper
public "-//mybatis.org//dtd mapper 3.0//en"
"http://mybatis.org/dtd/mybatis-3-mapper.dtd">
<mapper namespace="com.zhu.kaptcha.dao.userdao">
<select id="finduserbyusername" resulttype="com.zhu.kaptcha.entity.user">
select *
from tb_user
where
user_name=#{username}
</select>
</mapper>
|
3、service层
userserviceimpl.java
|
1
2
3
4
5
6
7
8
9
10
11
12
13
14
15
16
|
@service
public class userserviceimpl implements userservice {
@autowired
private userdao userdao;
@override
public boolean login(string username, string password) {
user user = userdao.finduserbyusername(username);
if (password.equals(user.getpassword())) {
return true;
} else {
return false;
}
}
}
|
注:写到dao层和service层应该做一下junit测试,测试比较简单,这里就不做说明了。
三、整合kaptcha
1、在resources的spring文件夹下新建 spring-kaptcha.xml 配置文件,内容如下:
|
1
2
3
4
5
6
7
8
9
10
11
12
13
14
15
16
17
18
19
|
<bean id="captchaproducer" class="com.google.code.kaptcha.impl.defaultkaptcha">
<property name="config">
<bean class="com.google.code.kaptcha.util.config">
<constructor-arg>
<props>
<prop key="kaptcha.border">yes</prop>
<prop key="kaptcha.border.color">105,179,90</prop>
<prop key="kaptcha.textproducer.font.color">blue</prop>
<prop key="kaptcha.image.width">125</prop>
<prop key="kaptcha.image.height">45</prop>
<prop key="kaptcha.textproducer.font.size">45</prop>
<prop key="kaptcha.session.key">code</prop>
<prop key="kaptcha.textproducer.char.length">4</prop>
<prop key="kaptcha.textproducer.font.names">宋体,楷体,微软雅黑</prop>
</props>
</constructor-arg>
</bean>
</property>
</bean>
|
注:这个bean就是配置了一些验证码的属性,也可以直接写在spring-web.xml中,根据个人习惯,我喜欢把不同模块的配置写在不同的文件中。
2、新建一个controller用于生成验证码
codecontroller.java
|
1
2
3
4
5
6
7
8
9
10
11
12
13
14
15
16
17
18
19
20
21
22
23
24
25
26
27
|
@controller
public class codecontroller {
@autowired
private producer captchaproducer = null;
@requestmapping("/kaptcha")
public void getkaptchaimage(httpservletrequest request, httpservletresponse response) throws exception {
httpsession session = request.getsession();
response.setdateheader("expires", 0);
response.setheader("cache-control", "no-store, no-cache, must-revalidate");
response.addheader("cache-control", "post-check=0, pre-check=0");
response.setheader("pragma", "no-cache");
response.setcontenttype("image/jpeg");
//生成验证码
string captext = captchaproducer.createtext();
session.setattribute(constants.kaptcha_session_key, captext);
//向客户端写出
bufferedimage bi = captchaproducer.createimage(captext);
servletoutputstream out = response.getoutputstream();
imageio.write(bi, "jpg", out);
try {
out.flush();
} finally {
out.close();
}
}
}
|
注意:这个controller的路由为“kaptcha”,那么等下前端验证码的src就为kaptcha.jpg 。
3、新建一个工具类用于比对验证码
codeutil.java
|
1
2
3
4
5
6
7
8
9
10
11
12
13
14
15
16
17
18
19
20
21
22
23
24
25
26
27
28
29
30
31
32
33
34
35
36
37
|
public class codeutil {
/**
* 将获取到的前端参数转为string类型
* @param request
* @param key
* @return
*/
public static string getstring(httpservletrequest request,string key) {
try {
string result = request.getparameter(key);
if(result != null) {
result = result.trim();
}
if("".equals(result)) {
result = null;
}
return result;
}catch(exception e) {
return null;
}
}
/**
* 验证码校验
* @param request
* @return
*/
public static boolean checkverifycode(httpservletrequest request) {
//获取生成的验证码
string verifycodeexpected = (string) request.getsession().getattribute(com.google.code.kaptcha.constants.kaptcha_session_key);
//获取用户输入的验证码
string verifycodeactual = codeutil.getstring(request, "verifycodeactual");
if(verifycodeactual == null ||!verifycodeactual.equals(verifycodeexpected)) {
return false;
}
return true;
}
}
|
注意:这里get传的参数名为“verifycodeactual”,那么等下在页面中验证码的name值也得为这个。
接下来就可以使用验证码了!
4、用户登录的controller
usercontroller.java
|
1
2
3
4
5
6
7
8
9
10
11
12
13
14
15
16
17
18
19
20
21
22
23
24
25
|
@controller
@requestmapping("/user")
public class usercontroller {
@autowired
private userservice userservice;
@requestmapping("/login")
public string login(@requestparam("username") string username, @requestparam("password") string password,
httpservletrequest request) {
boolean result = userservice.login(username, password);
if (!codeutil.checkverifycode(request)) {
request.setattribute("codeerr", "验证码有误!");
return "fail";
} else {
if (result) {
request.setattribute("user", username);
return "success";
} else {
request.setattribute("errmsg", "用户名或密码错误!");
return "fail";
}
}
}
}
|
注:这里调用codeutil工具类比对输入的验证码是否正确。
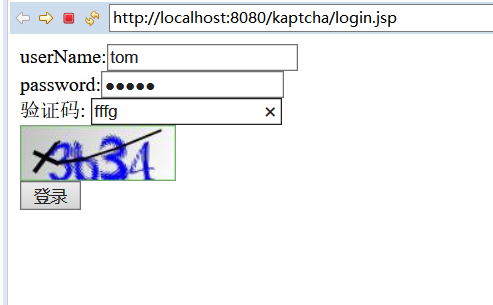
5、前端页面
login.jsp
|
1
2
3
4
5
6
7
8
9
10
11
12
13
14
15
16
17
18
19
20
21
22
23
24
25
26
27
28
29
30
|
<%@ page language="java" import="java.util.*"
contenttype="text/html; charset=utf-8" pageencoding="utf-8"%>
<!doctype html public "-//w3c//dtd html 4.01 transitional//en" "http://www.w3.org/tr/html4/loose.dtd">
<html>
<head>
<title>登录</title>
<script type="text/javascript">
function refresh() {
document.getelementbyid('captcha_img').src="kaptcha.jpg?"+math.random();
}
</script>
</head>
<body>
<form action="${pagecontext.request.contextpath }/user/login" method="post">
username:<input type="text" name="username" /><br />
password:<input type="password" name="password" /><br />
验证码: <input type="text" placeholder="请输入验证码" name="verifycodeactual">
<div class="item-input">
<img id="captcha_img" alt="点击更换" title="点击更换"
onclick="refresh()" src="kaptcha.jpg" />
</div>
<input type="submit" value="登录" />
</form>
</body>
</html>
|
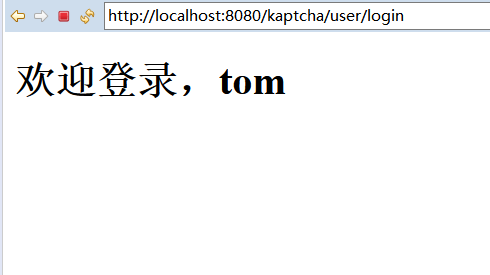
success.jsp
|
1
2
3
|
<body>
<h1>欢迎登录,${user}</h1>
</body>
|
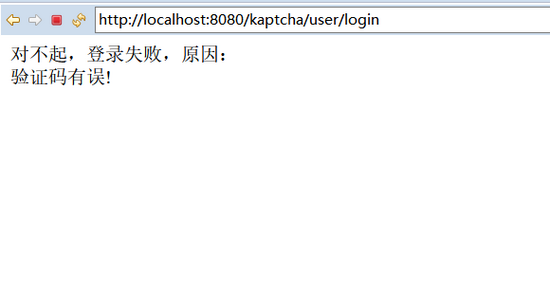
fail.jsp
|
1
2
3
4
5
|
<body>
对不起,登录失败,原因:<br>
${codeerr}
<h2>${errmsg}</h2>
</body>
|
注:login.jsp的js代码是完成“点击更换”功能;注意验证码的name要和传入工具类中的名字一样,src就是生成验证码的controller路由加上.jpg。
6、测试:
输入正确的验证码:

登录成功:
输入错误的验证码:
页面显示验证码有误:
点击验证码可以更换!
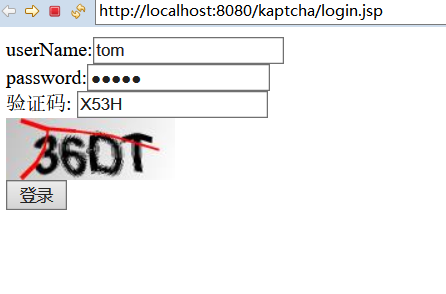
方式二、在web.xml中配置验证码
相比于方式一,一增二减。
减:
1、在上面那个项目的基础上,把 codecontroller.java删掉 。
2、把 spring-kaptcha.xml删掉 ,其他的保留。
增:
1、在 web.xml 中 添加 如下配置:
|
1
2
3
4
5
6
7
8
9
10
11
12
13
14
15
16
17
18
19
20
21
22
23
24
25
26
27
28
29
30
31
32
33
34
35
36
37
38
39
40
41
42
43
44
45
46
47
48
49
50
51
52
53
54
|
<!-- 验证码 -->
<servlet>
<servlet-name>kaptcha</servlet-name>
<servlet-class>com.google.code.kaptcha.servlet.kaptchaservlet</servlet-class>
<!-- 是否有边框 -->
<init-param>
<param-name>kaptcha.border</param-name>
<param-value>no</param-value>
</init-param>
<!-- 字体颜色 -->
<init-param>
<param-name>kaptcha.textproducer.font.color</param-name>
<param-value>black</param-value>
</init-param>
<!-- 图片宽度 -->
<init-param>
<param-name>kaptcha.image.width</param-name>
<param-value>135</param-value>
</init-param>
<!-- 使用哪些字符生成验证码 -->
<init-param>
<param-name>kaptcha.textproducer.char.string</param-name>
<param-value>acdefhkprstwx345679</param-value>
</init-param>
<!-- 图片宽度 -->
<init-param>
<param-name>kaptcha.image.height</param-name>
<param-value>50</param-value>
</init-param>
<!-- 字体大小 -->
<init-param>
<param-name>kaptcha.textproducer.font.size</param-name>
<param-value>43</param-value>
</init-param>
<!-- 干扰线 -->
<init-param>
<param-name>kaptcha.noise.color</param-name>
<param-value>red</param-value>
</init-param>
<!-- 字符个数 -->
<init-param>
<param-name>kaptcha.textproducer.char.length</param-name>
<param-value>4</param-value>
</init-param>
<!-- 字体 -->
<init-param>
<param-name>kaptcha.textproducer.font.names</param-name>
<param-value>arial</param-value>
</init-param>
</servlet>
<servlet-mapping>
<servlet-name>kaptcha</servlet-name>
<url-pattern>/kaptcha.jpg</url-pattern>
</servlet-mapping>
|
注:这段配置就是用来配置验证码的,注意最后的 <url-pattern>/kaptcha.jpg</url-pattern> 要与验证码中的 src = "kaptcha.jpg" 对应。
这样就完成了验证码的配置,接下来测试。 测试:
输入错误的验证码:
页面显示验证码错误:
输入正确的验证码:

登录成功:
测试通过!
总结:
1、在页面中加验证码很简单,只需要添加 <img src= "xx"> 即可。用一个img标签,然后通过src指向生成验证码的controller的路由加上 .jpg (验证码用spring方式配置),或者通过src指向
<url-pattern>/kaptcha.jpg</url-pattern> ,即 src="kaptcha.jpg" 。
2、点击更换也简单,就是给img标签加一个onclick事件,然后用js完成。
点击更换的js:
|
1
2
3
4
5
|
<script type="text/javascript">
function refresh() {
document.getelementbyid('captcha_img').src="kaptcha.jpg?"+math.random();
}
</script>
|
然后在img标签中加上 onclick="refresh()" ,这样就完成了这个点击事件。
3、更多kaptcha属性的配置
| constant | 描述 | 默认值 |
| kaptcha.border | 图片边框,合法值:yes , no | yes |
| kaptcha.border.color | 边框颜色,合法值: r,g,b (and optional alpha) 或者 white,black,blue. | black |
| kaptcha.border.thickness | 边框厚度,合法值:>0 | 1 |
| kaptcha.image.width | 图片宽 | 200 |
| kaptcha.image.height | 图片高 | 50 |
| kaptcha.producer.impl | 图片实现类 | com.google.code.kaptcha.impl.defaultkaptcha |
| kaptcha.textproducer.impl | 文本实现类 | com.google.code.kaptcha.text.impl.defaulttextcreator |
| kaptcha.textproducer.char.string | 文本集合,验证码值从此集合中获取 | abcde2345678gfynmnpwx |
| kaptcha.textproducer.char.length | 验证码长度 | 5 |
| kaptcha.textproducer.font.names | 字体 | arial, courier |
| kaptcha.textproducer.font.size | 字体大小 | 40px. |
| kaptcha.textproducer.font.color | 字体颜色,合法值: r,g,b 或者 white,black,blue. | black |
| kaptcha.textproducer.char.space | 文字间隔 | 2 |
| kaptcha.noise.impl | 干扰实现类 | com.google.code.kaptcha.impl.defaultnoise |
| kaptcha.noise.color | 干扰颜色,合法值: r,g,b 或者 white,black,blue. | black |
| kaptcha.obscurificator.impl |
图片样式: 水纹com.google.code.kaptcha.impl.waterripple 鱼眼com.google.code.kaptcha.impl.fisheyegimpy 阴影com.google.code.kaptcha.impl.shadowgimpy |
com.google.code.kaptcha.impl.waterripple |
| kaptcha.background.impl | 背景实现类 | com.google.code.kaptcha.impl.defaultbackground |
| kaptcha.background.clear.from | 背景颜色渐变,开始颜色 | light grey |
| kaptcha.background.clear.to | 背景颜色渐变,结束颜色 | white |
| kaptcha.word.impl | 文字渲染器 | com.google.code.kaptcha.text.impl.defaultwordrenderer |
| kaptcha.session.key | session key | kaptcha_session_key |
| kaptcha.session.date | session date | kaptcha_session_date |
以上内容属于个人笔记整理,如有错误,欢迎批评指正!
原文链接:https://www.jianshu.com/p/e5ffa123cda4

相关文章


- ASP.NET自助建站系统的域名绑定与解析教程 2025-06-10
- 个人服务器网站搭建:如何选择合适的服务器提供商? 2025-06-10
- ASP.NET自助建站系统中如何实现多语言支持? 2025-06-10
- 64M VPS建站:如何选择最适合的网站建设平台? 2025-06-10
- ASP.NET本地开发时常见的配置错误及解决方法? 2025-06-10