环境:
- apache-tomcat-8.5.15
- jdk1.8.0_172
- idea
建立一个maven-webapp项目:create new project
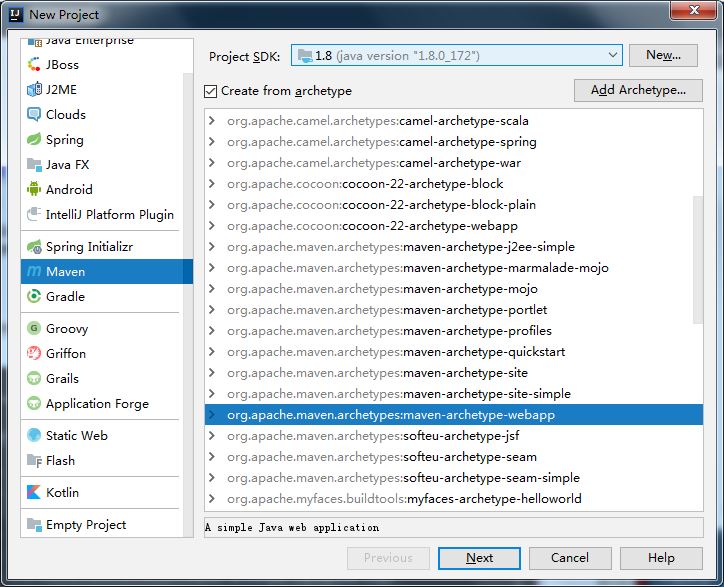
后点击next
然后next
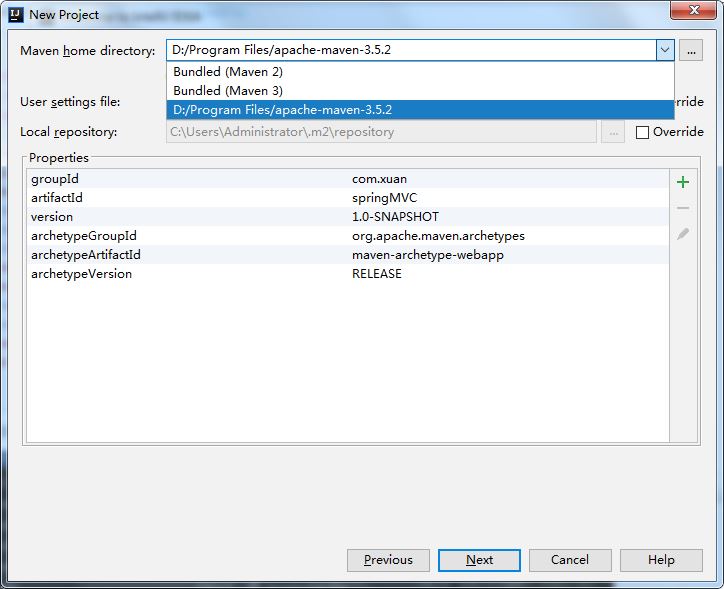
可以选择默认自带的maven,还可以修改配置默认的maven的仓库地址使加快下载速度,或者本地安装的apache-maven-3.5.2。
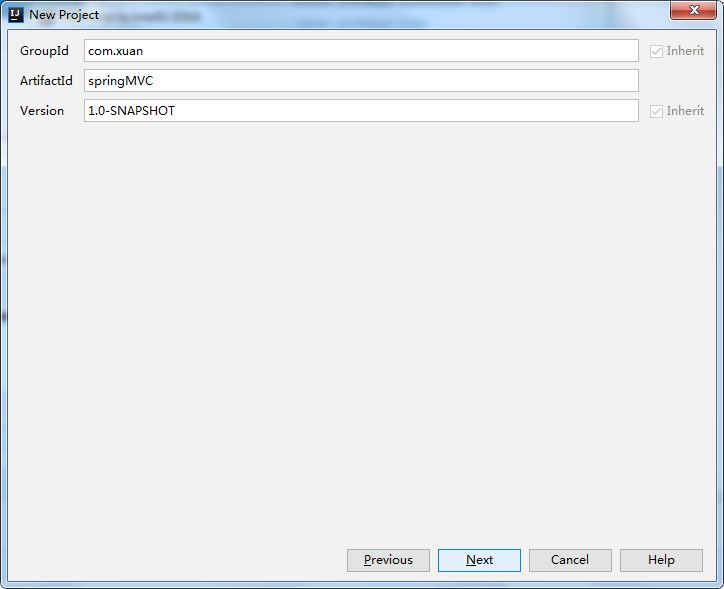
然后next
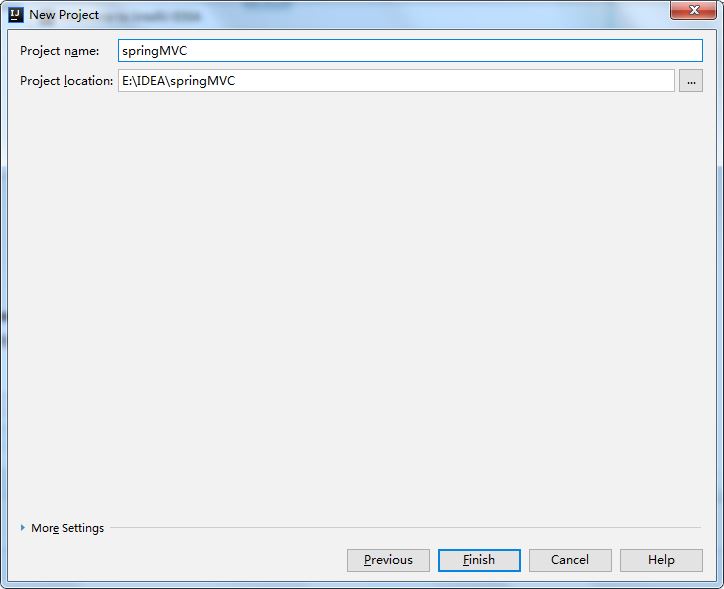
然后finish.
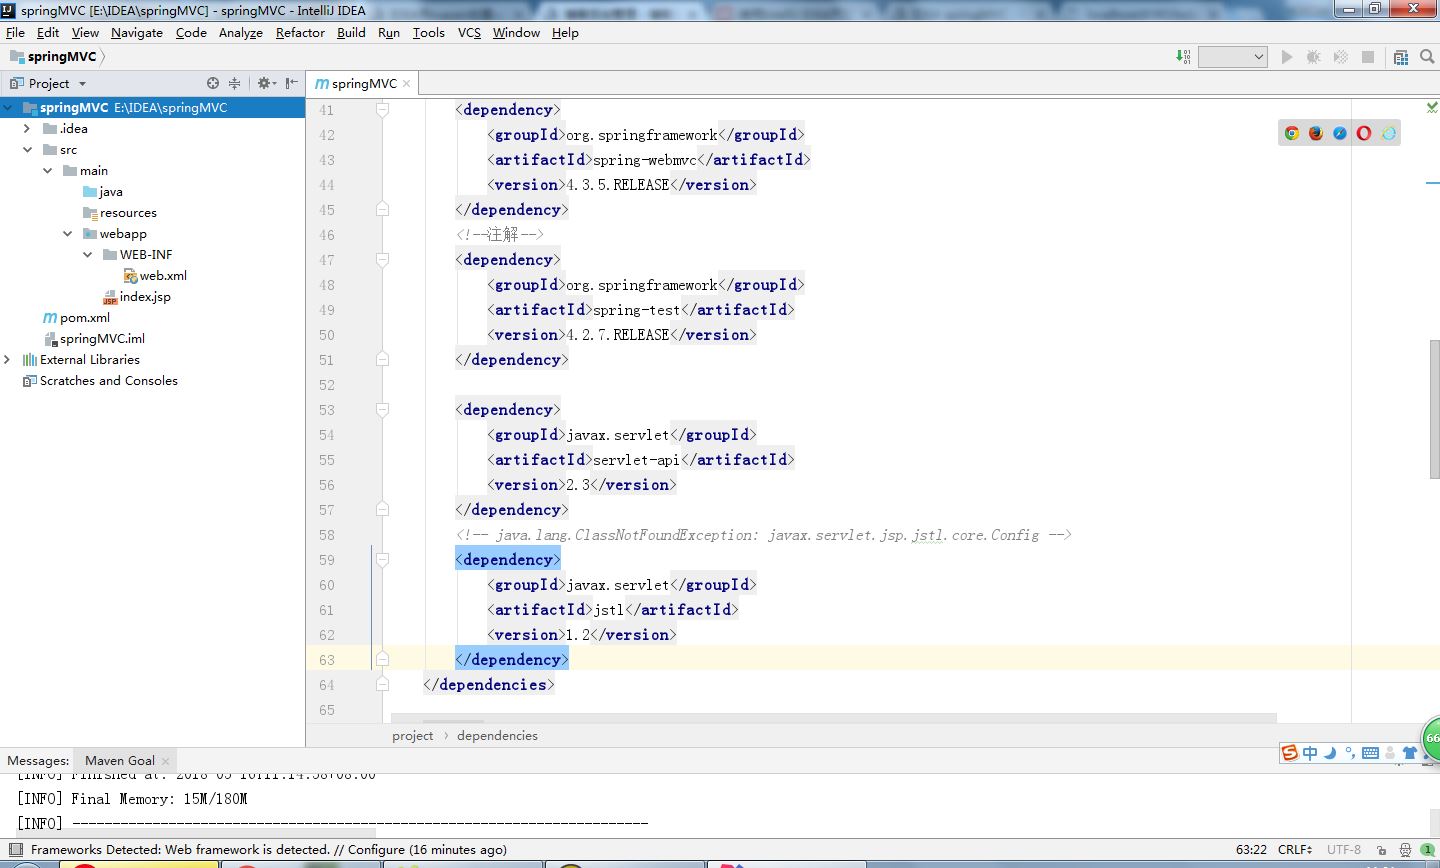
添加pom依赖
创建好之后的项目目录如图所示
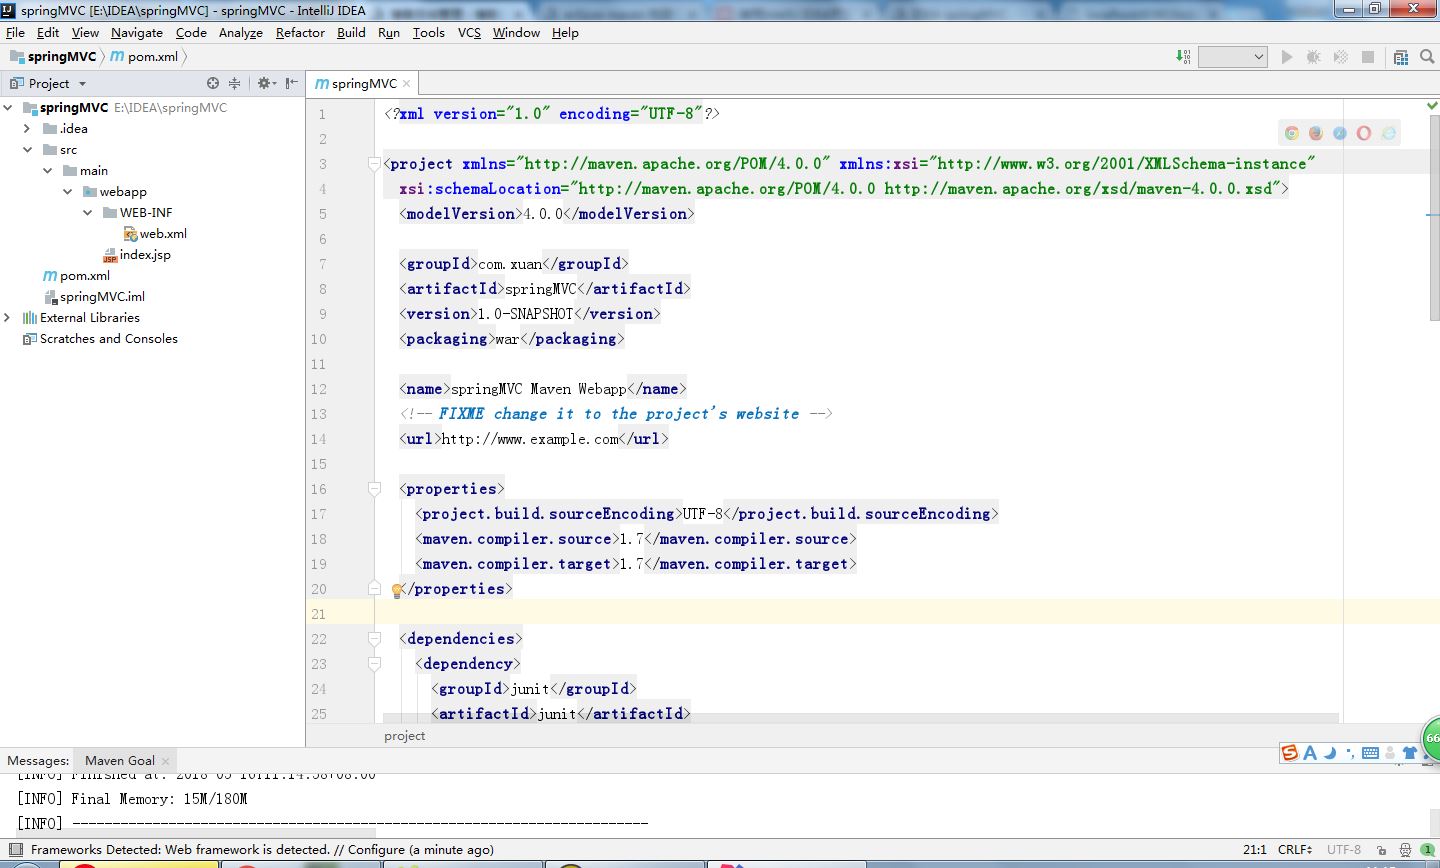
打开pom.xml,添加依赖
|
1
2
3
4
5
6
7
8
9
10
11
12
13
14
15
16
17
18
19
20
21
22
23
24
25
26
27
28
29
30
31
32
33
34
35
36
37
38
39
40
41
42
43
44
45
46
47
48
49
50
51
52
53
54
55
56
57
58
59
60
61
62
63
64
65
66
67
68
69
70
71
72
73
74
75
76
77
78
79
80
81
82
83
84
85
86
87
88
89
90
91
92
93
94
95
96
97
98
99
100
|
<?xml version="1.0" encoding="utf-8"?>
<project xmlns="http://maven.apache.org/pom/4.0.0" xmlns:xsi="http://www.w3.org/2001/xmlschema-instance"
xsi:schemalocation="http://maven.apache.org/pom/4.0.0 http://maven.apache.org/xsd/maven-4.0.0.xsd">
<modelversion>4.0.0</modelversion>
<groupid>com.xuan</groupid>
<artifactid>springmvc</artifactid>
<version>1.0-snapshot</version>
<packaging>war</packaging>
<name>springmvc maven webapp</name>
<!-- fixme change it to the project's website -->
<url>http://www.example.com</url>
<properties>
<project.build.sourceencoding>utf-8</project.build.sourceencoding>
<maven.compiler.source>1.7</maven.compiler.source>
<maven.compiler.target>1.7</maven.compiler.target>
</properties>
<dependencies>
<dependency>
<groupid>junit</groupid>
<artifactid>junit</artifactid>
<version>4.11</version>
<scope>test</scope>
</dependency>
<!--spring-->
<dependency>
<groupid>org.springframework</groupid>
<artifactid>spring-core</artifactid>
<version>4.3.5.release</version>
</dependency>
<dependency>
<groupid>org.springframework</groupid>
<artifactid>spring-web</artifactid>
<version>4.3.5.release</version>
</dependency>
<dependency>
<groupid>org.springframework</groupid>
<artifactid>spring-webmvc</artifactid>
<version>4.3.5.release</version>
</dependency>
<!--注解-->
<dependency>
<groupid>org.springframework</groupid>
<artifactid>spring-test</artifactid>
<version>4.2.7.release</version>
</dependency>
<dependency>
<groupid>javax.servlet</groupid>
<artifactid>servlet-api</artifactid>
<version>2.3</version>
</dependency>
<!-- java.lang.classnotfoundexception: javax.servlet.jsp.jstl.core.config -->
<dependency>
<groupid>javax.servlet</groupid>
<artifactid>jstl</artifactid>
<version>1.2</version>
</dependency>
</dependencies>
<build>
<finalname>springmvc</finalname>
<pluginmanagement><!-- lock down plugins versions to avoid using maven defaults (may be moved to parent pom) -->
<plugins>
<plugin>
<artifactid>maven-clean-plugin</artifactid>
<version>3.0.0</version>
</plugin>
<!-- see http://maven.apache.org/ref/current/maven-core/default-bindings.html#plugin_bindings_for_war_packaging -->
<plugin>
<artifactid>maven-resources-plugin</artifactid>
<version>3.0.2</version>
</plugin>
<plugin>
<artifactid>maven-compiler-plugin</artifactid>
<version>3.7.0</version>
</plugin>
<plugin>
<artifactid>maven-surefire-plugin</artifactid>
<version>2.20.1</version>
</plugin>
<plugin>
<artifactid>maven-war-plugin</artifactid>
<version>3.2.0</version>
</plugin>
<plugin>
<artifactid>maven-install-plugin</artifactid>
<version>2.5.2</version>
</plugin>
<plugin>
<artifactid>maven-deploy-plugin</artifactid>
<version>2.8.2</version>
</plugin>
</plugins>
</pluginmanagement>
</build>
</project>
|
建立相应的目录
项目创建完成后,src-main下建立java目录后,是无法在该目录下创建新的包和java类等文件的。在idea中需要对目录进行标注。
file->project structure:
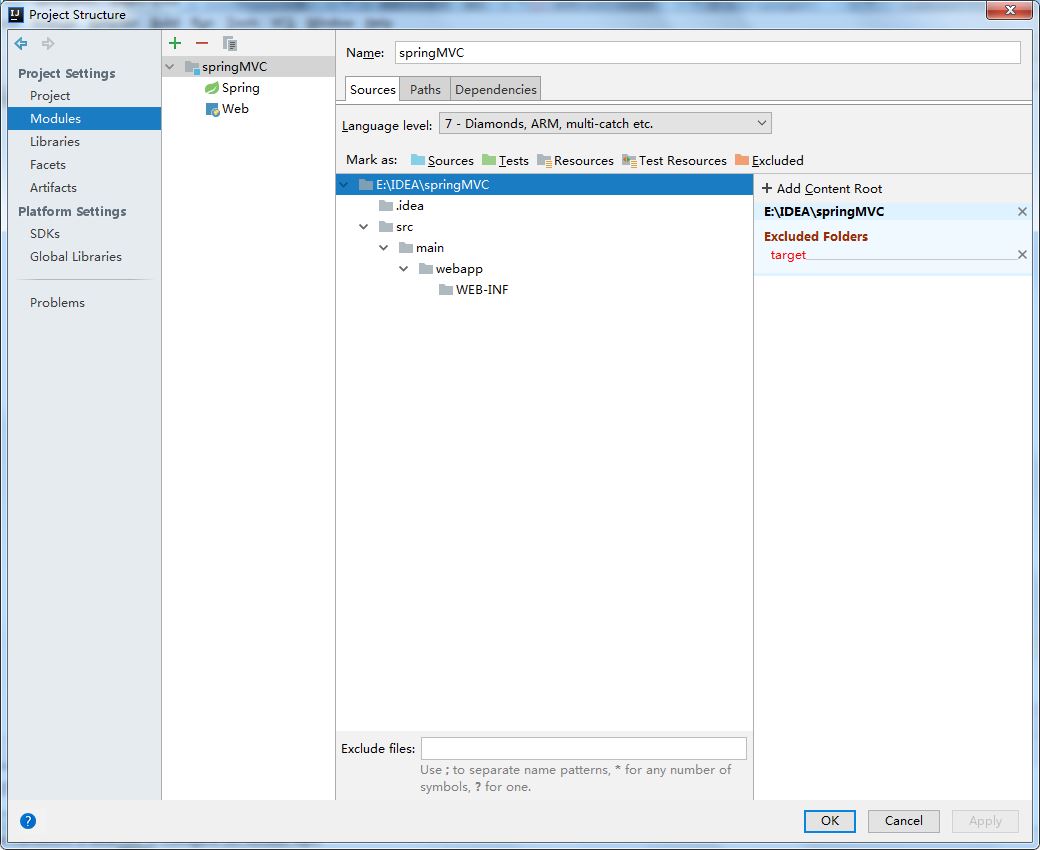
现在还没有创建对应的目录,然后创建目录后,选择对应的标注:
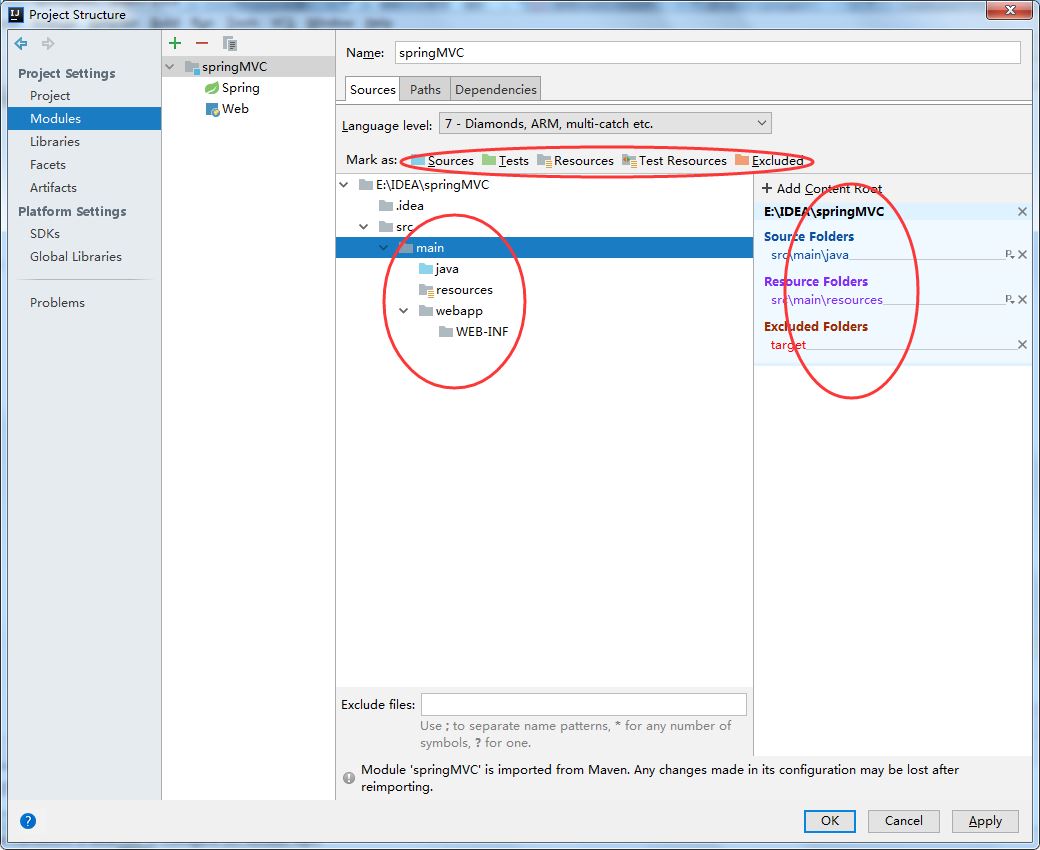
- sources 一般用于标注类似 src 这种可编译目录。有时候我们不单单项目的 src 目录要可编译,还有其他一些特别的目录也许我们也要作为可编译的目录,就需要对该目录进行此标注。只有 sources 这种可编译目录才可以新建 java 类和包,这一点需要牢记。
- tests 一般用于标注可编译的单元测试目录。在规范的 maven 项目结构中,顶级目录是 src,maven 的 src 我们是不会设置为 sources 的,而是在其子目录 main 目录下的 java 目录,我们会设置为 sources。而单元测试的目录是 src – test – java,这里的 java 目录我们就会设置为 tests,表示该目录是作为可编译的单元测试目录。一般这个和后面几个我们都是在 maven 项目下进行配置的,但是我这里还是会先说说。从这一点我们也可以看出 intellij idea 对 maven 项目的支持是比较彻底的。resources 一般用于标注资源文件目录。在 maven 项目下,资源目录是单独划分出来的,其目录为:src – main -resources,这里的
- resources 目录我们就会设置为 resources,表示该目录是作为资源目录。资源目录下的文件是会被编译到输出目录下的。
- test resources 一般用于标注单元测试的资源文件目录。在 maven 项目下,单元测试的资源目录是单独划分出来的,其目录为:src – test -resources,这里的 resources 目录我们就会设置为 test resources,表示该目录是作为单元测试的资源目录。资源目录下的文件是会被编译到输出目录下的。
- excluded 一般用于标注排除目录。被排除的目录不会被 intellij idea 创建索引,相当于被 intellij idea 废弃,该目录下的代码文件是不具备代码检查和智能提示等常规代码功能。通过上面的介绍,我们知道对于非 maven 项目我们只要会设置 src 即可。
(引用自http://wiki.jikexueyuan.com/project/intellij-idea-tutorial/eclipse-java-web-project-introduce.html)
标注完后,建立如下的目录。
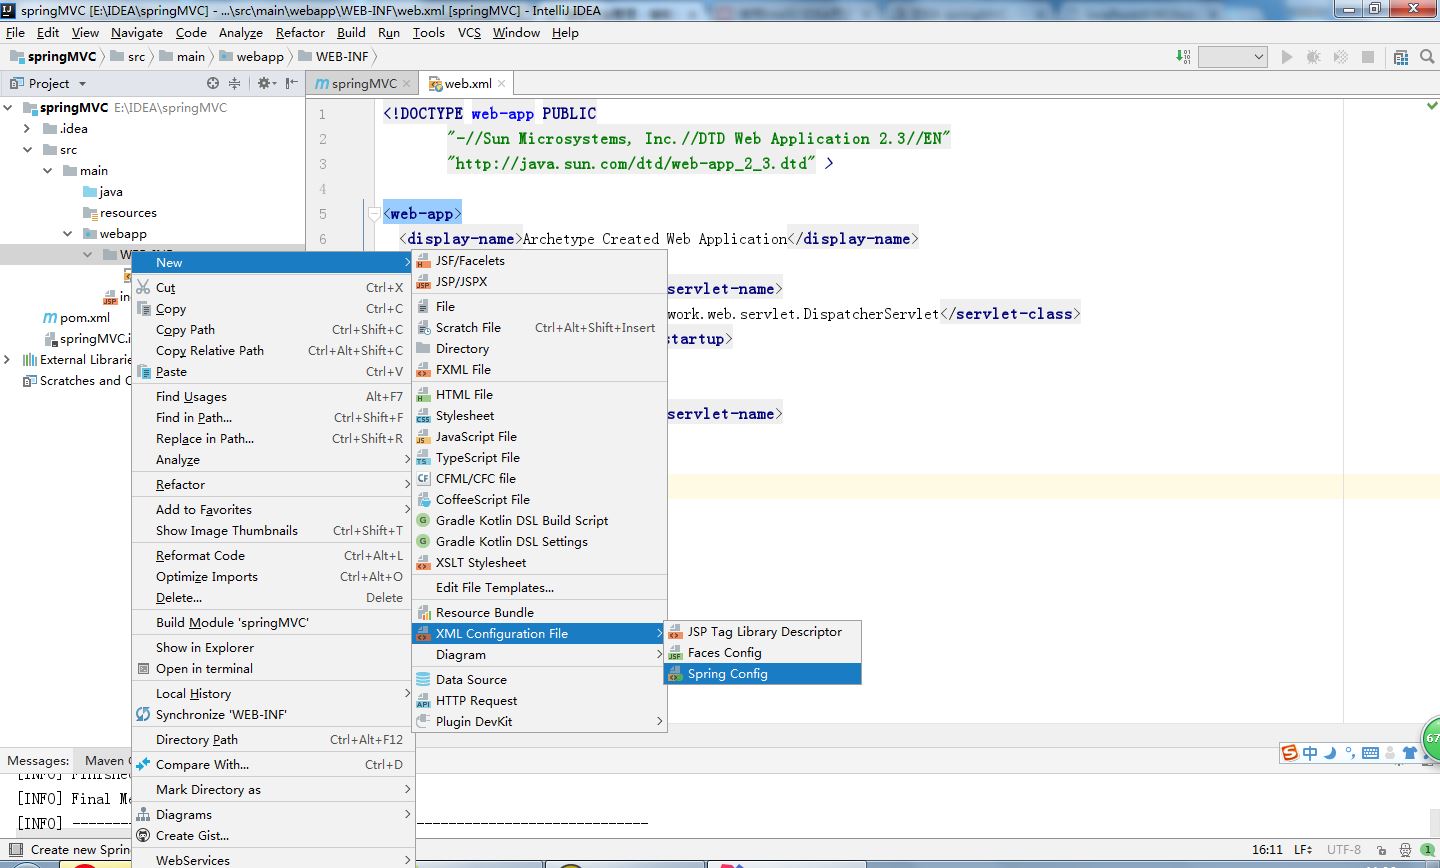
配置web.xml
如果用maven自动生成的web.xml,可能读取不到springmvc返回传入的参数值,应该要修改web.xml
直接在原来的文件上面修改:
|
1
2
3
4
5
6
7
8
9
10
11
12
13
14
15
16
|
<!doctype web-app public
"-//sun microsystems, inc.//dtd web application 2.3//en"
"http://java.sun.com/dtd/web-app_2_3.dtd" >
<web-app>
<display-name>archetype created web application</display-name>
<servlet>
<servlet-name>mvc-dispatcher</servlet-name>
<servlet-class>org.springframework.web.servlet.dispatcherservlet</servlet-class>
<load-on-startup>1</load-on-startup>
</servlet>
<servlet-mapping>
<servlet-name>mvc-dispatcher</servlet-name>
<url-pattern>/</url-pattern>
</servlet-mapping>
</web-app>
|
新文件:
|
1
2
3
4
5
6
7
8
9
10
11
12
13
14
15
16
17
18
19
|
<?xml version="1.0" encoding="utf-8"?>
<web-app version="2.4" xmlns="http://java.sun.com/xml/ns/j2ee"
xmlns:xsi="http://www.w3.org/2001/xmlschema-instance"
xsi:schemalocation="http://java.sun.com/xml/ns/j2ee
http://java.sun.com/xml/ns/j2ee/web-app_2_4.xsd">
<display-name>archetype created web application</display-name>
<servlet>
<servlet-name>mvc-dispatcher</servlet-name>
<servlet-class>org.springframework.web.servlet.dispatcherservlet</servlet-class>
<load-on-startup>1</load-on-startup>
</servlet>
<servlet-mapping>
<servlet-name>mvc-dispatcher</servlet-name>
<url-pattern>/</url-pattern>
</servlet-mapping>
</web-app>
|
注意要替换原来文件web-app的属性
启动时也会默认在/web-inf目录下查找xxx-servlet.xml作为配置文件,xxx就是dispatcherservlet的名字,也可以手动配置路径,现在使用默认的方式,
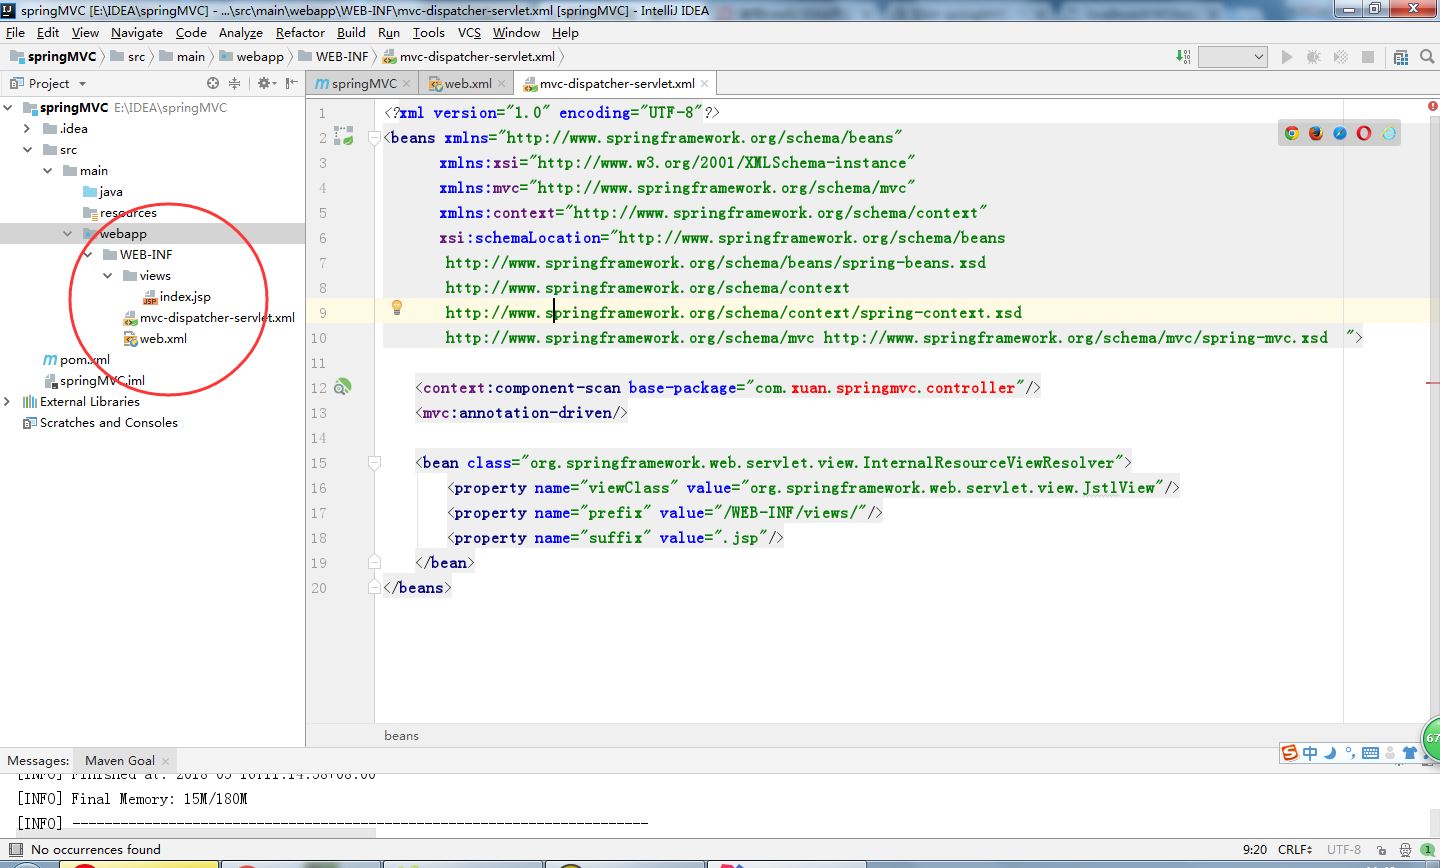
在web-inf目录下面创建mvc-dispatcher-servlet.xml:
mvc-dispatcher-servlet.xml:
|
1
2
3
4
5
6
7
8
9
10
11
12
13
14
15
16
17
18
19
20
|
<?xml version="1.0" encoding="utf-8"?>
<beans xmlns="http://www.springframework.org/schema/beans"
xmlns:xsi="http://www.w3.org/2001/xmlschema-instance"
xmlns:mvc="http://www.springframework.org/schema/mvc"
xmlns:context="http://www.springframework.org/schema/context"
xsi:schemalocation="http://www.springframework.org/schema/beans
http://www.springframework.org/schema/beans/spring-beans.xsd
http://www.springframework.org/schema/context
http://www.springframework.org/schema/context/spring-context.xsd
http://www.springframework.org/schema/mvc http://www.springframework.org/schema/mvc/spring-mvc.xsd ">
<context:component-scan base-package="com.xuan.springmvc.controller"/>
<mvc:annotation-driven/>
<bean class="org.springframework.web.servlet.view.internalresourceviewresolver">
<property name="viewclass" value="org.springframework.web.servlet.view.jstlview"/>
<property name="prefix" value="/web-inf/views/"/>
<property name="suffix" value=".jsp"/>
</bean>
</beans>
|
添加views目录: 把index.jsp拖到此目录下面:
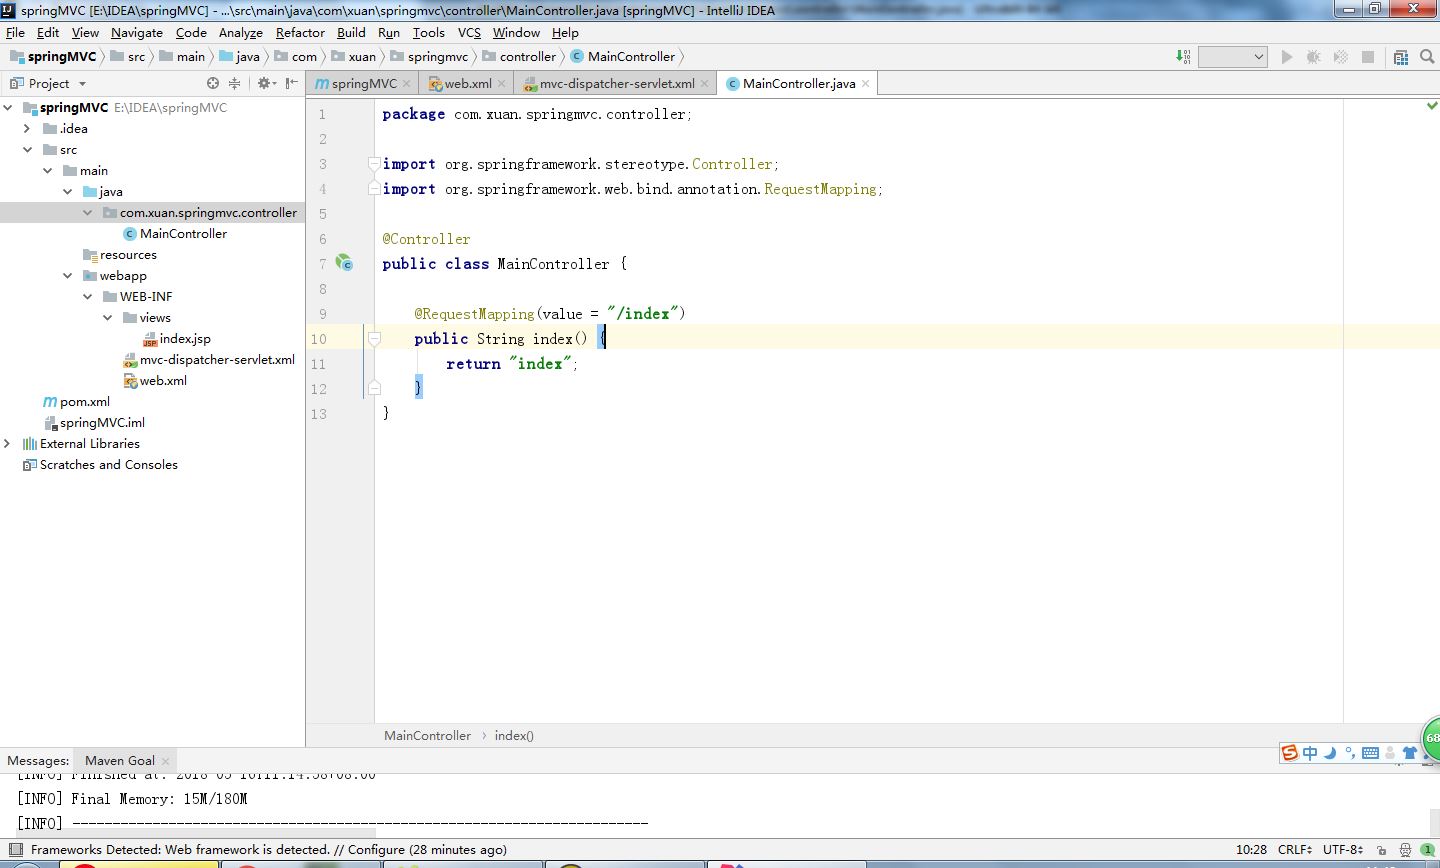
编辑代码路径/src/main/java,添加com.xuan.springmvc.controller包,增加maincontroller.java:
|
1
2
3
4
5
6
7
8
9
10
|
package com.xuan.springmvc.controller;
import org.springframework.stereotype.controller;
import org.springframework.web.bind.annotation.requestmapping;
@controller
public class maincontroller {
@requestmapping(value = "/index")
public string index() {
return "index";
}
}
|
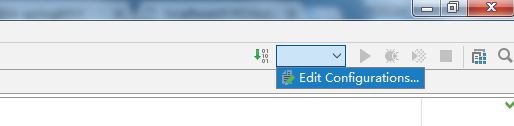
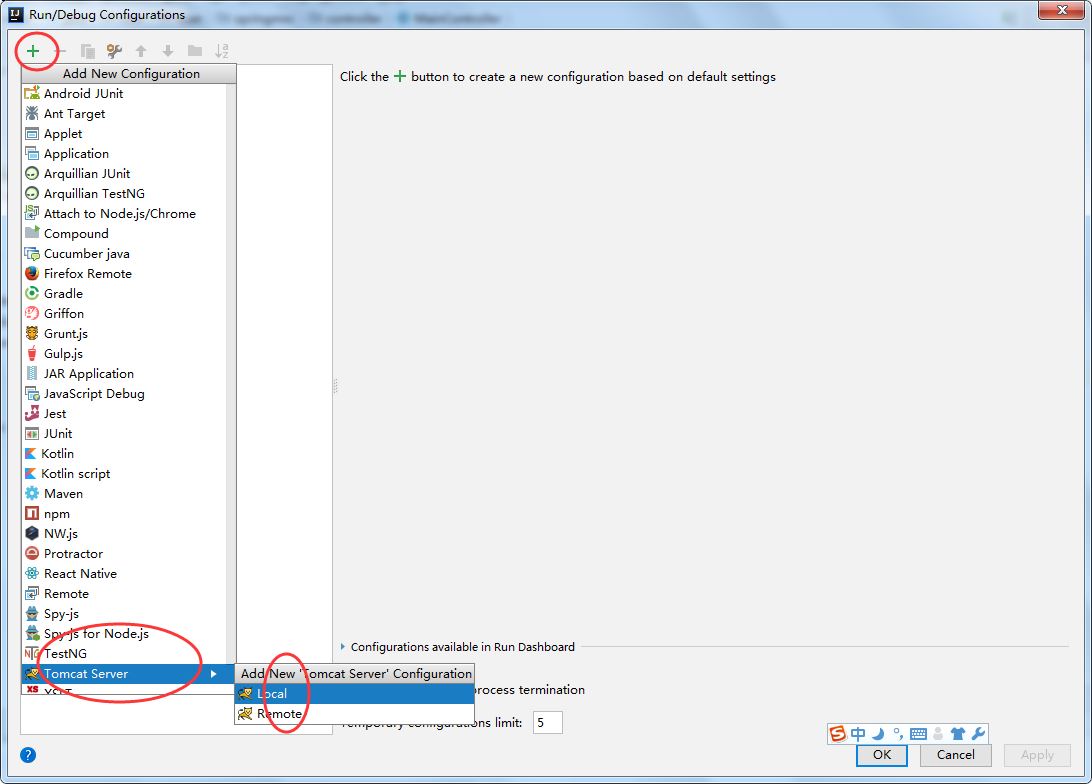
配置tomcat服务
configure…配置tomcat路径
绿色+号,把项目加到部署列表
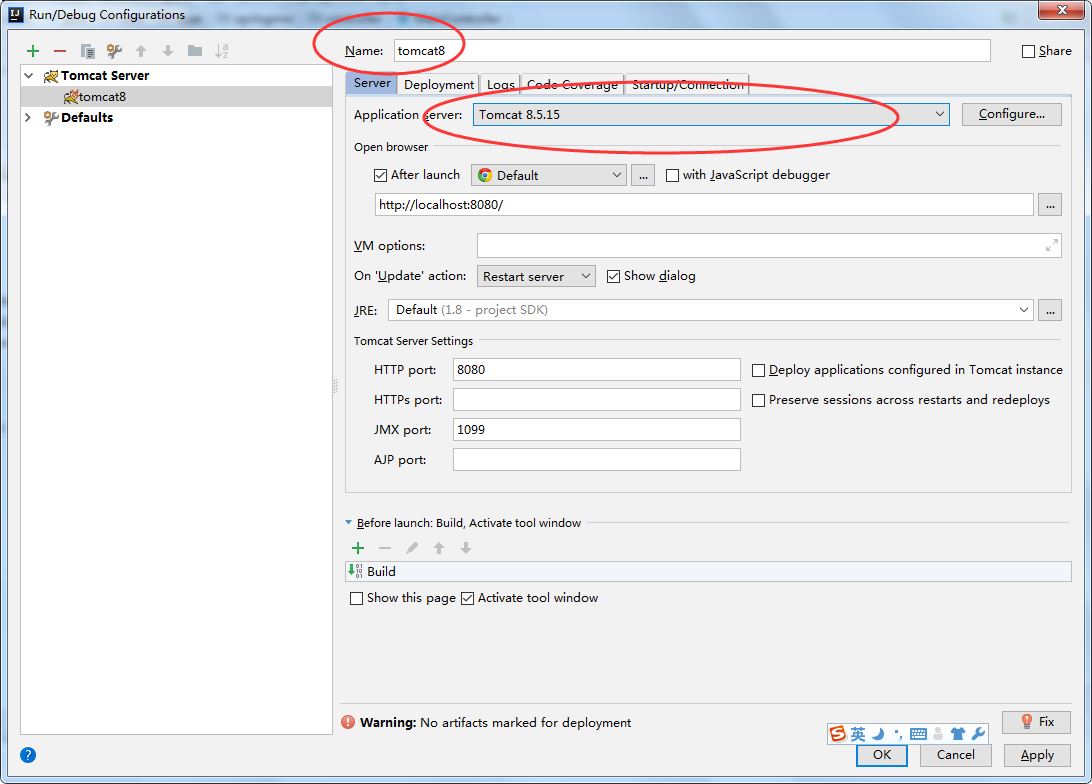
输入服务器名称和选择tomcat版本。
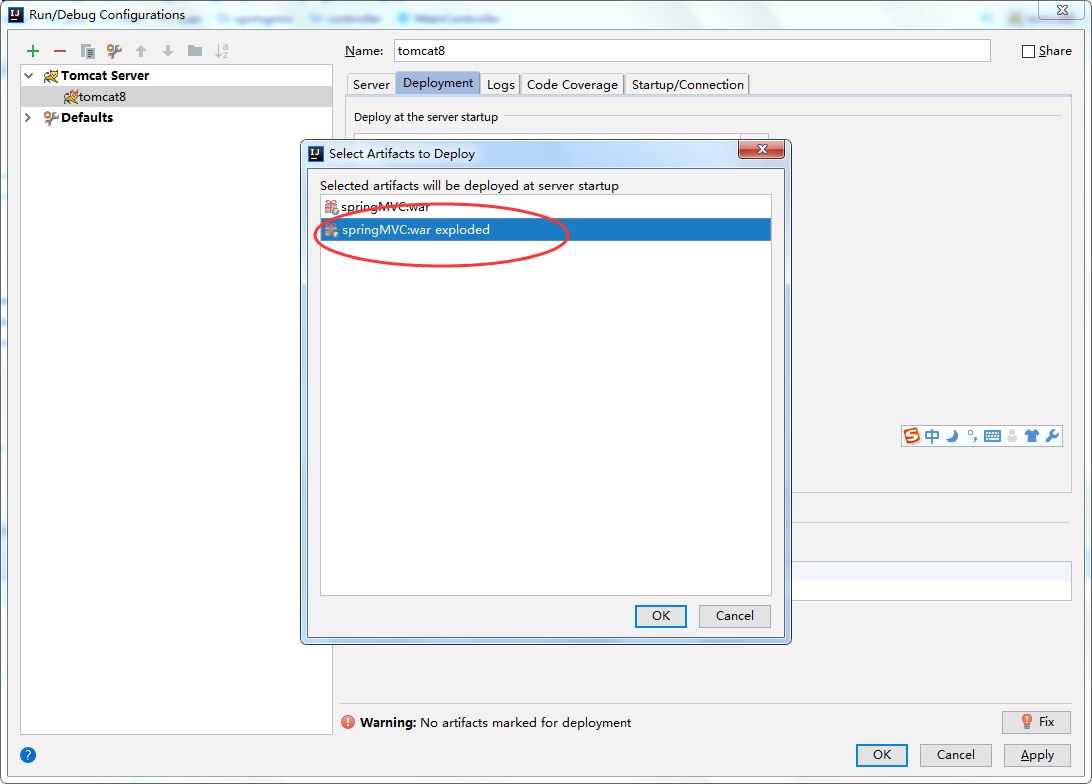
绿色+号,把项目加到部署列表
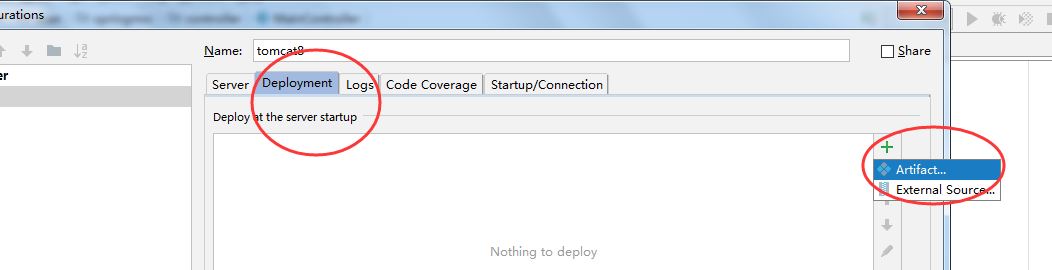
注意要选择第二项:
最后启动tomcat服务运行调试,显示结果:

以上就是本文的全部内容,希望对大家的学习有所帮助,也希望大家多多支持快网idc。
原文链接:https://www.cnblogs.com/grasp/p/9045242.html

相关文章


- ASP.NET自助建站系统的域名绑定与解析教程 2025-06-10
- 个人服务器网站搭建:如何选择合适的服务器提供商? 2025-06-10
- ASP.NET自助建站系统中如何实现多语言支持? 2025-06-10
- 64M VPS建站:如何选择最适合的网站建设平台? 2025-06-10
- ASP.NET本地开发时常见的配置错误及解决方法? 2025-06-10