这篇文章需要一定vue和springboot的知识,分为两个项目,一个是前端vue项目,一个是后端springboot项目。
后端项目搭建
我使用的是springboot1.5.10+jdk8+idea 使用idea新建一个springboot项目,一直点next即可
项目创建成功后,maven的pom配置如下
|
1
2
3
4
5
6
7
8
9
10
11
12
13
14
15
16
17
18
19
20
21
|
<dependencies>
<dependency>
<groupid>org.springframework.boot</groupid>
<artifactid>spring-boot-starter</artifactid>
</dependency>
<!--加入web模块-->
<dependency>
<groupid>org.springframework.boot</groupid>
<artifactid>spring-boot-starter-web</artifactid>
</dependency>
<dependency>
<groupid>org.springframework.boot</groupid>
<artifactid>spring-boot-starter-test</artifactid>
<scope>test</scope>
</dependency>
<dependency>
<groupid>com.alibaba</groupid>
<artifactid>fastjson</artifactid>
<version>1.2.39</version>
</dependency>
</dependencies>
|
接下来编写上传的api接口
|
1
2
3
4
5
6
7
8
9
10
11
12
13
14
15
16
17
18
19
20
21
22
23
24
25
26
27
28
29
30
31
|
@restcontroller
@requestmapping("/upload")
@crossorigin
public class uploadcontroller {
@value("${prop.upload-folder}")
private string upload_folder;
private logger logger = loggerfactory.getlogger(uploadcontroller.class);
@postmapping("/singlefile")
public object singlefileupload(multipartfile file) {
logger.debug("传入的文件参数:{}", json.tojsonstring(file, true));
if (objects.isnull(file) || file.isempty()) {
logger.error("文件为空");
return "文件为空,请重新上传";
}
try {
byte[] bytes = file.getbytes();
path path = paths.get(upload_folder + file.getoriginalfilename());
//如果没有files文件夹,则创建
if (!files.iswritable(path)) {
files.createdirectories(paths.get(upload_folder));
}
//文件写入指定路径
files.write(path, bytes);
logger.debug("文件写入成功...");
|
crossorigin注解:解决跨域问题,因为前后端完全分离,跨域问题在所难免,加上这个注解会让controller支持跨域,如果去掉这个注解,前端ajax请求不会到后端。这只是跨域的一种解决方法,还有其他解决方法这篇文章先不涉及。
multipartfile:springmvc的multipartfile对象,用于接收前端请求传入的formdata。
postmapping是spring4.3以后引入的新注解,是为了简化http方法的映射,相当于我们常用的@requestmapping(value = "/xx", method = requestmethod.post).
后端至此已经做完了,很简单。
前端项目搭建
我使用的是node8+webpack3+vue2
本地需要安装node环境,且安装vue-cli,使用vue-cli生成一个vue项目。
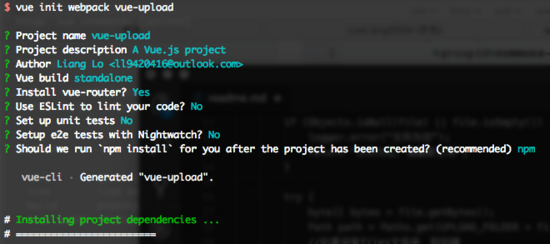
项目创建成功之后,用webstorm打开,就可以写一个简单的上传例子了,主要代码如下:
|
1
2
3
4
5
6
7
8
9
10
11
12
13
14
15
16
17
18
19
20
21
22
23
24
25
26
27
28
29
30
31
32
33
34
35
36
37
38
39
40
41
42
43
44
|
<template>
<div class="hello">
<h1>{{ msg }}</h1>
<form>
<input type="file" @change="getfile($event)">
<button class="button button-primary button-pill button-small" @click="submit($event)">提交</button>
</form>
</div>
</template>
<script>
import axios from 'axios';
export default {
name: 'helloworld',
data() {
return {
msg: 'welcome to your vue.js app',
file: ''
}
},
methods: {
getfile: function (event) {
this.file = event.target.files[0];
console.log(this.file);
},
submit: function (event) {
//阻止元素发生默认的行为
event.preventdefault();
let formdata = new formdata();
formdata.append("file", this.file);
axios.post('http://localhost:8082/upload/singlefile', formdata)
.then(function (response) {
alert(response.data);
console.log(response);
window.location.reload();
})
.catch(function (error) {
alert("上传失败");
console.log(error);
window.location.reload();
});
}
}
}
</script>
|
使用axios向后端发送ajax请求,使用h5的formdata对象封装图片数据
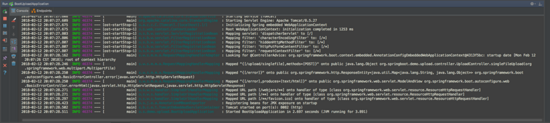
测试
启动服务端,直接运行bootapplication类的main方法,端口8082
启动前端,端口默认8080,cd到前端目录下,分别执行:
|
1
2
|
npm install
npm run dev
|
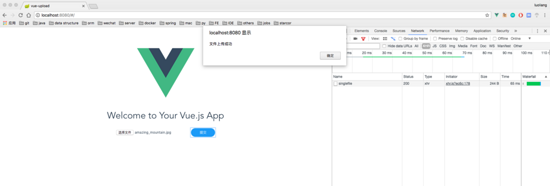
启动成功后访问localhost:8080
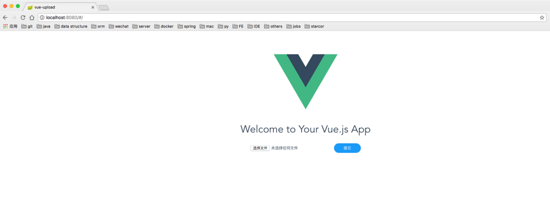
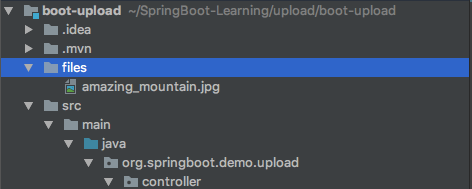
选择一张图片上传,可以看到,上传成功之后,后端指定目录下也有了图片文件
总结
到这里,一个前后端分离的上传demo就做完了,本篇文章是一个简单的demo,只能应对小文件的上传,后面我将会写一篇springboot+vue实现大文件分块上传,敬请期待。 附上源码,欢迎star:boot-upload 。
原文链接:https://juejin.im/post/5b3048ba51882574aa5f5e7c

相关文章


- ASP.NET本地开发时常见的配置错误及解决方法? 2025-06-10
- ASP.NET自助建站系统的数据库备份与恢复操作指南 2025-06-10
- 个人网站服务器域名解析设置指南:从购买到绑定全流程 2025-06-10
- 个人网站搭建:如何挑选具有弹性扩展能力的服务器? 2025-06-10
- 个人服务器网站搭建:如何选择适合自己的建站程序或框架? 2025-06-10