前言
逆向工程从数据库表直接生成代码,是日常开发中常用的敏捷开发手段,常见的例如:mybatis-plus的代码生成器等
为什么要自己写代码生成器呢?MP的生成器不香吗?香!
但是自己写的工具用起来最顺手,可以随意扩展,想怎么玩就怎么玩,只要自己有想法,玩出花来都没问题,当然了,能力有限,现在还只能实现简单版本,更多骚操作自己发挥!
思路:
1、建立jdbc连接,执行查询sql,获取表结构信息。
2、在指定的路径上创建文件。
3、按照我们的布局排版要求,根据表结构信息拼接文件的内容。
4、将字符输出到文件中。
以上即可完成一个文件的自动生成
编码
通用部分
几个内部工具类
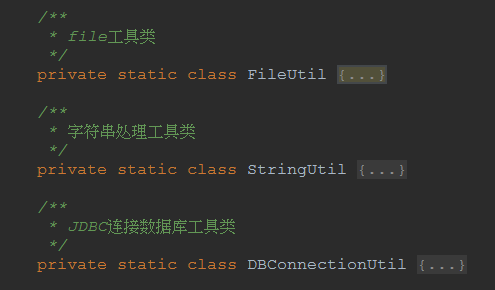
file工具类:创建、读取文件
字符串工具类:驼峰标识、下划线互转,首字母大写,数据库字段类型转java类型等
jdbc连接:连接数据库
表注释、表结构信息实体类、执行sql获取表结构信息的方法
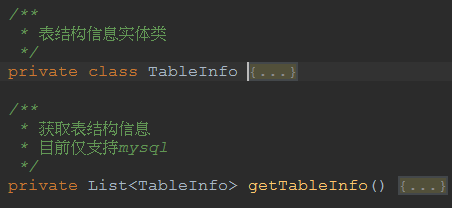
表结构信息
|
1
2
3
4
5
|
private String columnName;//字段名
private String dataType;//字段类型
private String columnComment;//字段注释
private String columnKey;//主键
private String extra;//主键类型
|
mysql查询表注释、表字段信息使用的是
表字段信息
|
1
2
3
4
5
6
7
8
9
10
11
12
13
|
SELECT
column_name,
data_type,
column_comment,
column_key,
extra
FROM
information_schema.COLUMNS
WHERE
table_schema = (
SELECT DATABASE
())
AND table_name =?
|
表注释
|
1
2
3
4
5
6
7
8
9
|
SELECT
table_comment
FROM
information_schema.TABLES
WHERE
table_schema = (
SELECT DATABASE
())
AND table_name =?
|
需要支持其他数据库类型的,自己调整就好了,例如oracle获取表注释、表结构sql如下:
|
1
2
3
4
5
6
7
8
9
10
11
12
13
14
15
16
17
18
19
20
|
-- 表、表注释
SELECT
t.table_name,
t1.comments
FROM
user_tables t
JOIN user_tab_comments t1 ON t.table_name = t1.table_name;
-- 表字段、字段注释
SELECT
t.table_name,
c.column_name,
c.data_type,
cc.comments
FROM
USER_TAB_COLUMNS c
JOIN user_tables t ON c.table_name = t.table_name
JOIN user_col_comments cc ON cc.table_name = t.table_name
WHERE
cc.column_name = c.column_name;
|
另外,数据连接、基础路径的配置也是一样
|
1
2
3
4
5
6
7
8
9
10
11
12
|
/**
* 数据连接相关,需要手动设置
*/
private static final String URL = "jdbc:mysql://localhost:3306/test?serverTimezone=GMT%2B8&characterEncoding=utf-8";
private static final String USERNAME = "root";
private static final String PASSWORD = "123456";
private static final String DRIVER_CLASSNAME = "com.mysql.cj.jdbc.Driver";
/**
* 基础路径,需要手动设置
*/
private String basePackage = "cn\\\\huanzi\\\\qch\\\\baseadmin\\\\";//根包位置
private String filePackage = basePackage + "sys\\\\";//文件所在包位置
|
2.0版本多一个模板文件路径
|
1
|
private String tlfPath = System.getProperty("user.dir") + "\\\\src\\\\main\\\\resources\\\\tlf\\\\";//模板文件位置
|
main函数也一样,调用构造参数,传入表名,调用入口函数
|
1
2
3
4
5
6
7
8
|
public static void main(String[] args) {
// String[] tables = {"sys_user","sys_menu","sys_authority","sys_user_menu","sys_user_authority","sys_shortcut_menu","sys_setting"};
String[] tables = {"tb_user"};
for (String table : tables) {
String msg = new AutoGenerator(table).create();
System.out.println(msg);
}
}
|
V1.0版本
AutoGenerator,1.0版本采用原始的在代码拼接字符串,然后创建文件将字符串输出的方法,比较原始但个人觉得可玩性较高
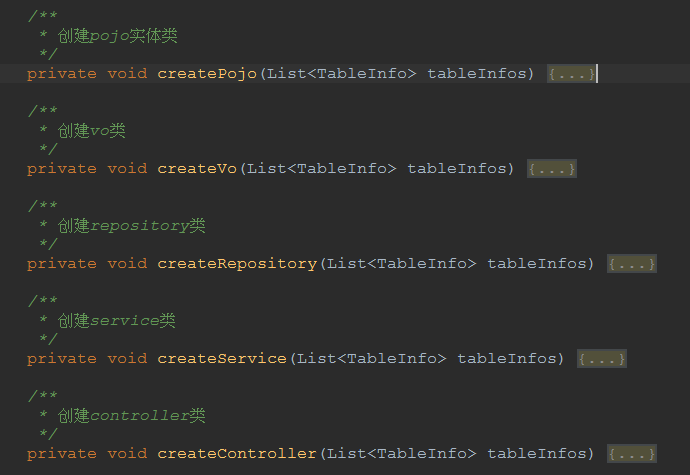
几个创建方法,就拿实体类来举例
|
1
2
3
4
5
6
7
8
9
10
11
12
13
14
15
16
17
18
19
20
21
22
23
24
25
26
27
28
29
30
31
32
33
34
35
36
37
38
39
|
/**
* 创建pojo实体类
*/
private void createPojo(List<TableInfo> tableInfos) {
//创建文件
File file = FileUtil.createFile(filePath + "pojo\\\\" + StringUtil.captureName(StringUtil.camelCaseName(tableName)) + ".java");
//拼接文件内容
StringBuffer stringBuffer = new StringBuffer();
stringBuffer.append(
"package " + filePackage.replaceAll("\\\\\\\\", ".") + "pojo;\\n" +
"\\n" +
"import lombok.Data;\\n" +
"import javax.persistence.*;\\n" +
"import java.io.Serializable;\\n" +
"import java.util.Date;\\n" +
"\\n" +
"@Entity\\n" +
"@Table(name = \\"" + tableName + "\\")\\n" +
"@Data\\n" +
"public class " + StringUtil.captureName(StringUtil.camelCaseName(tableName)) + " implements Serializable {\\n"
);
//遍历设置属性
for (TableInfo tableInfo : tableInfos) {
//主键
if ("PRI".equals(tableInfo.getColumnKey())) {
stringBuffer.append(" @Id\\n");
}
//自增
if ("auto_increment".equals(tableInfo.getExtra())) {
stringBuffer.append(" @GeneratedValue(strategy= GenerationType.IDENTITY)\\n");
}
stringBuffer.append(" private ").append(StringUtil.typeMapping(tableInfo.getDataType())).append(" ").append(StringUtil.camelCaseName(tableInfo.getColumnName())).append(";//").append(tableInfo.getColumnComment()).append("\\n\\n");
}
stringBuffer.append("}");
//写入文件内容
FileUtil.fileWriter(file, stringBuffer);
}
|
其他的也一样,无非就:创建文件、拼接文件内容、输出文件内容
入口函数,供main函数直接调用
|
1
2
3
4
5
6
7
8
9
10
11
12
13
14
15
16
17
18
|
/**
* 快速创建,供外部调用,调用之前先设置一下项目的基础路径
*/
private String create() {
System.out.println("生成路径位置:" + filePath);
//获取表信息
List<TableInfo> tableInfo = getTableInfo();
//开始生成代码
createPojo(tableInfo);
createVo(tableInfo);
createRepository(tableInfo);
createService(tableInfo);
createController(tableInfo);
return tableName + " 后台代码生成完毕!";
}
|
V2.0版本
AutoGeneratorPlus,2.0版本升级了,设置了模板文件、文件内容的字符串从模板读取,再根据关键字替换参数,最后再输出到创建的文件中,这个版本就比较好理解,大部分的代码生成器也都这样干
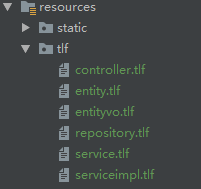
需要先定义模板文件(文件名后缀无所谓,自己随便定义),拿entity来举例
|
1
2
3
4
5
6
7
8
9
10
11
12
13
14
15
16
17
18
19
20
21
22
23
|
package cn.huanzi.qch.baseadmin.sys.${entityToLowerCase}.pojo;
import lombok.Data;
import javax.persistence.*;
import java.io.Serializable;
import java.util.Date;
/**
* ${tableComment} 实体类
*
* ${author}
* ${date}
*/
@Entity
@Table(name = "${tableName}")
@Data
public class ${entity} implements Serializable {
#for
#ifPri
#ifAutoIncrement
private ${tableInfo.dataType} ${tableInfo.columnName};//${tableInfo.columnComment}
#end
}
|
${},用于取参数,替换成我们的值
#for、#if,循环遍历表字段以及判断是否为主键、是否主键自增
各种关键字随便定义,我们在读取模板文件处理时能对上就行
文件内容处理
|
1
2
3
4
5
6
7
8
9
10
11
12
13
14
15
16
17
18
19
20
21
22
23
24
25
26
27
28
29
30
31
32
33
34
35
36
37
38
39
40
41
42
43
44
45
46
47
48
49
50
51
52
53
54
55
56
57
58
59
60
61
62
63
64
65
66
67
68
69
70
71
72
73
74
75
76
77
78
79
80
81
82
83
84
85
86
87
88
89
90
91
92
93
94
95
96
97
98
99
100
101
102
103
104
105
106
107
108
109
110
111
112
113
114
115
116
117
118
119
120
121
122
123
124
125
126
127
128
129
130
131
132
133
134
135
|
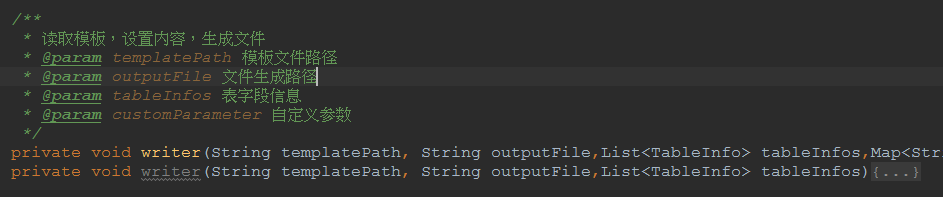
/**
* 读取模板,设置内容,生成文件
* @param templatePath 模板文件路径
* @param outputFile 文件生成路径
* @param tableInfos 表字段信息
* @param customParameter 自定义参数
*/
private void writer(String templatePath, String outputFile,List<TableInfo> tableInfos,Map<String,String> customParameter){
//主键
TableInfo prikey = new TableInfo();
//for循环标识
boolean forFlag = false;
StringBuilder forContent = new StringBuilder();
//驼峰标识映射后的表名
String replacement = StringUtil.captureName(StringUtil.camelCaseName(tableName));
//遍历属性
for (TableInfo tableInfo : tableInfos) {
//主键
if ("PRI".equals(tableInfo.getColumnKey())) {
prikey = tableInfo;
break;
}
}
try(FileReader fileReader = new FileReader(templatePath);
BufferedReader reader = new BufferedReader(fileReader)) {
//生成文件
File file = FileUtil.createFile(outputFile);
StringBuffer stringBuffer = new StringBuffer();
//读取模板文件,拼接文件内容
Object[] lines = reader.lines().toArray();
for (Object o : lines) {
String line = String.valueOf(o);
/* 设置值 */
//${tableName} 表名称,例如:tb_user
if(line.contains("${tableName}")){
line = line.replaceAll("\\\\$\\\\{tableName}", tableName);
}
//${tableComment} 表注释,例如:tb_user
if(line.contains("${tableComment}")){
line = line.replaceAll("\\\\$\\\\{tableComment}", tableComment);
}
//${entity} 实体类名称,例如:TbUser
if(line.contains("${entity}")){
line = line.replaceAll("\\\\$\\\\{entity}", replacement);
}
//${entityFirstToLowerCase} 实体类名称首字母小写,例如:tbUser
if(line.contains("${entityFirstToLowerCase}")){
line = line.replaceAll("\\\\$\\\\{entityFirstToLowerCase}", StringUtil.camelCaseName(tableName));
}
//${entityToLowerCase} 实体类名称全小写,例如:tbuser
if(line.contains("${entityToLowerCase}")){
line = line.replaceAll("\\\\$\\\\{entityToLowerCase}", replacement.toLowerCase());
}
//${priDataType} 实体类主键类型,例如:String
if(line.contains("${priDataType}")){
line = line.replaceAll("\\\\$\\\\{priDataType}", StringUtil.typeMapping(prikey.getDataType()));
}
//处理自定义参数
line = customParameter(line,customParameter);
//先取得循环体的内容
if(forFlag){
forContent.append(line).append("\\n");
}
//是否为for循环遍历表字段
if(line.contains("#for")){
forFlag = true;
}
if(line.contains("#end")){
forFlag = false;
line = line.replaceAll("#end", "");
}
//遍历循环体的内容,并设置值
if(!forFlag && forContent.length() > 0){
//遍历表字段
for (TableInfo tableInfo : tableInfos) {
String tableColumns = forContent.toString()
//表字段信息:类型、名称、注释
.replaceAll("\\\\$\\\\{tableInfo.dataType}", StringUtil.typeMapping(tableInfo.getDataType()))
.replaceAll("\\\\$\\\\{tableInfo.columnName}", StringUtil.camelCaseName(tableInfo.getColumnName()))
.replaceAll("\\\\$\\\\{tableInfo.columnComment}", tableInfo.getColumnComment());
//清除多余#end,以及换行符
tableColumns = tableColumns.replaceAll("#end", "").replaceAll("\\n", "");
//设置是否主键、是否自增
String pri = "",autoIncrement="";
//主键
if ("PRI".equals(tableInfo.getColumnKey())) {
pri = " @Id\\n";
//自增id
if ("auto_increment".equals(tableInfo.getExtra())){
autoIncrement = "@GeneratedValue(strategy= GenerationType.IDENTITY)\\n";
}
}
tableColumns = tableColumns
.replaceAll("#ifPri", pri)
.replaceAll("#ifAutoIncrement", autoIncrement);
//处理自定义参数
tableColumns = customParameter(tableColumns,customParameter);
//前补tab,后补换行符
stringBuffer.append(" ").append(tableColumns.trim()).append("\\n\\n");
}
//置空
forContent.setLength(0);
}
if(!forFlag){
stringBuffer.append(line).append("\\n");
}
}
//写入数据到到文件中
FileUtil.fileWriter(file, stringBuffer);
}catch (Exception e){
e.printStackTrace();
}
}
|
内置了几个重要参数
|
1
2
3
4
5
6
7
8
9
10
11
|
${tableName} 表名称,例如:tb_user
${tableComment} 表注释,例如:tb_user
${entity} 实体类名称,例如:TbUser
${entityFirstToLowerCase} 实体类名称首字母小写,例如:tbUser
${entityToLowerCase} 实体类名称全小写,例如:tbuser
${priDataType} 实体类主键类型,例如:String
还有三个表字段信息:类型、名称、注释
${tableInfo.dataType}
${tableInfo.columnName}
${tableInfo.columnComment}
|
支持自定义参数Map<String,String> customParameter,例如模板文件中的注释:
|
1
2
3
4
|
/**
* ${author}
* ${date}
*/
|
入口函数
|
1
2
3
4
5
6
7
8
9
10
11
12
13
14
15
16
17
18
19
20
21
22
23
24
25
26
27
28
29
30
31
32
33
34
35
36
37
38
39
|
/**
* 快速创建,供外部调用,调用之前先设置一下项目的基础路径
*/
private String create() {
System.out.println("生成路径位置:" + filePath);
//获取表信息
List<TableInfo> tableInfo = getTableInfo();
//驼峰标识映射后的表名
String captureName = StringUtil.captureName(StringUtil.camelCaseName(tableName));
//自定义参数
HashMap<String, String> customParameter = new HashMap<>();
customParameter.put("author","作者:Auto Generator By 'huanzi-qch'");
customParameter.put("date","生成日期:"+new SimpleDateFormat("yyyy-MM-dd HH:mm:ss").format(new Date()));
//读取模板、生成代码
writer(tlfPath+"controller.tlf",
filePath + "controller\\\\" + captureName + "Controller.java",
tableInfo,customParameter);
writer(tlfPath+"entity.tlf",
filePath + "pojo\\\\" + captureName + ".java",
tableInfo,customParameter);
writer(tlfPath+"entityvo.tlf",
filePath + "vo\\\\" + captureName + "Vo.java",
tableInfo,customParameter);
writer(tlfPath+"repository.tlf",
filePath + "repository\\\\" + captureName + "Repository.java",
tableInfo,customParameter);
writer(tlfPath+"service.tlf",
filePath + "service\\\\" + captureName + "Service.java",
tableInfo,customParameter);
writer(tlfPath+"serviceimpl.tlf",
filePath + "service\\\\" + captureName + "ServiceImpl.java",
tableInfo,customParameter);
return tableName + " 后台代码生成完毕!";
}
|